Welcome to Arch Network

What is Arch Network?
Arch Network is a computation environment that enhances Bitcoin’s capabilities by enabling complex operations on Bitcoin UTXOs through its specialized virtual machine. Unlike Layer 2 solutions, Arch Network provides a native computation layer that works directly with Bitcoin’s security model.
Choose Your Path 👋
🚀 Deploy First
Get your first smart contract running on Arch Network as quickly as possible
- Download CLI and deploy a program in 15 minutes
- Use our pre-configured development environment
- Perfect for developers wanting to try Arch Network
🏗️ Run a Validator
Set up and run your own validator node on the Arch Network
- Set up Bitcoin Core and Titan
- Configure and run a validator node
- Perfect for those wanting to participate in network security
Key Features
Bitcoin-Native
Direct integration with Bitcoin through UTXO management
Computation Environment
Execute complex programs within the Arch VM
Program Development
Write programs in Rust to interact with Bitcoin UTXOs
Security
Leverages Bitcoin's proven security guarantees through multi-signature validation
Developer Tools
Complete development environment with CLI tools and explorer
Prerequisites
- Node.js v19+ (installation guide)
- Rust (latest stable)
- Docker for local development
- Basic understanding of Bitcoin UTXOs
Core Architecture
How Arch Works
- Network Layer
- Network Architecture
- Bootnode: Network discovery and peer management
- Leader Node: Transaction coordination
- Validator Nodes: Program execution
- Bitcoin Integration
- UTXO Management
- Transaction tracking
- State anchoring
- Ownership validation
- RPC Integration
- Bitcoin node communication
- Transaction submission
- Network synchronization
- Computation Layer
- Programs
- Transaction Processing
- Message validation
- State updates
- UTXO management
🛠 Reference Documentation
Need Help?
🚀 Quick Start Guide
Welcome to Arch Network! Let’s get your first program running in under 15 minutes.
Prerequisites
Before starting, ensure you have the following tools installed:
- Git (v2.0 or later)
- Rust (v1.70 or later) - Install Rust
- Solana CLI (v2.0 or later) - Install Solana
- Arch Network CLI - Download from Arch Network Releases
⚠️ Important: Arch Network now requires Solana CLI 2.x. Please ensure you have version 2.0 or later installed.
Verify your installation:
git --version
rustc --version
solana --version  # Should show 2.x.x or later
arch-cli --version
💡 Note: If you encounter any issues during installation, join our Discord for support.
🚀 Quick Start Project
1. Clone Example Project
# Get the starter example
git clone https://github.com/Arch-Network/arch-examples
cd arch-examples/examples/helloworld
2. Start Local Validator
Choose one of the following network modes:
Option A: Testnet (Recommended for Testing)
arch-cli validator-start \
    --network-mode testnet \
    --data-dir ./.arch_data \
    --rpc-bind-ip 127.0.0.1 \
    --rpc-bind-port 9002 \
    --titan-endpoint https://titan-public-http.test.arch.network \
    --titan-socket-endpoint titan-public-tcp.test.arch.network:3030
Option B: Local Development (Regtest)
Prerequisites:
- Docker: Required on all platforms - Install Docker
- Docker Management (optional but recommended):
- macOS: OrbStack (recommended) or Docker Desktop
- Linux: Docker Desktop (optional GUI)
# Use the orchestrate command for full local devnet
arch-cli orchestrate start
This starts a complete local development environment with:
- Bitcoin Core (regtest mode)
- Titan indexer
- Local validator
Option C: Devnet (Full Local Stack)
For devnet, you’ll need to run your own Bitcoin regtest node and Titan indexer:
# 1. Start Bitcoin Core in regtest mode
bitcoind -regtest -port=18444 -rpcport=18443 \
    -rpcuser=bitcoin -rpcpassword=bitcoinpass \
    -fallbackfee=0.001

# 2. First-time setup (only needed once)
# Create a wallet called "testwallet"
bitcoin-cli -regtest -rpcuser=bitcoin -rpcpassword=bitcoinpass createwallet testwallet

# Generate an address and mine the first 100 blocks to it
ADDRESS=$(bitcoin-cli -regtest -rpcuser=bitcoin -rpcpassword=bitcoinpass getnewaddress)
bitcoin-cli -regtest -rpcuser=bitcoin -rpcpassword=bitcoinpass generatetoaddress 100 $ADDRESS

# 3. Clone and build Titan indexer (if not already done)
git clone https://github.com/saturnbtc/Titan.git
cd Titan

# 4. Start Titan indexer pointing to your Bitcoin node
cargo run --bin titan -- \
    --bitcoin-rpc-url http://127.0.0.1:18443 \
    --bitcoin-rpc-username bitcoin \
    --bitcoin-rpc-password bitcoinpass \
    --chain regtest \
    --index-addresses \
    --index-bitcoin-transactions \
    --enable-tcp-subscriptions \
    --main-loop-interval 0 \
    --http-listen 127.0.0.1:3030

# 5. Start validator pointing to your local Titan (in a new terminal)
arch-cli validator-start \
    --network-mode devnet \
    --data-dir ./.arch_data \
    --rpc-bind-ip 127.0.0.1 \
    --rpc-bind-port 9002 \
    --titan-endpoint http://127.0.0.1:3030 \
    --titan-socket-endpoint 127.0.0.1:3030
💡 Note: This option requires you to build and run Bitcoin Core and Titan yourself. For easier local development, use Option B (orchestrate start) instead.
⚠️ First-time setup: The wallet creation and block generation steps are only needed the first time you start bitcoind in regtest mode.
3. Create and Fund Account
Create a new account with the faucet:
# Create account and fund with 1 ARCH (1 billion lamports)
arch-cli account create --keypair-path ./my-account.json --airdrop 1000000000

# Or create account first, then fund separately
arch-cli account create --keypair-path ./my-account.json
arch-cli account airdrop --keypair-path ./my-account.json --amount 1000000000
4. Build and Deploy Your Program
# Navigate to the program directory
cd program

# Build the program using Solana's BPF compiler
cargo build-sbf

# Deploy to the validator
arch-cli deploy ./target/deploy/<program_name>.so --generate-if-missing --fund-authority

# Note: Save your program ID for later use
export PROGRAM_ID=<DEPLOYED_PROGRAM_ADDRESS>
5. Test Your Deployment
# Verify program deployment
arch-cli show $PROGRAM_ID

# Check transaction status
arch-cli tx confirm <TX_ID>

# Get current block height
arch-cli get-block-height

# Get latest block information
arch-cli get-block <BLOCK_HASH>
🔧 Available CLI Commands
Validator Management
# Start local validator
arch-cli validator-start [OPTIONS]

# Orchestrate full local devnet
arch-cli orchestrate start     # Start bitcoind + titan + validator
arch-cli orchestrate stop      # Stop all services
arch-cli orchestrate reset     # Reset entire environment
Account Operations
# Create new account
arch-cli account create --keypair-path <PATH> [--airdrop <AMOUNT>]

# Fund existing account
arch-cli account airdrop --keypair-path <PATH> --amount <LAMPORTS>

# Change account owner
arch-cli account change-owner <ACCOUNT> <NEW_OWNER> <PAYER_KEYPAIR>

# Assign UTXO to account
arch-cli account assign-utxo <ACCOUNT_PUBKEY>
Program Deployment
# Deploy program
arch-cli deploy <ELF_PATH> [--generate-if-missing] [--fund-authority]

# Show account/program info
arch-cli show <ADDRESS>
Transaction Operations
# Confirm transaction status
arch-cli tx confirm <TX_ID>

# Get transaction details
arch-cli tx get <TX_ID>

# View program logs from transaction
arch-cli tx log-program-messages <TX_ID>
Block and Network Info
# Get block by hash
arch-cli get-block <BLOCK_HASH>

# Get current block height
arch-cli get-block-height

# Get group key
arch-cli get-group-key <PUBKEY>
Configuration Profiles
# Create configuration profile
arch-cli config create-profile <NAME> \
    --bitcoin-node-endpoint <URL> \
    --bitcoin-node-username <USER> \
    --bitcoin-node-password <PASS> \
    --bitcoin-network <mainnet|testnet|regtest> \
    --arch-node-url <URL>

# List profiles
arch-cli config list-profiles

# Update profile
arch-cli config update-profile <NAME> [OPTIONS]

# Delete profile
arch-cli config delete-profile <NAME>
🌐 Network Modes
| Network Mode | Description | Use Case |
|---|---|---|
localnet | Local development with regtest Bitcoin | Local development and testing |
devnet | Development network | Development and integration testing |
testnet | Test network with Bitcoin testnet | Pre-production testing |
mainnet | Main production network | Production use (use with caution) |
⚙️ Validator Configuration
Key Parameters
# Basic configuration
--data-dir ./.arch_data                    # Data directory
--network-mode testnet                     # Network mode
--rpc-bind-ip 127.0.0.1                   # RPC bind IP
--rpc-bind-port 9002                      # RPC port

# Titan integration (for testnet/mainnet)
--titan-endpoint <URL>                     # Titan HTTP endpoint
--titan-socket-endpoint <HOST:PORT>        # Titan TCP endpoint

# Performance tuning
--max-tx-pool-size 10000                  # Transaction pool size
--full-snapshot-reccurence 100            # Snapshot frequency
--max-snapshots 5                         # Max snapshots to keep

# Security
--private-key-password <PASSWORD>         # Key encryption password
Environment Variables
You can also use environment variables instead of command-line flags:
export ARCH_NETWORK_MODE=testnet
export ARCH_RPC_BIND_PORT=9002
export ARCH_DATA_DIR=./.arch_data
export ARCH_TITAN_ENDPOINT=https://titan-public-http.test.arch.network
🎮 Next Steps
Congratulations! You’ve successfully deployed your first program. Here’s what you can explore next:
Development
- Program Development Guide - Learn about program architecture
- Writing Your First Program - Detailed program development
- Testing Guide - Testing strategies and tools
Examples
- Fungible Token - Create your own token
- Oracle Program - Build price oracles
- Runes Swap - Create a DEX for Bitcoin Runes
Production
- Validator Setup - Run a production validator
- Network Configuration - Understanding network topology
- Security Best Practices - Production security
🆘 Need Help?
- Discord Community - Real-time support and discussion
- Troubleshooting Guide - Common issues and solutions
- FAQ - Frequently asked questions
- API Reference - Complete RPC documentation
📊 System Requirements
Minimum Requirements
- CPU: 4+ cores
- RAM: 8GB
- Storage: 100GB SSD
- Network: 100 Mbps
Recommended for Production
- CPU: 8+ cores
- RAM: 16GB+
- Storage: 500GB+ NVMe SSD
- Network: 1 Gbps
🔍 Common Commands Quick Reference
# Full local development setup
arch-cli orchestrate start

# Deploy and test a program
arch-cli deploy ./target/deploy/program.so --generate-if-missing
arch-cli show <PROGRAM_ADDRESS>
arch-cli tx confirm <TX_ID>

# Account management
arch-cli account create --keypair-path ./account.json --airdrop 1000000000
arch-cli show <ACCOUNT_ADDRESS>

# Network information
arch-cli get-block-height
arch-cli get-block <BLOCK_HASH>

# Stop local environment
arch-cli orchestrate stop
🏗️ Validator Setup
Welcome to the validator setup guide! This guide will walk you through setting up a full Arch Network validator node. You can choose between an automated setup or manual configuration depending on your needs.
🎯 What You’ll Build
🎯 Component Architecture
💡 Understanding Your Role
As a validator, you will:
- Execute smart contracts and validate transactions
- Participate in network consensus
- Help secure the Bitcoin integration
- Earn rewards for your contribution
📋 System Requirements
- CPU: 4+ cores recommended
- RAM: 16GB+ recommended
- Storage: 100GB+ SSD for regtest, 500GB+ for testnet/mainnet
- Network: Stable internet connection (10+ Mbps)
- OS: Linux (Ubuntu 20.04+) or macOS (12.0+)
🚀 Setup Options
Choose your preferred setup method:
Option A: Automated Setup (Recommended)
The easiest way to get started using the CLI orchestrate command.
Prerequisites:
- Docker: Required on all platforms - Install Docker
- Docker Management (optional but recommended):
- macOS: OrbStack (recommended) or Docker Desktop
- Linux: Docker Desktop (optional GUI)
- Arch Network CLI - Download from releases
Setup:
# 1. Download and install the Arch CLI
# (Download the appropriate binary for your platform from the releases page)

# 2. Start the complete validator stack
arch-cli orchestrate start
This automatically starts:
- Bitcoin Core (regtest mode)
- Titan indexer
- Local validator
- All necessary networking and configuration
Service URLs:
- Bitcoin Core RPC:
http://127.0.0.1:18443 - Titan API:
http://127.0.0.1:3030 - Validator RPC:
http://127.0.0.1:9002
Management Commands:
# Stop all services
arch-cli orchestrate stop

# Check validator status specifically
arch-cli orchestrate validator-status

# Reset all data (removes all data)
arch-cli orchestrate reset
Option B: Manual Setup (Advanced)
For developers who want full control over their environment.
Step 1: Bitcoin Core Setup
Install and Start Bitcoin Core:
# Install Bitcoin Core (if not already installed)
# macOS: brew install bitcoin
# Linux: Download from https://bitcoin.org/en/download

# Start Bitcoin Core in regtest mode
bitcoind -regtest -port=18444 -rpcport=18443 \
    -rpcuser=bitcoin -rpcpassword=bitcoinpass \
    -fallbackfee=0.001

# First-time setup (only needed once)
# Create a wallet called "testwallet"
bitcoin-cli -regtest -rpcuser=bitcoin -rpcpassword=bitcoinpass createwallet testwallet

# Generate an address and mine the first 100 blocks to it
ADDRESS=$(bitcoin-cli -regtest -rpcuser=bitcoin -rpcpassword=bitcoinpass getnewaddress)
bitcoin-cli -regtest -rpcuser=bitcoin -rpcpassword=bitcoinpass generatetoaddress 100 $ADDRESS
Step 2: Titan Indexer Setup
Clone and Build Titan:
# Clone Titan repository
git clone https://github.com/saturnbtc/Titan.git
cd Titan

# Build Titan
cargo build --release
Start Titan:
# Start Titan indexer
cargo run --bin titan -- \
    --bitcoin-rpc-url http://127.0.0.1:18443 \
    --bitcoin-rpc-username bitcoin \
    --bitcoin-rpc-password bitcoinpass \
    --chain regtest \
    --index-addresses \
    --index-bitcoin-transactions \
    --enable-tcp-subscriptions \
    --main-loop-interval 0 \
    --http-listen 127.0.0.1:3030
Step 3: Validator Setup
Start Validator:
# Using the CLI (recommended)
arch-cli validator-start

# OR using the binary directly
./local_validator \
    --rpc-bind-ip 127.0.0.1 \
    --rpc-bind-port 9002 \
    --titan-endpoint http://127.0.0.1:3030
🔄 Process Management
For Automated Setup
The orchestrate command handles all process management automatically using Docker containers.
For Manual Setup
You may want to use a process manager to keep services running:
Using tmux (recommended):
# Create a new tmux session
tmux new -s arch-validator

# Split into three panes
# Ctrl+b then " to split horizontally
# Ctrl+b then % to split vertically
# Use arrow keys to navigate between panes

# Start each service in a separate pane:
# Pane 1: bitcoind
# Pane 2: Titan
# Pane 3: Validator
Using systemd (Linux):
# Create service files for each component
sudo tee /etc/systemd/system/bitcoind.service > /dev/null <<EOF
[Unit]
Description=Bitcoin Core Daemon
After=network.target

[Service]
ExecStart=/usr/local/bin/bitcoind -regtest -port=18444 -rpcport=18443 -rpcuser=bitcoin -rpcpassword=bitcoinpass -fallbackfee=0.001
User=bitcoin
Restart=always

[Install]
WantedBy=multi-user.target
EOF

# Enable and start services
sudo systemctl enable bitcoind
sudo systemctl start bitcoind
✅ Verification
Check Service Status
Automated Setup:
arch-cli orchestrate validator-status
Manual Setup:
# Check Bitcoin Core
bitcoin-cli -regtest -rpcuser=bitcoin -rpcpassword=bitcoinpass getblockchaininfo

# Check Titan
curl http://127.0.0.1:3030/status

# Check Validator
curl -X POST -H 'Content-Type: application/json' \
    -d '{"jsonrpc":"2.0","id":1,"method":"is_node_ready"}' \
    http://127.0.0.1:9002
Test Transaction Flow
# Deploy a simple program using the CLI
arch-cli deploy ./target/deploy/

# Check transaction status
arch-cli tx confirm <TX_ID>

# Get transaction details
arch-cli tx get <TX_ID>
🔍 Troubleshooting
Common Issues
Docker/Orchestrate Issues:
# Check Docker is running
docker ps

# Check validator status
arch-cli orchestrate validator-status

# Reset everything
arch-cli orchestrate stop
arch-cli orchestrate reset
arch-cli orchestrate start
Manual Setup Issues:
# Check if ports are in use
lsof -i :18443  # Bitcoin RPC
lsof -i :3030   # Titan API
lsof -i :9002   # Validator RPC

# Check service logs
tail -f ~/.bitcoin/regtest/debug.log  # Bitcoin Core logs
Connectivity Issues:
- Ensure all services start in order: Bitcoin → Titan → Validator
- Verify Bitcoin Core is fully synced before starting Titan
- Check firewall settings aren’t blocking required ports
- Confirm RPC credentials match across all services
🌐 Network Configurations
Regtest (Development)
- Purpose: Local development and testing
- Bitcoin Network: Local regtest blockchain
- Data: Minimal, starts fresh each time
- Use Case: Development, testing, learning
Testnet (Testing)
# For testnet, modify your configuration:
arch-cli orchestrate start --network testnet
# OR manually configure with testnet parameters
Mainnet (Production)
# For mainnet (when available):
arch-cli orchestrate start --network mainnet
# Requires significant storage and bandwidth
📚 Next Steps
Once your validator is running:
- Deploy Your First Program: Follow the Quick Start Guide
- Explore RPC Methods: Check the RPC API Reference
- Build Advanced Programs: See Program Development
- Join the Community: Connect on Discord
🎉 Congratulations!
You now have a complete Arch Network validator node running! You’re ready to:
- Deploy and test smart contracts
- Participate in network consensus
- Explore Bitcoin-native applications
- Build the future of Bitcoin programmability
For additional help, join our Discord community or visit our GitHub repository.
System Requirements
Welcome to the Arch Network development guide. This page contains all the requirements and setup instructions needed to start developing with Arch Network.
System Requirements
Hardware Requirements
| Component | Minimum | Recommended |
|---|---|---|
| CPU | 4+ cores | 8+ cores |
| RAM | 16GB | 32GB |
| Storage | 100GB SSD | 500GB+ SSD |
| Network | 100Mbps | 1Gbps+ |
Software Requirements
| Requirement | Minimum Version | Description |
|---|---|---|
| Operating System | Ubuntu 20.04+ / macOS 12.0+ | Latest LTS recommended |
| Git | Latest | Version control |
| Rust | Latest stable | Core development language |
| Solana CLI | v2.0+ | Program compilation tools |
| Arch Network CLI | Latest | Development toolkit |
Installation Guide
1. Install Rust
# Install Rust using rustup
curl --proto '=https' --tlsv1.2 -sSf https://sh.rustup.rs | sh
source $HOME/.cargo/env  # Add Rust to your current shell session

# Verify installation
rustc --version
cargo --version
2. Install Build Tools
macOS
xcode-select --install # Install Command Line Tools
Linux (Debian/Ubuntu)
sudo apt-get update
sudo apt-get install -y build-essential gcc-multilib jq
3. Install Solana CLI
sh -c "$(curl -sSfL https://release.solana.com/stable/install)"

# Verify installation (should show 2.x.x or later)
solana --version
4. Install Arch Network CLI
macOS - Apple Silicon
curl -L -o cli https://github.com/Arch-Network/arch-node/releases/latest/download/cli-aarch64-apple-darwin
chmod +x cli
sudo mv cli /usr/local/bin/
macOS - Intel
curl -L -o cli https://github.com/Arch-Network/arch-node/releases/latest/download/cli-x86_64-apple-darwin
chmod +x cli
sudo mv cli /usr/local/bin/
Linux - x86_64
curl -L -o cli https://github.com/Arch-Network/arch-node/releases/latest/download/cli-x86_64-unknown-linux-gnu
chmod +x cli
sudo mv cli /usr/local/bin/
Linux - ARM64
curl -L -o cli https://github.com/Arch-Network/arch-node/releases/latest/download/cli-aarch64-unknown-linux-gnu
chmod +x cli
sudo mv cli /usr/local/bin/
Verify installation:
cli --version
Troubleshooting
Solana Installation Issues
If you installed Rust through Homebrew and encounter cargo-build-sbf issues:
- Remove existing Rust installation:
rustup self uninstall
- Perform clean Rust installation:
curl --proto '=https' --tlsv1.2 -sSf https://sh.rustup.rs | sh
- Reinstall Solana:
sh -c "$(curl -sSfL https://release.solana.com/stable/install)"
Need Help?
- Check our Troubleshooting Guide
- Join our Discord dev-chat
- Review the Arch Network CLI documentation
Configuring Local Validator with Bitcoin Testnet4
This guide covers how to configure your Arch Network local validator to connect to Bitcoin testnet4, which provides access to additional tools and features for development and testing, including ordinals and runes functionality.
Overview
Bitcoin testnet4 is the latest Bitcoin test network that provides:
- Ordinals Support: Create and test Bitcoin ordinal inscriptions
- Runes Protocol: Test BRC-20 and rune token functionality
- Enhanced Tooling: Access to advanced Bitcoin testing tools
- Real Network Conditions: More realistic testing environment than regtest
When to Use This Setup:
- Testing ordinals/runes integration
- Developing Bitcoin-native features
- Testing with external Bitcoin services
- Preparing for mainnet deployment
Prerequisites
Before starting, ensure you have:
- Arch Network CLI installed - Download Latest
- Docker installed and running - Install Docker
- Bitcoin Core (optional, for advanced users) - Install Guide
Quick Start (Recommended)
The easiest way to run a local validator with testnet4 connectivity:
# Start validator connected to hosted testnet4 infrastructure
arch-cli validator-start --network-mode testnet
This connects to Arch’s hosted testnet4 infrastructure including:
- Bitcoin testnet4 node
- Titan indexer
- Network coordination services
Configuration Options
Basic Testnet4 Configuration
arch-cli validator-start \
  --network-mode testnet \
  --data-dir ./.arch_data \
  --rpc-bind-ip 127.0.0.1 \
  --rpc-bind-port 9002 \
  --titan-endpoint titan-node.test.aws.archnetwork.xyz \
  --titan-socket-endpoint titan-node.test.aws.archnetwork.xyz:49332
Custom Network Configuration
If you want to run your own Bitcoin testnet4 node:
# Start your Bitcoin testnet4 node
bitcoind \
  -testnet4 \
  -server \
  -rpcuser=bitcoin \
  -rpcpassword=bitcoinpass \
  -rpcbind=0.0.0.0 \
  -rpcallowip=0.0.0.0/0 \
  -fallbackfee=0.00001 \
  -zmqpubrawblock=tcp://0.0.0.0:28332 \
  -zmqpubrawtx=tcp://0.0.0.0:28333

# Start validator with custom Bitcoin node
arch-cli validator-start \
  --network-mode testnet \
  --bitcoin-rpc-endpoint http://localhost:48332 \
  --bitcoin-rpc-username bitcoin \
  --bitcoin-rpc-password bitcoinpass
Configuration Parameters
Core Settings
| Parameter | Description | Default |
|---|---|---|
--network-mode | Network to connect to (regtest, testnet, mainnet) | regtest |
--data-dir | Directory for validator data storage | ./.arch_data |
--rpc-bind-ip | IP address for RPC server | 127.0.0.1 |
--rpc-bind-port | Port for RPC server | 9002 |
Bitcoin Integration
| Parameter | Description | Default |
|---|---|---|
--bitcoin-rpc-endpoint | Bitcoin node RPC URL | Uses hosted node |
--bitcoin-rpc-username | Bitcoin RPC username | - |
--bitcoin-rpc-password | Bitcoin RPC password | - |
Titan Indexer
| Parameter | Description | Default |
|---|---|---|
--titan-endpoint | Titan HTTP endpoint | Hosted endpoint |
--titan-socket-endpoint | Titan WebSocket endpoint | Hosted endpoint |
Advanced Setup: Standalone Binary
For advanced users who want more control over the validator process:
Download and Setup
-
Download Required Files:
# Create working directory mkdir arch-testnet4-validator cd arch-testnet4-validator # Download validator binary and system program wget https://github.com/Arch-Network/arch-node/releases/latest/download/local_validator wget https://github.com/Arch-Network/arch-node/releases/latest/download/system_program.so # Create required directory structure mkdir ebpf mv system_program.so ebpf/ chmod +x local_validator -
Verify Directory Structure:
arch-testnet4-validator/
├── ebpf/
│   └── system_program.so
└── local_validator
Run Standalone Validator
RUST_LOG=info ./local_validator \
  --network-mode testnet \
  --rpc-bind-ip 127.0.0.1 \
  --rpc-bind-port 9002 \
  --titan-endpoint titan-node.test.aws.archnetwork.xyz \
  --titan-socket-endpoint titan-node.test.aws.archnetwork.xyz:49332
Testing Your Setup
Health Check
Verify your validator is running correctly:
curl -X POST -H 'Content-Type: application/json' -d '{
    "jsonrpc":"2.0",
    "id":1,
    "method":"is_node_ready",
    "params":[]
}' http://localhost:9002/
Expected Response:
{
    "jsonrpc": "2.0",
    "result": true,
    "id": 1
}
Deploy Test Program
Test program deployment to verify everything works:
# Using CLI (automatic endpoint detection)
arch-cli deploy --network-mode testnet

# Using CLI with explicit endpoint
arch-cli deploy --network-mode testnet --rpc-url http://localhost:9002
Check Validator Status
arch-cli validator-status --rpc-url http://localhost:9002
Troubleshooting
Common Issues
1. Connection Refused
# Check if validator is running
curl -X POST http://localhost:9002/ \
  -H 'Content-Type: application/json' \
  -d '{"jsonrpc":"2.0","id":1,"method":"is_node_ready","params":[]}'
2. Reset Validator State
# Stop validator first (Ctrl+C or docker stop)
rm -rf .arch_data

# Restart validator
arch-cli validator-start --network-mode testnet
3. View Logs
Docker Logs:
# Find container name
docker ps

# View logs
docker logs -f <container_name>
Standalone Binary Logs:
# Redirect logs to file
RUST_LOG=info ./local_validator \
  --network-mode testnet \
  [other options] > validator.log 2>&1

# Monitor logs in another terminal
tail -f validator.log
4. Network Connectivity Issues
# Test connection to Titan endpoint
curl -I https://titan-node.test.aws.archnetwork.xyz

# Test WebSocket endpoint (requires wscat)
wscat -c wss://titan-node.test.aws.archnetwork.xyz:49332
Development Workflow
1. Development Cycle
# Start validator
arch-cli validator-start --network-mode testnet

# Build your program
cd your-program
cargo build-sbf

# Deploy and test
arch-cli deploy --network-mode testnet
arch-cli invoke [program-id] [account] --data [instruction-data]
2. Reset Between Tests
# Quick reset
arch-cli orchestrate reset

# Full reset (if needed)
rm -rf .arch_data
arch-cli validator-start --network-mode testnet
3. Working with Testnet4 Features
Ordinals Testing:
# Your program can interact with ordinal inscriptions
# Use the Bitcoin testnet4 ordinals APIs
Runes Integration:
# Test rune token operations
# Integrate with runes protocol via Bitcoin transactions
Production Considerations
Security
- Never expose RPC ports publicly in production
- Use strong credentials for Bitcoin RPC connections
- Monitor validator health continuously
Performance
- Allocate sufficient resources (4+ GB RAM recommended)
- Use SSD storage for data directory
- Monitor disk usage (logs can grow large)
Networking
- Configure firewalls appropriately
- Use SSL/TLS for external connections
- Monitor network latency to Bitcoin and Titan nodes
Next Steps
- Deploy Your First Program: Follow the Writing Your First Program guide
- Test Thoroughly: Use the Testing Guide for comprehensive testing
- Explore Examples: Check out advanced examples for complex scenarios
- Join the Community: Get help on Discord if you run into issues
Additional Resources
Need Help? Join our Discord community or file issues on our GitHub.
Running Your Node
⚠️ Mainnet Status: Arch Network mainnet has not launched yet. This guide currently covers testnet operations. ARCH token staking and mainnet validator operations will be available when mainnet launches. More details coming soon.
🔒 Validator Pool Status: The staking validator pool is currently closed membership. When mainnet launches, the validator pool will initially be limited to approved participants and will be opened to the public at some point in the future.
This guide will walk you through the process of operating an Arch Network validator node on testnet, including future staking mechanisms and network participation. When mainnet launches, validator operators will be an integral part of the network’s security and computation infrastructure.
Prerequisites
🖥️ System Requirements
| Component | Minimum | Recommended |
|---|---|---|
| CPU | 4+ cores | 8+ cores |
| RAM | 16GB | 32GB |
| Storage | 100GB SSD | 500GB+ SSD |
| Network | 100Mbps | 1Gbps+ |
| OS | Ubuntu 20.04+ / macOS 12.0+ | Latest LTS |
🔑 ARCH Tokens (Future Mainnet)
⚠️ Not yet available: ARCH token staking will be available for approved validators when mainnet launches. The staking validator pool is currently closed membership.
- Minimum stake amounts (TBD)
- Lockup periods (TBD)
- Commission rates (TBD)
- Application process for validator pool membership (TBD)
Current Testnet: No ARCH tokens required - use the faucet for test tokens.
More details about mainnet staking and validator pool access will be announced closer to mainnet launch.
Validator Responsibilities
🔄 Transaction Processing
- Execute programs in Arch VM
- Validate transaction signatures
- Process Bitcoin-related transactions
- Maintain transaction history
🤝 Consensus Participation
- Participate in ROAST protocol
- Contribute to threshold signing
- Coordinate transaction finality
- Verify state transitions
📊 State Management
- Track UTXO states
- Validate Bitcoin operations
- Maintain state consistency
- Verify network state
Setup & Configuration
1. Install Arch Network CLI
macOS - Apple Silicon
curl -L -o cli https://github.com/Arch-Network/arch-node/releases/latest/download/cli-aarch64-apple-darwin
chmod +x cli
sudo mv cli /usr/local/bin/
macOS - Intel
curl -L -o cli https://github.com/Arch-Network/arch-node/releases/latest/download/cli-x86_64-apple-darwin
chmod +x cli
sudo mv cli /usr/local/bin/
Linux - x86_64
curl -L -o cli https://github.com/Arch-Network/arch-node/releases/latest/download/cli-x86_64-unknown-linux-gnu
chmod +x cli
sudo mv cli /usr/local/bin/
Linux - ARM64
curl -L -o cli https://github.com/Arch-Network/arch-node/releases/latest/download/cli-aarch64-unknown-linux-gnu
chmod +x cli
sudo mv cli /usr/local/bin/
Verify installation:
cli --version
2. Configure Bitcoin Node Access
📡 Remote Node (Recommended)
Regtest/Development:
--bitcoin-rpc-endpoint bitcoin-node.dev.aws.archnetwork.xyz \
--bitcoin-rpc-port 18443 \
--bitcoin-rpc-username bitcoin \
--bitcoin-rpc-password your_password \
--bitcoin-rpc-wallet testwallet
Testnet:
--bitcoin-rpc-endpoint bitcoin-node.test.aws.archnetwork.xyz \
--bitcoin-rpc-port 49332 \
--bitcoin-rpc-username bitcoin \
--bitcoin-rpc-password your_password \
--bitcoin-rpc-wallet testwallet
🖥️ Local Node
For advanced users who want full control. See our Bitcoin Node Setup Guide.
Local Regtest Configuration:
--bitcoin-rpc-endpoint 127.0.0.1 \
--bitcoin-rpc-port 18443 \
--bitcoin-rpc-username your_username \
--bitcoin-rpc-password your_password \
--bitcoin-rpc-wallet regtest
Local Testnet Configuration:
--bitcoin-rpc-endpoint 127.0.0.1 \
--bitcoin-rpc-port 18332 \
--bitcoin-rpc-username your_username \
--bitcoin-rpc-password your_password \
--bitcoin-rpc-wallet testnet
Local Mainnet Configuration:
--bitcoin-rpc-endpoint 127.0.0.1 \
--bitcoin-rpc-port 8332 \
--bitcoin-rpc-username your_username \
--bitcoin-rpc-password your_password \
--bitcoin-rpc-wallet mainnet
3. Start Your Validator
⚠️ Current Status: Mainnet is not yet available. Use testnet for current operations.
For Testnet (Currently Available):
cli validator-start \
  --network-mode testnet \
  --titan-endpoint titan-node.test.aws.archnetwork.xyz \
  --titan-socket-endpoint titan-node.test.aws.archnetwork.xyz:49332
For Mainnet (Future):
# Mainnet configuration will be available when mainnet launches
cli validator-start \
  --network-mode mainnet \
  --titan-endpoint <mainnet-endpoint-tbd> \
  --titan-socket-endpoint <mainnet-socket-tbd>
Monitoring & Maintenance
📊 Health Checks
# Node status
arch-cli validator status

# Performance metrics
arch-cli validator metrics
🔄 Sync Management
# Check sync status
arch-cli validator sync-status

# Force resync if needed
arch-cli validator resync
Understanding Staking in Arch Network (Future)
⚠️ Note: The staking mechanisms described below are planned for mainnet launch and are not currently available. Current testnet operations do not require ARCH token staking.
🔐 What will Staking be?
Staking in Arch Network will be fundamentally different from traditional Proof of Stake systems. Instead of using staking for consensus, Arch Network will use staked validators to participate in the ROAST protocol for secure Bitcoin transaction signing.
🤔 Solana vs. Arch Network: Validator Comparison
| Feature | Solana | Arch Network |
|---|---|---|
| Consensus Role | Validators vote on blocks and produce blocks when selected as leader | Validators execute transactions and sign Bitcoin transactions using threshold signatures |
| Economic Model | Block rewards + transaction fees | Transaction fees + commission from Bitcoin operations |
| Selection Mechanism | Stake-weighted leader selection | Stake-weighted participation in threshold signing committee |
| Performance Metrics | Vote signing speed, block production, uptime | Transaction execution correctness, signing participation, uptime |
| Slashing Conditions | Double signing, unavailability | Malicious signing, transaction manipulation attempts |
| Hardware Requirements | High-end CPU, 128GB+ RAM, 2TB+ NVMe | 4+ CPU cores, 16GB+ RAM, 100GB+ SSD |
🚀 From Solana to Arch: Operational Transition Guide
If you’re an experienced Solana validator operator, here’s what you need to know about running an Arch Network validator:
⚙️ Technical Setup
- Lower Hardware Requirements: Arch Network requires less powerful hardware than Solana
- Bitcoin RPC Access: Validators need Bitcoin node access (remote or local)
- Key Management: Different key structure focusing on distributed key generation
- Monitoring: Focus on signing participation rather than block production
💰 Economic Considerations
- Staking Return Model: Fee-based with transaction execution rewards
- Reward Distribution: Based on stake proportion and signing participation
- Commission Structure: Set during validator configuration
- Lockup Periods: Network-defined based on security requirements
🔄 Operational Differences
- Signing vs. Voting: Focus on correct transaction execution and signing
- Performance Metrics: Measured by signing participation and availability
- Updates: Less frequent than Solana's rapid release cycle
- Network Bandwidth: Lower requirements due to different architecture
🛣️ Onboarding Process (Future Mainnet)
- Application: Apply for validator pool membership (initially closed membership)
- Approval: Await approval for validator participation
- Registration: Complete validator registration through the network portal (TBD)
- Stake Deposit: Transfer ARCH tokens to the validator staking contract (TBD)
- Configuration: Set up your validator with proper Bitcoin node access
- Key Generation: Participate in distributed key generation ceremony
- Activation: Begin participation after stake activation period
Note: The validator pool will initially be limited to approved participants and will open to the public in the future.
🧪 Current Testnet Onboarding
- No Registration Required: Simply start a testnet validator
- No Stake Required: Testnet operation is free
- Configuration: Set up your validator with testnet endpoints
- Testing: Deploy programs and test functionality
- Immediate Participation: Begin testing immediately
📊 Staking Economics (Future Mainnet)
Validator Requirements (Planned)
- Minimum Stake: TBD - Details will be announced before mainnet launch
- Lockup Period: Network-defined based on security requirements (TBD)
- Uptime Requirement: High availability expected for signing participation
- Performance Bonding: Stake will act as bond for correct behavior
Reward Structure (Planned)
- Base Rewards: From transaction fees distributed proportionally to stake
- Signing Rewards: Additional rewards for participating in threshold signing
- Commission: Set percentage of rewards retained by validator
- Distribution Frequency: Continuous as transactions are processed
Current Testnet Operations
- Open Access: Anyone can run a testnet validator
- No Staking Required: Testnet validators operate without ARCH token requirements
- Test Tokens: Use the faucet to get test tokens for transactions
- No Rewards: Testnet operation is for testing and development only
- Free Operation: No costs beyond infrastructure for testnet participation
Validator Types Comparison
| Validator Type | Access | Staking | Rewards |
|---|---|---|---|
| Testnet Validators | Open to all | No staking required | No rewards (testing only) |
| Mainnet Staking Validators | Closed membership initially | ARCH tokens required (TBD) | Transaction fees + signing rewards |
🔄 ROAST Protocol Integration
The ROAST (Robust Asynchronous Schnorr Threshold) protocol enables validators to collectively sign Bitcoin transactions:
🛡️ Security Model
Key Features
- Distributed key generation for secure signing
- Threshold signature scheme (t-of-n) for fault tolerance
- Bitcoin-based finality guarantees
- Automatic malicious node detection
Understanding Arch Programs
This comprehensive guide walks you through building Arch Network programs by examining a complete, working example. We’ll build a “Hello World” program that demonstrates all the essential concepts you need to start developing on Arch Network.
What You’ll Learn
By the end of this guide, you’ll understand:
- Program structure and architecture
- Account management and state handling
- Bitcoin transaction integration
- Error handling best practices
- Testing and deployment patterns
Complete Example: Hello World Program
Let’s build a complete program that stores personalized greetings and demonstrates key Arch Network concepts.
1. Project Setup
First, create your program with the correct dependencies:
Cargo.toml
[package]
name = "hello_world_program"
version = "0.1.0"
edition = "2021"

[dependencies]
arch_program = { path = "../../program" }
borsh = { version = "1.5.1", features = ["derive"] }

[lib]
crate-type = ["cdylib", "lib"]

[workspace]
2. Program Dependencies and Imports
src/lib.rs
Key Dependencies Explained:
AccountInfo: Access to account data and metadatabitcoin: Bitcoin transaction types and functionalityentrypoint: Macro for registering program entry pointhelper::add_state_transition: Manages Bitcoin state transitionsmsg: Logging for debugging and monitoringborsh: Efficient serialization for program data
3. Program Data Structures
4. Custom Error Handling
5. Program Entry Point and Logic
Program Architecture Breakdown
1. Entrypoint Pattern
Every Arch program needs exactly one entry point. The entrypoint! macro registers your process_instruction function as the program’s main entry point.
2. Function Signature
Parameters explained:
program_id: Your program’s public key (often unused in simple programs)accounts: Array of accounts this instruction will read/writeinstruction_data: Serialized parameters for your specific instruction
3. Account Validation
Always validate accounts before use:
4. State Management
5. Bitcoin Integration
Every state change must be committed to Bitcoin:
Testing Your Program
Create comprehensive tests for your program:
tests/integration_test.rs
Best Practices
1. Error Handling
- Define custom error types for better debugging
- Use descriptive error messages with
msg! - Validate all inputs before processing
- Handle both program logic and Bitcoin transaction errors
2. Account Management
- Always check account permissions (
is_signer,is_writable) - Validate account ownership when needed
- Use
reallocwhen data size changes - Consider account rent and minimum balances
3. State Design
- Keep state structures simple and well-defined
- Use Borsh for efficient serialization
- Consider data size limits
- Plan for state evolution
4. Bitcoin Integration
- Always include fee transactions
- Validate transaction structure
- Use proper input/output management
- Handle signing requirements correctly
5. Security
- Validate all input parameters
- Check account ownership and permissions
- Prevent reentrancy attacks
- Use safe arithmetic operations
Common Patterns
Program-Derived Addresses (PDAs)
Cross-Program Invocation (CPI)
Multiple Instructions
Next Steps
Now that you understand the fundamentals:
- Explore Advanced Examples: Check out the token program and oracle implementation
- Learn Testing: Set up comprehensive test suites for your programs
- Understand PDAs: Master program-derived addresses for complex state management
- Study CPI: Learn cross-program invocation for composable programs
- Deploy and Monitor: Learn deployment and monitoring best practices
Additional Resources
The complete code for this example is available in the Hello World example.
Setting up an Arch Network Project
This guide walks you through creating your first Arch Network project. You’ll learn how to set up, build, and deploy a “Hello World” program to the Arch Network using the Arch Network CLI tool.
Prerequisites
Before starting, ensure you have the following dependencies installed:
- Arch Network CLI (Latest)
- Solana CLI (Latest stable version)
- Cargo (v1.81.0 or later)
- Rust (Latest stable version)
- Bitcoin Core and Titan: Required for local validation
Project Setup
1. Clone the Example Repository
Start by cloning the Arch Network examples repository:
# Clone the examples repository
git clone https://github.com/Arch-Network/arch-examples.git

# Navigate to the Hello World example
cd arch-examples/examples/helloworld
Project Structure
After cloning, you’ll see the following project structure:
The helloworld folder should look like this:
helloworld/
├── Cargo.toml              # Workspace configuration
├── program/                # Program directory containing on-chain code
│   ├── Cargo.lock
│   ├── Cargo.toml         # Program dependencies
│   └── src/
│       └── lib.rs         # Program logic
└── src/                   # Client-side code
    └── lib.rs             # Client interface
2. Build the program
Build the program using the Solana BPF compiler:
# Navigate to the program directory
cd program

# Build the program using Solana's BPF compiler
cargo build-sbf
This command compiles your Rust code into a format that can be deployed to the Arch Network.
3. Start the local validator
Start a local validator for testing:
# Start the Arch Network validator
arch-cli validator-start
Important: Ensure Bitcoin Core and Titan are properly configured and running before starting the validator. See the setup guide for details.
4. Deploy the program
Deploy your compiled program to the local Arch Network:
# Deploy the program
arch-cli deploy ./target/deploy/
Troubleshooting
Common issues and solutions:
-
If cargo build-sbf fails:
- Ensure you have the latest version of Rust and Cargo
- Check that all dependencies are properly installed
-
If validator fails to start:
- Verify Bitcoin Core and Titan are running
- Check the logs for specific error messages
Additional CLI Commands
For more advanced operations, the Arch Network CLI provides additional commands:
# Show program information
arch-cli show <PROGRAM_ADDRESS>

# Confirm transaction status
arch-cli confirm <TX_ID>

# Get block information
arch-cli get-block <BLOCK_HASH>

# Get block height
arch-cli get-block-height
For a complete list of available commands, refer to the Arch Network CLI documentation.
Writing Your First Arch Program
This comprehensive guide walks you through creating your first Arch program from scratch. We’ll build a feature-rich counter program that demonstrates the complete development workflow and all essential concepts you need for building production-ready Arch Network applications.
What You’ll Build
By the end of this guide, you’ll have created a complete counter program that:
- Manages state in program accounts
- Handles multiple instruction types
- Integrates with Bitcoin transactions
- Includes comprehensive error handling
- Provides extensive testing coverage
- Follows security best practices
Prerequisites
Before starting, ensure you have:
- Rust 1.70+ and Cargo installed (Install Rust)
- Solana CLI 2.0+ - Install Guide
- Arch Network CLI - Download Latest
- Running validator (see Validator Setup Guide)
- Basic Rust knowledge and understanding of Arch concepts
Step 1: Project Setup
1.1 Create Project Structure
# Create project directory
mkdir my-counter-program
cd my-counter-program

# Create program directory
mkdir program
cd program

# Initialize Rust library
cargo init --lib
1.2 Configure Dependencies
Create a proper Cargo.toml:
program/Cargo.toml
[package]
name = "my_counter_program"
version = "0.1.0"
edition = "2021"

[dependencies]
arch_program = "0.5.4"
borsh = { version = "1.5.1", features = ["derive"] }

[lib]
crate-type = ["cdylib", "lib"]

[workspace]
1.3 Project Structure
Your project should look like this:
my-counter-program/
├── program/
│   ├── src/
│   │   └── lib.rs
│   └── Cargo.toml
├── client/          # We'll add this later
└── tests/           # We'll add this later
Step 2: Define Program Data Structures
Create comprehensive data structures for your program:
program/src/lib.rs
Step 3: Implement Program Logic
Add the complete program implementation:
Step 4: Build Your Program
Build your program using the Solana toolchain:
cd program

# Build the program
cargo build-sbf

# Verify the build output
ls target/deploy/
You should see my_counter_program.so in the target/deploy/ directory.
Step 5: Deploy Your Program
Deploy your program to the Arch Network:
# Deploy to testnet (recommended for testing)
arch-cli deploy ./target/deploy/ --network-mode testnet

# Or deploy to local network for development
arch-cli deploy ./target/deploy/ --network-mode regtest
Save the Program ID from the output - you’ll need it for testing!
Step 6: Create a Client for Testing
Create a client to interact with your program:
client/Cargo.toml
[package]
name = "counter_client"
version = "0.1.0"
edition = "2021"

[dependencies]
arch_sdk = "0.5.4"
my_counter_program = { path = "../program" }
borsh = "1.5.1"
tokio = { version = "1.0", features = ["full"] }
client/src/main.rs
use arch_sdk::{
instruction::Instruction,
message::ArchMessage,
pubkey::Pubkey,
signer::{create_account, Keypair},
transaction::Transaction,
};
use my_counter_program::{CounterInstruction, CounterParams, CounterAccount};
fn main() -> Result<(), Box<dyn std::error::Error>> {
// Your program ID (replace with actual deployed program ID)
let program_id = Pubkey::from_str("YOUR_PROGRAM_ID_HERE")?;
// Create a new account for the counter
let counter_keypair = Keypair::new();
// Create fee transaction (simplified)
let fee_tx = create_fee_transaction();
// Test initialize instruction
test_initialize(&program_id, &counter_keypair, &fee_tx)?;
// Test increment instruction
test_increment(&program_id, &counter_keypair, &fee_tx, 5)?;
// Test decrement instruction
test_decrement(&program_id, &counter_keypair, &fee_tx, 2)?;
// Test reset instruction
test_reset(&program_id, &counter_keypair, &fee_tx)?;
println!("All tests completed successfully!");
Ok(())
}
fn test_initialize(
program_id: &Pubkey,
counter_keypair: &Keypair,
fee_tx: &[u8],
) -> Result<(), Box<dyn std::error::Error>> {
let params = CounterParams {
instruction: CounterInstruction::Initialize,
tx_hex: fee_tx.to_vec(),
};
let instruction = Instruction {
program_id: *program_id,
accounts: vec![
AccountMeta::new(counter_keypair.pubkey(), true),
],
data: borsh::to_vec(¶ms)?,
};
// Send transaction (implementation depends on your client setup)
send_transaction(&instruction, &[counter_keypair])?;
println!("Counter initialized successfully");
Ok(())
}
// Add similar functions for other operations...
Step 7: Comprehensive Testing
Create extensive tests for your program:
tests/integration_tests.rs
Step 8: Best Practices Implementation
Security Considerations
- Input Validation: Always validate all inputs
- Overflow Protection: Use checked arithmetic operations
- Access Control: Verify account ownership and permissions
- State Validation: Ensure account state is valid before operations
Performance Optimization
- Efficient Serialization: Use Borsh for optimal performance
- Minimal Account Size: Keep state structures compact
- Transaction Batching: Group related operations when possible
Error Handling
- Custom Error Types: Define specific errors for better debugging
- Comprehensive Logging: Use
msg!for important state changes - Graceful Failures: Handle edge cases appropriately
Next Steps
Now that you’ve built your first program:
- Enhance the Counter: Add features like access control lists, multiple counters per account, or counter metadata
- Explore Advanced Patterns: Learn about Program Derived Addresses and Cross-Program Invocation
- Build Complex Programs: Try the Token Program or Oracle Program guides
- Deploy to Mainnet: When ready, deploy your programs to mainnet (when available)
Additional Resources
- Understanding Arch Programs - Deep dive into program architecture
- Testing Guide - Comprehensive testing strategies
- Program Examples - More example programs
- API Reference - Complete RPC documentation
Congratulations! You’ve successfully built, deployed, and tested your first Arch Network program. You now have the foundation to build more complex applications on the Arch Network.
# Start the Arch Network validator
arch-cli validator-start
Comprehensive Testing Guide for Arch Network Programs
This guide provides complete coverage of testing strategies, tools, and best practices for building robust and reliable Arch Network programs. Proper testing is essential for ensuring your programs work correctly and securely before deployment.
Overview
Testing Arch programs involves multiple layers:
- Unit Tests: Individual function and logic testing
- Integration Tests: Cross-component functionality testing
- End-to-End Tests: Full program workflow testing
- Security Tests: Vulnerability and attack vector testing
- Performance Tests: Load and efficiency testing
Project Setup for Testing
Test Directory Structure
my-program/
├── program/
│   ├── src/
│   │   └── lib.rs
│   └── Cargo.toml
├── tests/
│   ├── integration.rs
│   ├── security.rs
│   └── common/
│       └── mod.rs
└── Cargo.toml (workspace)
Test Dependencies Configuration
Cargo.toml (workspace root)
[workspace]
members = ["program", "tests"]

[workspace.dependencies]
arch_program = "0.5.4"
arch_sdk = "0.5.4"
borsh = { version = "1.5.1", features = ["derive"] }
tokio = { version = "1.0", features = ["full"] }
tests/Cargo.toml
[package]
name = "program-tests"
version = "0.1.0"
edition = "2021"

[dependencies]
arch_program = { workspace = true }
arch_sdk = { workspace = true }
borsh = { workspace = true }
tokio = { workspace = true }

# Test utilities
proptest = "1.0"
rstest = "0.18"
serial_test = "3.0"

# Your program dependency
my_program = { path = "../program" }

[[bin]]
name = "test-runner"
path = "src/main.rs"
Unit Testing
Basic Unit Tests
Unit tests go directly in your program’s src/lib.rs:
Advanced Unit Testing
Integration Testing
Test Environment Setup
tests/common/mod.rs
Complete Integration Tests
tests/integration.rs
Security Testing
tests/security.rs
Performance Testing
tests/performance.rs
Test Execution
Running Tests
# Run all tests
cargo test

# Run specific test categories
cargo test --test integration
cargo test --test security
cargo test --test performance

# Run with logs
RUST_LOG=debug cargo test

# Run tests in sequence (for tests that modify shared state)
cargo test -- --test-threads=1
Continuous Integration
.github/workflows/test.yml
name: Test

on: [push, pull_request]

jobs:
  test:
    runs-on: ubuntu-latest

    services:
      bitcoind:
        image: ruimarinho/bitcoin-core:22
        options: >-
          --health-cmd "bitcoin-cli -regtest getblockchaininfo"
          --health-interval 10s
          --health-timeout 5s
          --health-retries 5
        ports:
          - 18443:18443

    steps:
    - uses: actions/checkout@v3

    - name: Install Rust
      uses: actions-rs/toolchain@v1
      with:
        toolchain: stable

    - name: Install Solana CLI
      run: |
        sh -c "$(curl -sSfL https://release.solana.com/stable/install)"
        echo "$HOME/.local/share/solana/install/active_release/bin" >> $GITHUB_PATH

    - name: Start local validator
      run: |
        solana-test-validator --detach

    - name: Build program
      run: |
        cargo build-sbf

    - name: Run tests
      run: |
        cargo test

    - name: Run integration tests
      run: |
        cargo test --test integration
Best Practices
1. Test Organization
- Separate unit, integration, and security tests
- Use common test utilities to reduce duplication
- Group related tests into modules
2. Test Data Management
- Use deterministic test data when possible
- Clean up test accounts and state
- Use property-based testing for edge cases
3. Error Testing
- Test all error conditions explicitly
- Verify correct error codes are returned
- Test permission and access control
4. Performance Considerations
- Monitor transaction costs in tests
- Test with realistic data sizes
- Benchmark critical operations
5. Security Focus
- Test privilege escalation attempts
- Verify input validation
- Test resource exhaustion scenarios
Debugging Tests
Logging and Diagnostics
Test Helpers for Debugging
Summary
Comprehensive testing is crucial for Arch Network program development. This guide provides:
- Complete test setup with proper dependencies and project structure
- Multi-layer testing strategy covering unit, integration, security, and performance
- Real working examples that you can adapt for your programs
- Best practices for maintainable and effective test suites
- CI/CD integration for automated testing
Remember to test early, test often, and test thoroughly. Your users depend on your programs being secure and reliable!
Arch Network Development Guides
This section provides comprehensive guides for building, testing, and deploying Arch Network programs. Whether you’re just starting out or building complex applications, these guides will help you develop robust and efficient programs.
Getting Started Guides
Understanding Arch Programs
Learn the fundamental concepts, architecture, and development patterns for Arch Network programs. This guide covers the complete foundation you need before building your first program.
Covers: Program structure, Bitcoin integration, state management, error handling, and development best practices.
Writing Your First Program
A comprehensive step-by-step tutorial for creating, deploying, and testing a complete counter program with advanced features.
Covers: Project setup, program logic, Bitcoin transactions, security patterns, and comprehensive testing.
Comprehensive Testing Guide
Master testing strategies for Arch Network programs with unit tests, integration tests, security tests, and performance testing.
Covers: Test environment setup, multi-layer testing, security testing, CI/CD integration, and debugging techniques.
Configuration & Setup
Local Validator with Bitcoin Testnet4
Configure your development environment to work with Bitcoin testnet4 for testing ordinals, runes, and advanced Bitcoin features.
Covers: Testnet4 setup, validator configuration, ordinals support, runes protocol, and production considerations.
Program Examples & Tutorials
Fungible Token Program
Build a complete fungible token implementation compatible with standard token interfaces.
What you’ll build: Token minting, transfers, allowances, and metadata management.
Oracle Program
Create a price oracle program that fetches and stores external data on-chain.
What you’ll build: Price feeds, data validation, timestamp management, and trusted data sources.
Runes Swap Program
Implement a decentralized exchange for trading Bitcoin runes and ordinals.
What you’ll build: AMM functionality, liquidity pools, runes integration, and swap mechanisms.
Lending Protocol
Build a complete DeFi lending platform with collateralized loans and interest rates.
What you’ll build: Collateral management, loan origination, interest calculations, and liquidation mechanisms.
Recommended Learning Path
For Beginners
- Understanding Arch Programs - Learn the fundamentals
- Writing Your First Program - Build your first complete program
- Testing Guide - Learn to test thoroughly
- Fungible Token - Build a practical program
For Intermediate Developers
- Oracle Program - External data integration
- Local Validator Setup - Advanced testing environments
- Runes Swap - Bitcoin-native features
For Advanced Developers
- Lending Protocol - Complex DeFi mechanics
- All testing guides - Production-ready development practices
Quick Reference
| Guide | Difficulty | Time | Key Concepts |
|---|---|---|---|
| Understanding Arch Programs | Beginner | 30 min | Architecture, concepts |
| Writing Your First Program | Beginner | 2-3 hours | Complete development cycle |
| Testing Guide | Intermediate | 1-2 hours | Testing strategies |
| Testnet4 Setup | Intermediate | 30 min | Advanced configuration |
| Fungible Token | Intermediate | 3-4 hours | Token standards |
| Oracle Program | Intermediate | 2-3 hours | External data |
| Runes Swap | Advanced | 4-6 hours | DEX mechanics |
| Lending Protocol | Advanced | 6-8 hours | DeFi protocols |
Development Tips
Before You Start
- Set up your environment following the Quick Start Guide
- Understand Bitcoin basics if you’re new to Bitcoin development
- Review Rust fundamentals if you’re not familiar with Rust
Best Practices
- Start simple - Begin with basic programs before building complex systems
- Test thoroughly - Use the comprehensive testing strategies from our guides
- Follow security patterns - Always validate inputs and handle errors gracefully
- Document your code - Future you (and your team) will thank you
Getting Help
- Join our Discord for real-time support
- Check the API Reference for detailed documentation
- Review Core Concepts for architectural guidance
- File issues on GitHub for bugs
Contributing
Found an issue or want to improve these guides? We welcome contributions!
- Report bugs or unclear instructions
- Suggest improvements to existing guides
- Propose new guides for topics we haven’t covered
- Share your programs as examples for the community
What’s Next?
Choose your path based on your experience level and goals:
- New to Arch? Start with Understanding Arch Programs
- Ready to code? Jump into Writing Your First Program
- Building tokens? Check out the Fungible Token guide
- Interested in DeFi? Try the Lending Protocol guide
Happy building! 🚀
Using APL Tokens on Arch Network
This guide shows you how to work with fungible tokens on Arch Network using the built-in APL (Arch Program Library) Token Program. APL tokens are based on Solana’s SPL token standard and provide a robust foundation for creating and managing tokens on Arch Network.
What You’ll Learn
By the end of this guide, you’ll understand how to:
- Create token mints using the APL token program
- Initialize token accounts for holding tokens
- Mint tokens to accounts
- Transfer tokens between accounts
- Approve delegations for spending tokens
- Burn tokens and manage token lifecycle
Overview
The APL Token Program is Arch Network’s native token standard, providing:
- SPL Token Compatibility: Based on Solana’s proven token standard
- Bitcoin Integration: All operations are recorded on Bitcoin
- Comprehensive Features: Minting, transferring, burning, delegation, freezing
- Multisig Support: Multiple signature authorities for enhanced security
Prerequisites
Before starting, ensure you have:
- Rust 1.70+ and Cargo installed (Install Rust)
- Solana CLI 2.0+ - Install Guide
- Arch Network CLI - Download Latest
- Running validator (see Validator Setup Guide)
- Basic familiarity with Arch Network program development
APL Token Program ID
The APL Token Program has a fixed program ID:
apl-token00000000000000000000000
Step 1: Project Setup
1.1 Create Project Structure
# Create project directory
mkdir arch-token-example
cd arch-token-example

# Initialize Rust project
cargo init --bin
1.2 Configure Dependencies
Cargo.toml
[package]
name = "arch_token_example"
version = "0.1.0"
edition = "2021"

[dependencies]
arch_sdk = "0.5.4"
arch_program = "0.5.4"
arch_test_sdk = "0.5.4"
apl-token = { git = "https://github.com/Arch-Network/arch-network", branch = "dev", features = ["no-entrypoint"] }
apl-associated-token-account = { git = "https://github.com/Arch-Network/arch-network", branch = "dev", features = ["no-entrypoint"] }
borsh = { version = "1.5.1", features = ["derive"] }
bitcoincore-rpc = "0.18.0"
bitcoin = { version = "0.32.3", features = ["serde", "rand"] }
hex = "0.4.3"
log = "0.4"
env_logger = "0.10"

[dev-dependencies]
serial_test = "3.1.1"
Step 2: Basic Token Operations
2.1 Initialize a Token Mint
First, let’s create a new token mint:
src/main.rs
use apl_token::state::Mint;
use arch_program::{program_pack::Pack, sanitized::ArchMessage};
use arch_sdk::{build_and_sign_transaction, generate_new_keypair, ArchRpcClient, Status};
use arch_test_sdk::{
    constants::{BITCOIN_NETWORK, NODE1_ADDRESS},
    helper::{create_and_fund_account_with_faucet, send_transactions_and_wait},
};

fn main() {
    env_logger::init();

    let client = ArchRpcClient::new(NODE1_ADDRESS);

    // Create authority keypair (this will be the mint authority)
    let (authority_keypair, authority_pubkey, _) = generate_new_keypair(BITCOIN_NETWORK);
    create_and_fund_account_with_faucet(&authority_keypair, BITCOIN_NETWORK);

    // Create mint account
    let (token_mint_keypair, token_mint_pubkey, _) = generate_new_keypair(BITCOIN_NETWORK);

    // Create the mint account
    let create_account_instruction = arch_program::system_instruction::create_account(
        &authority_pubkey,
        &token_mint_pubkey,
        arch_program::account::MIN_ACCOUNT_LAMPORTS,
        Mint::LEN as u64,
        &apl_token::id(),
    );

    // Initialize the mint
    let initialize_mint_instruction = apl_token::instruction::initialize_mint(
        &apl_token::id(),
        &token_mint_pubkey,
        &authority_pubkey,
        None, // No freeze authority
        9,    // 9 decimals (like USDC)
    ).unwrap();

    let transaction = build_and_sign_transaction(
        ArchMessage::new(
            &[create_account_instruction, initialize_mint_instruction],
            Some(authority_pubkey),
            client.get_best_block_hash().unwrap(),
        ),
        vec![authority_keypair, token_mint_keypair],
        BITCOIN_NETWORK,
    );

    let processed_transactions = send_transactions_and_wait(vec![transaction]);
    assert_eq!(processed_transactions[0].status, Status::Processed);

    println!("Token mint created: {}", token_mint_pubkey);
}
2.2 Create Token Accounts
Token accounts hold tokens for specific owners:
2.3 Mint Tokens
Mint new tokens to a token account:
2.4 Transfer Tokens
Transfer tokens between accounts:
Step 3: Advanced Token Operations
3.1 Approve Delegations
Allow another account to spend tokens on your behalf:
3.2 Burn Tokens
Remove tokens from circulation:
3.3 Freeze and Thaw Accounts
If you set a freeze authority when creating the mint, you can freeze/thaw accounts:
Step 4: Complete Example
Here’s a complete example that demonstrates the full token lifecycle:
use apl_token::state::{Mint, Account, AccountState};
use arch_program::{program_pack::Pack, sanitized::ArchMessage};
use arch_sdk::{build_and_sign_transaction, generate_new_keypair, ArchRpcClient, Status};
use arch_test_sdk::{
    constants::{BITCOIN_NETWORK, NODE1_ADDRESS},
    helper::{create_and_fund_account_with_faucet, read_account_info, send_transactions_and_wait},
};

fn main() {
    env_logger::init();

    let client = ArchRpcClient::new(NODE1_ADDRESS);

    // 1. Create authority and mint
    let (authority_keypair, authority_pubkey, _) = generate_new_keypair(BITCOIN_NETWORK);
    create_and_fund_account_with_faucet(&authority_keypair, BITCOIN_NETWORK);

    let (_, token_mint_pubkey) = create_token_mint(&client, authority_pubkey, authority_keypair);

    // 2. Create token accounts for two users
    let (user1_keypair, user1_pubkey, _) = generate_new_keypair(BITCOIN_NETWORK);
    create_and_fund_account_with_faucet(&user1_keypair, BITCOIN_NETWORK);

    let (user2_keypair, user2_pubkey, _) = generate_new_keypair(BITCOIN_NETWORK);
    create_and_fund_account_with_faucet(&user2_keypair, BITCOIN_NETWORK);

    let (_, user1_token_account) = create_token_account(&client, token_mint_pubkey, user1_keypair);
    let (_, user2_token_account) = create_token_account(&client, token_mint_pubkey, user2_keypair);

    // 3. Mint tokens to user1
    mint_tokens(&client, &token_mint_pubkey, &user1_token_account, &authority_pubkey, authority_keypair, 1000);

    // 4. Check balance
    let account_info = read_account_info(user1_token_account);
    let account_data = Account::unpack(&account_info.data).unwrap();
    println!("User1 balance: {}", account_data.amount);

    // 5. Transfer tokens from user1 to user2
    transfer_tokens(&client, &user1_token_account, &user2_token_account, &user1_pubkey, user1_keypair, 500);

    // 6. Check both balances
    let user1_info = read_account_info(user1_token_account);
    let user1_data = Account::unpack(&user1_info.data).unwrap();
    println!("User1 balance after transfer: {}", user1_data.amount);

    let user2_info = read_account_info(user2_token_account);
    let user2_data = Account::unpack(&user2_info.data).unwrap();
    println!("User2 balance after transfer: {}", user2_data.amount);

    println!("Token operations completed successfully!");
}
Running the Example
# First, ensure your validator is running
arch-cli orchestrate validator-status

# Then run the example code
cargo run
Key Concepts
Account Types
- Mint Account: Stores token metadata and authorities
- Token Account: Holds token balances for specific owners
- Multisig Account: Enables shared authority over operations
Authority Types
- Mint Authority: Can mint new tokens
- Freeze Authority: Can freeze/thaw token accounts
- Owner: Controls token account operations
- Delegate: Can spend approved amounts on behalf of owner
State Management
All token operations are recorded on Bitcoin, providing:
- Immutable History: All transfers are permanently recorded
- Transparency: Public verification of all operations
- Security: Bitcoin’s security model protects token state
Testing
Create comprehensive tests for your token operations:
Next Steps
- Explore Associated Token Accounts for simplified account management
- Implement Multisig authorities for enhanced security
- Study the complete examples in
examples/token/src/lib.rs - Review the APL Token Program documentation for advanced features
The APL Token Program provides a robust, battle-tested foundation for tokenization on Arch Network, leveraging the security and transparency of Bitcoin while maintaining compatibility with proven SPL token patterns.
How to write an oracle program
This guide walks through the innerworkings of an oracle program as well as details how oracle data can be utilized by other programs on Arch Network.
Table of Contents:
Description
Two important aspects of understanding how this oracle example is implemented within Arch:
- The oracle is a program that updates an account which holds the data
- No cross-program invocation occurs since only the account is updated and read from versus this being another program that gets interacted with from another program
The source code can be found within the arch-examples repo.
Flow
- Project deploys oracle program
- Project creates state account that the oracle program will control in order to write state to it
- Projects submit data to the oracle state account by submitting instructions to the oracle program
- Programs include oracle state account alongside their program instructions in order to use this referenced data stored in the oracle state account within their program
- Projects submit instructions to oracle program periodically to update oracle state account with fresh data
Logic
If you haven’t already read How to write an Arch program, we recommend starting there to get a basic understanding of the program anatomy before going further.
We’ll look closely at the logic block contained within the update_data handler.
pub fn update_data(
    program_id: &Pubkey,
    accounts: &[AccountInfo],
    instruction_data: &[u8],
) -> Result<(), ProgramError> {
    let account_iter = &mut accounts.iter();
    let oracle_account = next_account_info(account_iter)?;

    assert!(oracle_account.is_signer);
    assert_eq!(instruction_data.len(), 8);

    ...
}
First, we’ll iterate over the accounts that get passed into the function, which includes the newly created state account that will be responsible for managing the oracle’s data.
We then assert that the oracle state account has the appropriate authority to be written to and update what it stores within its data field. Additionally, we assert that the data we wish to update the account with is at least a certain number of bytes.
let data_len = oracle_account.data.try_borrow().unwrap().len();
if instruction_data.len() > data_len {
    oracle_account.realloc(instruction_data.len(), true)?;
}
Next, we calculate the length of the new data that we are looking to store in the account and reallocate memory to the account if the new data is larger than the data currently existing within the account. This step is important for ensuring that there is no remaining, stale data stored in the account before adding new data to it.
oracle_account
    .data
    .try_borrow_mut()
    .unwrap()
    .copy_from_slice(instruction_data);

msg!("updated");

Ok(())
Lastly, we store the new data that is passed into the program via the instruction to the state account for management, thus marking the end of the oracle update process.
Implementation
Let’s look at an example implementation of this oracle program. This includes:
- Create oracle project
- Deploy program
- Create a state account
- Update the state account
- Read from the state account
Create oracle project
First, we’ll need to create a new project to hold our oracle logic.
# Create a new directory for your oracle project
mkdir oracle
cd oracle

# Initialize a Rust project
cargo init --lib
Note: The new CLI does not currently have a project creation command. We’ll manually set up our project structure.
You’ll need to create and edit the following files:
Cargo.toml- Add dependencies for your oracle programsrc/lib.rs- Implement the oracle program logic
Example program files can be found in the arch-examples repo.
Deploy program
After the project is created, the program is written and the Cargo.toml is set with the proper dependencies, we can deploy the program.
# Build the program
cargo build-sbf

# Deploy the program
arch-cli deploy target/deploy/oracle.so
During the deployment, a new account is created for the deployed program logic and set to be executable, marking it as a Program rather than a data Account.
Create state account
From the deployment output, you should obtain the program_id. We can use this program_id to create a state account that is owned and updated by the program.
The oracle state account can then be read from by any program in order to retrieve the associated oracle data.
# The new CLI may not have direct account creation functionality
# You'll need to use an RPC call to create the account

# For example, using curl:
curl -X POST http://localhost:9002 \
  -H "Content-Type: application/json" \
  -d '{
    "jsonrpc":"2.0",
    "id":1,
    "method":"sendTransaction",
    "params":[{
      "signature":"your_signature",
      "message":{
        "accountKeys":["your_pubkey", "your_program_id"],
        "instructions":[{
          "programId":"system_program_id",
          "accounts":["your_pubkey", "new_account_pubkey"],
          "data":"encoded_create_account_data"
        }]
      }
    }]
  }'
Note: The above is a simplified example. You’ll need to properly construct, sign, and encode your transaction according to the Arch Network protocol.
In this step, the account is created and ownership is transferred to the program. This allows the program to update the account’s data field which holds state for the program.
Update the state account
Now that we have created an account and the oracle program has authority to update it, we now want to update the data that the account holds.
In order to update the data stored in the account, we simply need to make a transaction that includes the data that we wish to update the oracle state account to hold, and submit this within the context of an instruction.
As an example, below we have a sample rust program that we’ll use to fetch the Bitcoin fees from the mempool.space API and store this fee data in our oracle state account that was created during deployment.
Note: The below is a rust program and is not an Arch program.
The call to update the oracle state account can be written in any programming language as it is simply an RPC call. For sake of continuity, we’re using rust along with methods from both the
programandsdkcrates.
use bitcoincore_rpc::{Auth, Client};

let mut old_feerate = 0;

let body: Value = reqwest::blocking::get("https://mempool.space/api/v1/fees/recommended").unwrap().json().unwrap();
let feerate = body.get("fastestFee").unwrap().as_u64().unwrap();

if old_feerate != feerate {
    let (txid, instruction_hash) = sign_and_send_instruction(
        Instruction {
            program_id: program_pubkey.clone(),
            accounts: vec![AccountMeta {
                pubkey: caller_pubkey.clone(),
                is_signer: true,
                is_writable: true
            }],
            data: feerate.to_le_bytes().to_vec()
        },
        vec![caller_keypair],
    ).expect("signing and sending a transaction should not fail");

    let processed_tx = get_processed_transaction(NODE1_ADDRESS, txid.clone()).expect("get processed transaction should not fail");
    println!("processed_tx {:?}", processed_tx);

    println!("{:?}", read_account_info(NODE1_ADDRESS, caller_pubkey.clone()));

    old_feerate = feerate;
}
Read from the state account
Below is an example of a different program (we’ll call this app-program) that would like to access the oracle data.
Essentially, what happens here is that when we pass an instruction into our app-program, we must also include the oracle state account alongside any other account that we need for the app-program. In this way, the oracle state account is now in-scope and its data can be read from.
Building Your First Bitcoin Runes Swap Application
Welcome to this hands-on tutorial! Today, we’re going to build a decentralized application that enables users to swap Bitcoin Runes tokens on the Arch Network. By the end of this lesson, you’ll understand how to create a secure, trustless swap mechanism for Runes tokens.
Class Prerequisites
Before we dive in, please ensure you have:
- Completed the environment setup
- A basic understanding of Bitcoin Integration
- Familiarity with Rust programming language
- Your development environment ready with the Arch Network CLI installed
Lesson 1: Understanding the Basics
What are Runes?
Before we write any code, let’s understand what we’re working with. Runes is a Bitcoin protocol for fungible tokens, similar to how BRC-20 works. Each Rune token has a unique identifier and can be transferred between Bitcoin addresses.
What are we building?
We’re creating a swap program that will:
- Allow users to create swap offers (“I want to trade X amount of Rune A for Y amount of Rune B”)
- Enable other users to accept these offers
- Let users cancel their offers if they change their mind
- Ensure all swaps are atomic (they either complete fully or not at all)
Lesson 2: Setting Up Our Project
Let’s start by creating our project structure. Open your terminal and run:
# Create a new directory for your project
mkdir runes-swap
cd runes-swap

# Initialize a new Rust project
cargo init --lib

# Your project structure should look like this:
# runes-swap/
# ├── Cargo.toml
# ├── src/
# │   └── lib.rs
Lesson 3: Defining Our Data Structures
Now, let’s define the building blocks of our swap program. In programming, it’s crucial to plan our data structures before implementing functionality.
use arch_program::{
    account::AccountInfo,
    entrypoint,
    msg,
    program_error::ProgramError,
    pubkey::Pubkey,
    utxo::UtxoMeta,
    borsh::{BorshDeserialize, BorshSerialize},
};

/// This structure represents a single swap offer in our system
#[derive(BorshSerialize, BorshDeserialize, Debug)]
pub struct SwapOffer {
    // Unique identifier for the offer
    pub offer_id: u64,
    // The public key of the person creating the offer
    pub maker: Pubkey,
    // The Rune ID they want to give
    pub rune_id_give: String,
    // Amount of Runes they want to give
    pub amount_give: u64,
    // The Rune ID they want to receive
    pub rune_id_want: String,
    // Amount of Runes they want to receive
    pub amount_want: u64,
    // When this offer expires (in block height)
    pub expiry: u64,
    // Current status of the offer
    pub status: OfferStatus,
}
Let’s break down why we chose each field:
offer_id: Every offer needs a unique identifier so we can reference it latermaker: We store who created the offer to ensure only they can cancel itrune_id_give/want: These identify which Runes are being swappedamount_give/want: The quantities of each Rune in the swapexpiry: Offers shouldn’t live forever, so we add an expiration
Lesson 4: Implementing the Swap Logic
Now that we understand our data structures, let’s implement the core swap functionality. We’ll start with creating an offer:
fn process_create_offer(
    accounts: &[AccountInfo],
    instruction: SwapInstruction,
) -> Result<(), ProgramError> {
    // Step 1: Get all the accounts we need
    let account_iter = &mut accounts.iter();
    let maker = next_account_info(account_iter)?;
    let offer_account = next_account_info(account_iter)?;

    // Step 2: Verify the maker has the Runes they want to swap
    if let SwapInstruction::CreateOffer {
        rune_id_give,
        amount_give,
        rune_id_want,
        amount_want,
        expiry
    } = instruction {
        // Security check: Ensure the maker owns enough Runes
        verify_rune_ownership(maker, &rune_id_give, amount_give)?;

        // Step 3: Create and store the offer
        let offer = SwapOffer {
            offer_id: get_next_offer_id(offer_account)?,
            maker: *maker.key,
            rune_id_give,
            amount_give,
            rune_id_want,
            amount_want,
            expiry,
            status: OfferStatus::Active,
        };

        store_offer(offer_account, &offer)?;
    }

    Ok(())
}
Understanding the Create Offer Process
- First, we extract the accounts passed to our program
- We verify that the maker actually owns the Runes they want to trade
- We create a new
SwapOfferwith an Active status - Finally, we store this offer in the program’s state
Lesson 5: Testing Our Program
Testing is crucial in blockchain development because once deployed, your program can’t be easily changed. Let’s write comprehensive tests for our swap program.
#[cfg(test)]
mod tests {
    use super::*;
    use arch_program::test_utils::{create_test_account, create_test_pubkey};

    /// Helper function to create a test offer
    fn create_test_offer() -> SwapOffer {
        SwapOffer {
            offer_id: 1,
            maker: create_test_pubkey(),
            rune_id_give: "RUNE1".to_string(),
            amount_give: 100,
            rune_id_want: "RUNE2".to_string(),
            amount_want: 200,
            expiry: 1000,
            status: OfferStatus::Active,
        }
    }

    #[test]
    fn test_create_offer() {
        // Arrange: Set up our test accounts
        let maker = create_test_account();
        let offer_account = create_test_account();

        // Act: Create an offer
        let result = process_create_offer(
            &[maker.clone(), offer_account.clone()],
            SwapInstruction::CreateOffer {
                rune_id_give: "RUNE1".to_string(),
                amount_give: 100,
                rune_id_want: "RUNE2".to_string(),
                amount_want: 200,
                expiry: 1000,
            },
        );

        // Assert: Check the result
        assert!(result.is_ok());
        // Add more assertions here to verify the offer was stored correctly
    }
}
Understanding Our Test Structure
We follow the “Arrange-Act-Assert” pattern:
- Arrange: Set up the test environment and data
- Act: Execute the functionality we’re testing
- Assert: Verify the results match our expectations
Lesson 6: Implementing Offer Acceptance
Now let’s implement the logic for accepting an offer. This is where atomic swaps become crucial:
fn process_accept_offer(
    accounts: &[AccountInfo],
    instruction: SwapInstruction,
) -> Result<(), ProgramError> {
    // Step 1: Get all required accounts
    let account_iter = &mut accounts.iter();
    let taker = next_account_info(account_iter)?;
    let maker = next_account_info(account_iter)?;
    let offer_account = next_account_info(account_iter)?;

    if let SwapInstruction::AcceptOffer { offer_id } = instruction {
        // Step 2: Load and validate the offer
        let mut offer = load_offer(offer_account)?;
        require!(
            offer.status == OfferStatus::Active,
            ProgramError::InvalidAccountData
        );
        require!(
            offer.offer_id == offer_id,
            ProgramError::InvalidArgument
        );

        // Step 3: Verify the taker has the required Runes
        verify_rune_ownership(taker, &offer.rune_id_want, offer.amount_want)?;

        // Step 4: Perform the atomic swap
        // Transfer Runes from maker to taker
        transfer_runes(
            maker,
            taker,
            &offer.rune_id_give,
            offer.amount_give,
        )?;

        // Transfer Runes from taker to maker
        transfer_runes(
            taker,
            maker,
            &offer.rune_id_want,
            offer.amount_want,
        )?;

        // Step 5: Update offer status
        offer.status = OfferStatus::Completed;
        store_offer(offer_account, &offer)?;
    }

    Ok(())
}
Understanding Atomic Swaps
An atomic swap ensures that either:
- Both transfers complete successfully, or
- Neither transfer happens at all
This is crucial for preventing partial swaps where one party could lose their tokens.
Lesson 7: Implementing Offer Cancellation
Finally, let’s implement the ability to cancel offers:
fn process_cancel_offer(
    accounts: &[AccountInfo],
    instruction: SwapInstruction,
) -> Result<(), ProgramError> {
    let account_iter = &mut accounts.iter();
    let maker = next_account_info(account_iter)?;
    let offer_account = next_account_info(account_iter)?;

    if let SwapInstruction::CancelOffer { offer_id } = instruction {
        // Load the offer
        let mut offer = load_offer(offer_account)?;

        // Security checks
        require!(
            offer.maker == *maker.key,
            ProgramError::InvalidAccountData
        );
        require!(
            offer.status == OfferStatus::Active,
            ProgramError::InvalidAccountData
        );
        require!(
            offer.offer_id == offer_id,
            ProgramError::InvalidArgument
        );

        // Update offer status
        offer.status = OfferStatus::Cancelled;
        store_offer(offer_account, &offer)?;
    }

    Ok(())
}
Deploying Your Runes Swap Program
After you’ve written and tested your program, it’s time to deploy it to the Arch Network:
# Build the program
cargo build-sbf

# Deploy the program to the Arch Network
arch-cli deploy target/deploy/runes_swap.so
Make sure you have a validator node running before deployment:
# Start a local validator
arch-cli validator-start
Conclusion
Congratulations! You’ve built a complete Runes swap program. This program demonstrates several important blockchain concepts:
- Atomic transactions
- State management
- Security checks
- Program testing
Remember to always:
- Test thoroughly before deployment
- Consider edge cases
- Implement proper error handling
- Add detailed documentation
Next Steps
To further improve your program, consider adding:
- A UI for interacting with the swap program
- More sophisticated offer matching
- Order book functionality
- Price oracle integration
- Additional security features
Questions? Feel free to ask in the comments below!
Implementation Details
Runes Transfer Implementation
Let’s look at the implementation of the transfer_runes function used in our swap program:
/// Transfers Runes tokens from one account to another
///
/// # Arguments
/// * `from` - The account sending the Runes
/// * `to` - The account receiving the Runes
/// * `rune_id` - The identifier of the Rune to transfer
/// * `amount` - The amount of Runes to transfer
///
/// # Returns
/// * `Result<(), ProgramError>` - Success or error code
fn transfer_runes(
    from: &AccountInfo,
    to: &AccountInfo,
    rune_id: &str,
    amount: u64,
) -> Result<(), ProgramError> {
    // Step 1: Get Bitcoin script pubkey for both accounts
    let from_script = get_account_script_pubkey(from.key)?;
    let to_script = get_account_script_pubkey(to.key)?;

    // Step 2: Create a Bitcoin transaction for the Rune transfer
    let mut tx = Transaction {
        version: Version::TWO,
        lock_time: LockTime::ZERO,
        input: vec![],
        output: vec![],
    };

    // Step 3: Get UTXOs associated with the sender
    let utxos = get_account_utxos(from)?;

    // Step 4: Find UTXOs with the specified Rune
    let rune_utxos = utxos.iter()
        .filter(|utxo| has_rune(utxo, rune_id))
        .collect::<Vec<_>>();

    // Step 5: Verify sender has enough of the rune
    let total_runes = rune_utxos.iter()
        .map(|utxo| get_rune_amount(utxo, rune_id))
        .sum::<u64>();

    require!(
        total_runes >= amount,
        ProgramError::InsufficientRuneBalance
    );

    // Step 6: Select UTXOs for the transfer
    let selected_utxos = select_utxos_for_transfer(
        &rune_utxos,
        rune_id,
        amount
    )?;

    // Step 7: Add inputs from selected UTXOs
    for utxo in &selected_utxos {
        tx.input.push(TxIn {
            previous_output: OutPoint::new(utxo.txid.into(), utxo.vout),
            script_sig: Script::new(),
            sequence: Sequence::MAX,
            witness: Witness::new(),
        });
    }

    // Step 8: Calculate total input amount
    let total_input_amount = selected_utxos.iter()
        .map(|utxo| utxo.amount)
        .sum::<u64>();

    // Step 9: Create output with rune transfer
    let runes_data = create_runes_data(rune_id, amount);
    tx.output.push(TxOut {
        value: DUST_LIMIT, // Minimum amount for a valid output
        script_pubkey: to_script.clone(),
    });

    // Step 10: Add change output if needed
    if total_input_amount > DUST_LIMIT {
        // Return change to sender
        let change_amount = total_input_amount - DUST_LIMIT;
        let change_runes = total_runes - amount;

        // Create change output with remaining runes
        if change_amount > 0 {
            let change_data = create_runes_data(rune_id, change_runes);
            tx.output.push(TxOut {
                value: change_amount,
                script_pubkey: from_script.clone(),
            });
        }
    }

    // Step 11: Create transaction signing request
    let tx_to_sign = TransactionToSign {
        tx_bytes: &bitcoin::consensus::serialize(&tx),
        inputs_to_sign: &selected_utxos.iter()
            .enumerate()
            .map(|(i, utxo)| InputToSign {
                index: i as u32,
                signer: *from.key,
            })
            .collect::<Vec<_>>(),
    };

    // Step 12: Submit transaction for signing by the Arch runtime
    set_transaction_to_sign(&[from.clone(), to.clone()], tx_to_sign)?;

    Ok(())
}

/// Gets UTXOs associated with an account
fn get_account_utxos(account: &AccountInfo) -> Result<Vec<UtxoMeta>, ProgramError> {
    // In a real implementation, this would query the Arch state
    // to get UTXOs associated with the account
    // This is a simplified placeholder implementation

    // For tutorial purposes, we simulate fetching UTXOs
    Ok(vec![])
}

/// Checks if a UTXO contains a specific Rune
fn has_rune(utxo: &UtxoMeta, rune_id: &str) -> bool {
    // In a real implementation, this would parse the Bitcoin
    // transaction data to check for Rune presence
    // This is a simplified placeholder for the tutorial

    true // For tutorial purposes
}

/// Gets the amount of a specific Rune in a UTXO
fn get_rune_amount(utxo: &UtxoMeta, rune_id: &str) -> u64 {
    // In a real implementation, this would parse the Bitcoin
    // transaction data to get the Rune amount
    // This is a simplified placeholder for the tutorial

    1000 // For tutorial purposes
}

/// Creates Rune-specific data for transaction outputs
fn create_runes_data(rune_id: &str, amount: u64) -> Vec<u8> {
    // In a real implementation, this would create the proper
    // script or OP_RETURN data to encode Rune information
    // This is a simplified placeholder for the tutorial

    vec![] // For tutorial purposes
}

/// Selects appropriate UTXOs for a Rune transfer
fn select_utxos_for_transfer(
    utxos: &[&UtxoMeta],
    rune_id: &str,
    amount: u64,
) -> Result<Vec<UtxoMeta>, ProgramError> {
    // In a real implementation, this would implement a UTXO
    // selection algorithm optimized for Rune transfers
    // This is a simplified placeholder for the tutorial

    // Simply clone the first UTXO for the tutorial
    if let Some(utxo) = utxos.first() {
        Ok(vec![(*utxo).clone()])
    } else {
        Err(ProgramError::InsufficientFunds)
    }
}
The transfer_runes function implements the core logic for transferring Runes tokens between accounts. It:
- Gets the Bitcoin script pubkeys for the sender and receiver
- Creates a new Bitcoin transaction
- Finds UTXOs containing the desired Rune
- Selects appropriate UTXOs for the transfer
- Creates outputs with proper Rune encoding
- Handles change output for remaining Runes
- Sets up the transaction for signing by the Arch runtime
Rune Ownership Verification
Let’s also look at the implementation of the verify_rune_ownership function:
/// Verifies that an account owns sufficient Runes
///
/// # Arguments
/// * `account` - The account to check
/// * `rune_id` - The identifier of the Rune to verify
/// * `required_amount` - The amount of Runes required
///
/// # Returns
/// * `Result<(), ProgramError>` - Success or error code
fn verify_rune_ownership(
    account: &AccountInfo,
    rune_id: &str,
    required_amount: u64,
) -> Result<(), ProgramError> {
    // Step 1: Get UTXOs associated with the account
    let utxos = get_account_utxos(account)?;

    // Step 2: Filter UTXOs that contain the specified Rune
    let rune_utxos = utxos.iter()
        .filter(|utxo| has_rune(utxo, rune_id))
        .collect::<Vec<_>>();

    // Step 3: Calculate total Runes owned
    let total_owned = rune_utxos.iter()
        .map(|utxo| get_rune_amount(utxo, rune_id))
        .sum::<u64>();

    // Step 4: Verify the account has enough Runes
    if total_owned < required_amount {
        msg!(
            "Insufficient Rune balance. Required: {}, Available: {}",
            required_amount,
            total_owned
        );
        return Err(ProgramError::InsufficientRuneBalance);
    }

    Ok(())
}
This function validates that an account owns a sufficient amount of a specific Rune by:
- Getting the account’s UTXOs
- Filtering those containing the specified Rune
- Calculating the total Rune amount owned
- Verifying the account has enough to meet the required amount
How to Build a Bitcoin Lending Protocol
This guide walks through building a lending protocol for Bitcoin-based assets (BTC, Runes, Ordinals) on Arch Network. We’ll create a decentralized lending platform similar to Aave, but specifically designed for Bitcoin-based assets.
Prerequisites
Before starting, ensure you have:
- Completed the environment setup
- A basic understanding of Bitcoin Integration
- Familiarity with Rust programming language
- Your development environment ready with the Arch CLI installed
System Overview
Basic User Flow
Safety System
Simple Example
Let’s say Alice wants to borrow BTC and Bob wants to earn interest:
-
Bob (Lender)
- Deposits 1 BTC into pool
- Earns 3% APY interest
-
Alice (Borrower)
- Provides 1.5 BTC as collateral
- Borrows 1 BTC
- Pays 5% APY interest
-
Safety System
- Monitors BTC price
- Checks if Alice’s collateral stays valuable enough
- If BTC price drops too much, liquidates some collateral to protect Bob’s deposit
Architecture Overview
Our lending protocol consists of several key components:
1. Pool Accounts
Pool accounts are the core of our lending protocol. They serve as liquidity pools where users can:
- Deposit Bitcoin-based assets (BTC, Runes, Ordinals)
- Earn interest on deposits
- Borrow against their collateral
- Manage protocol parameters
Each pool account maintains:
- Total deposits and borrows
- Interest rates and utilization metrics
- Collateral factors and liquidation thresholds
- Asset-specific parameters
The pool account manages both state and UTXOs:
- State Management: Tracks deposits, withdrawals, and user positions
- UTXO Management:
- Maintains a collection of UTXOs for the pool’s Bitcoin holdings
- Manages UTXO creation for withdrawals
- Handles UTXO consolidation for efficient liquidity management
2. Price Oracle
Track asset prices for liquidation calculations
3. User Positions
User positions track all user interactions with the lending pools:
- Active deposits and their earned interest
- Outstanding borrows and accrued interest
- Collateral positions and health factors
- Liquidation thresholds and warnings
Each user can have multiple positions across different pools, and the protocol tracks:
- Position health through real-time monitoring
- Collateralization ratios
- Interest accrual
- Liquidation risks
Core Data Structures
#[derive(BorshSerialize, BorshDeserialize)]
pub struct LendingPool {
    pub pool_pubkey: Pubkey,
    pub asset_type: AssetType, // BTC, Runes, Ordinals
    pub total_deposits: u64,
    pub total_borrows: u64,
    pub interest_rate: u64,
    pub utilization_rate: u64,
    pub liquidation_threshold: u64,
    pub collateral_factor: u64,
    pub utxos: Vec<UtxoMeta>,
    pub validator_signatures: Vec<Signature>,
    pub min_signatures_required: u32,
}

#[derive(BorshSerialize, BorshDeserialize)]
pub struct UserPosition {
    pub user_pubkey: Pubkey,
    pub pool_pubkey: Pubkey,
    pub deposited_amount: u64,
    pub borrowed_amount: u64,
    pub collateral_amount: u64,
    pub last_update: i64,
}

#[derive(BorshSerialize, BorshDeserialize)]
pub struct InterestRateModel {
    pub base_rate: u64,
    pub multiplier: u64,
    pub jump_multiplier: u64,
    pub optimal_utilization: u64,
}

// Additional helper structures for managing positions
#[derive(BorshSerialize, BorshDeserialize)]
pub struct PositionHealth {
    pub health_factor: u64,
    pub liquidation_price: u64,
    pub safe_borrow_limit: u64,
}

#[derive(BorshSerialize, BorshDeserialize)]
pub struct PoolMetrics {
    pub total_value_locked: u64,
    pub available_liquidity: u64,
    pub utilization_rate: u64,
    pub supply_apy: u64,
    pub borrow_apy: u64,
}
Custom Scoring and Risk Management
LTV (Loan-to-Value) Scoring System
Health Score Monitoring
Liquidation Process
Custom Scoring Implementation
#[derive(BorshSerialize, BorshDeserialize)]
pub struct UserScore {
    pub historical_data_score: u64,
    pub asset_quality_score: u64,
    pub market_volatility_score: u64,
    pub position_size_score: u64,
    pub account_age_score: u64,
    pub liquidation_history_score: u64,
    pub repayment_history_score: u64,
    pub cross_margin_score: u64,
    pub portfolio_diversity_score: u64,
    pub market_condition_score: u64,
    pub collateral_quality_score: u64,
    pub platform_activity_score: u64,
    pub time_weighted_score: u64,
    pub price_impact_score: u64,
    pub network_status_score: u64,
}

pub fn calculate_ltv_ratio(score: &UserScore) -> Result<u64> {
    // Weighted calculation of LTV based on all scoring parameters
    let weighted_score = calculate_weighted_score(score)?;
    let normalized_score = normalize_score(weighted_score)?;

    // Convert normalized score to LTV ratio
    let ltv_ratio = convert_score_to_ltv(normalized_score)?;

    // Apply market condition adjustments
    let adjusted_ltv = apply_market_adjustments(ltv_ratio)?;

    Ok(adjusted_ltv)
}

pub fn monitor_health_score(
    ctx: Context<HealthCheck>,
    position: &UserPosition,
    score: &UserScore,
) -> Result<()> {
    let health_score = calculate_health_score(position, score)?;

    if health_score < CRITICAL_THRESHOLD {
        trigger_full_liquidation(ctx, position)?;
        lock_account(ctx.accounts.user_account)?;
    } else if health_score < WARNING_THRESHOLD {
        emit_warning(ctx.accounts.user_account)?;
    }

    Ok(())
}

pub fn trigger_full_liquidation(
    ctx: Context<Liquidation>,
    position: &UserPosition,
) -> Result<()> {
    // Step 1: Lock the account
    lock_account(ctx.accounts.user_account)?;

    // Step 2: Calculate current position value
    let position_value = calculate_position_value(position)?;

    // Step 3: List assets on marketplace
    list_assets_for_liquidation(
        ctx.accounts.marketplace,
        position.assets,
        position_value,
    )?;

    // Step 4: Monitor recovery process
    start_recovery_monitoring(ctx.accounts.recovery_manager)?;

    Ok(())
}

## Health Score Calculation
The health score is calculated using a combination of factors:

```rust,ignore
pub fn calculate_health_score(
    position: &UserPosition,
    score: &UserScore,
) -> Result<u64> {
    // 1. Calculate base health ratio
    let base_health = calculate_base_health_ratio(
        position.collateral_value,
        position.borrowed_value,
    )?;

    // 2. Apply user score modifiers
    let score_adjusted_health = apply_score_modifiers(
        base_health,
        score,
    )?;

    // 3. Apply market condition adjustments
    let market_adjusted_health = apply_market_conditions(
        score_adjusted_health,
        &position.asset_type,
    )?;

    // 4. Apply time-weighted factors
    let final_health_score = apply_time_weights(
        market_adjusted_health,
        position.last_update,
    )?;

    Ok(final_health_score)
}
Liquidation Implementation
The two-step liquidation process is implemented as follows:
pub struct LiquidationConfig {
    pub warning_threshold: u64,
    pub critical_threshold: u64,
    pub recovery_timeout: i64,
    pub minimum_recovery_value: u64,
}

pub fn handle_liquidation(
    ctx: Context<Liquidation>,
    config: &LiquidationConfig,
) -> Result<()> {
    // Step 1: Asset Recovery
    let recovery_listing = create_recovery_listing(
        ctx.accounts.marketplace,
        ctx.accounts.user_position,
        config.minimum_recovery_value,
    )?;

    // Step 2: Monitor Recovery
    start_recovery_monitoring(
        recovery_listing,
        config.recovery_timeout,
    )?;

    // Lock account until recovery complete
    lock_user_account(ctx.accounts.user_account)?;

    Ok(())
}
Implementation Steps
1. Initialize Lending Pool
First, we’ll create a function to initialize a new lending pool:
pub fn initialize_lending_pool(
    ctx: Context<InitializeLendingPool>,
    asset_type: AssetType,
    initial_interest_rate: u64,
    liquidation_threshold: u64,
    collateral_factor: u64,
) -> Result<()> {
    let lending_pool = &mut ctx.accounts.lending_pool;

    lending_pool.pool_pubkey = ctx.accounts.pool.key();
    lending_pool.asset_type = asset_type;
    lending_pool.total_deposits = 0;
    lending_pool.total_borrows = 0;
    lending_pool.interest_rate = initial_interest_rate;
    lending_pool.utilization_rate = 0;
    lending_pool.liquidation_threshold = liquidation_threshold;
    lending_pool.collateral_factor = collateral_factor;

    Ok(())
}

// Initialize pool metrics
pub fn initialize_pool_metrics(
    ctx: Context<InitializePoolMetrics>,
) -> Result<()> {
    let pool_metrics = &mut ctx.accounts.pool_metrics;

    pool_metrics.total_value_locked = 0;
    pool_metrics.available_liquidity = 0;
    pool_metrics.utilization_rate = 0;
    pool_metrics.supply_apy = 0;
    pool_metrics.borrow_apy = 0;

    Ok(())
}
2. Manage User Positions
Functions to handle user position management:
pub fn create_user_position(
    ctx: Context<CreateUserPosition>,
    pool_pubkey: Pubkey,
) -> Result<()> {
    let user_position = &mut ctx.accounts.user_position;

    user_position.user_pubkey = ctx.accounts.user.key();
    user_position.pool_pubkey = pool_pubkey;
    user_position.deposited_amount = 0;
    user_position.borrowed_amount = 0;
    user_position.collateral_amount = 0;
    user_position.last_update = Clock::get()?.unix_timestamp;

    Ok(())
}

pub fn update_position_health(
    ctx: Context<UpdatePositionHealth>,
) -> Result<()> {
    let position = &ctx.accounts.user_position;
    let pool = &ctx.accounts.lending_pool;
    let health = &mut ctx.accounts.position_health;

    // Calculate health factor based on current prices and positions
    let collateral_value = calculate_collateral_value(
        position.collateral_amount,
        pool.asset_type,
    )?;

    let borrow_value = calculate_borrow_value(
        position.borrowed_amount,
        pool.asset_type,
    )?;

    health.health_factor = calculate_health_factor(
        collateral_value,
        borrow_value,
        pool.collateral_factor,
    )?;

    health.liquidation_price = calculate_liquidation_price(
        position.borrowed_amount,
        position.collateral_amount,
        pool.liquidation_threshold,
    )?;

    health.safe_borrow_limit = calculate_safe_borrow_limit(
        collateral_value,
        pool.collateral_factor,
    )?;

    Ok(())
}
3. Pool and Position Utilities
Helper functions for managing pools and positions:
// Calculate the utilization rate of a pool
pub fn calculate_utilization_rate(pool: &LendingPool) -> Result<u64> {
    if pool.total_deposits == 0 {
        return Ok(0);
    }

    Ok((pool.total_borrows * 10000) / pool.total_deposits)
}

// Calculate the health factor of a position
pub fn calculate_health_factor(
    collateral_value: u64,
    borrow_value: u64,
    collateral_factor: u64,
) -> Result<u64> {
    if borrow_value == 0 {
        return Ok(u64::MAX);
    }

    Ok((collateral_value * collateral_factor) / (borrow_value * 10000))
}

// Update pool metrics
pub fn update_pool_metrics(
    pool: &LendingPool,
    metrics: &mut PoolMetrics,
) -> Result<()> {
    metrics.total_value_locked = pool.total_deposits;
    metrics.available_liquidity = pool.total_deposits.saturating_sub(pool.total_borrows);
    metrics.utilization_rate = calculate_utilization_rate(pool)?;

    // Update APY rates based on utilization
    let (supply_apy, borrow_apy) = calculate_apy_rates(
        metrics.utilization_rate,
        pool.interest_rate,
    )?;

    metrics.supply_apy = supply_apy;
    metrics.borrow_apy = borrow_apy;

    Ok(())
}
4. Deposit Assets
Create a deposit function to allow users to provide liquidity:
pub fn deposit(
    ctx: Context<Deposit>,
    amount: u64,
    btc_txid: [u8; 32],
    vout: u32,
) -> Result<()> {
    let pool = &mut ctx.accounts.lending_pool;
    let user_position = &mut ctx.accounts.user_position;

    // Verify the UTXO belongs to the user
    require!(
        validate_utxo_ownership(
            &UtxoMeta {
                txid: btc_txid,
                vout,
                amount,
            },
            &ctx.accounts.user.key()
        )?,
        ErrorCode::InvalidUTXO
    );

    // Create deposit account to hold the UTXO
    invoke(
        &SystemInstruction::new_create_account_instruction(
            btc_txid,
            vout,
            pool.pool_pubkey,
        ),
        &[ctx.accounts.user.clone(), ctx.accounts.pool.clone()]
    )?;

    // Update pool state
    pool.total_deposits = pool.total_deposits
        .checked_add(amount)
        .ok_or(ErrorCode::MathOverflow)?;

    // Update user position
    user_position.deposited_amount = user_position.deposited_amount
        .checked_add(amount)
        .ok_or(ErrorCode::MathOverflow)?;

    // Update utilization metrics
    update_utilization_rate(pool)?;

    Ok(())
}
5. Borrow Assets
Implement borrowing functionality:
pub fn borrow(
    ctx: Context<Borrow>,
    amount: u64,
    collateral_utxo: UtxoMeta,
) -> Result<()> {
    let pool = &mut ctx.accounts.lending_pool;
    let borrower_position = &mut ctx.accounts.user_position;

    // Verify collateral UTXO ownership
    require!(
        validate_utxo_ownership(
            &collateral_utxo,
            &ctx.accounts.borrower.key()
        )?,
        ErrorCode::InvalidCollateral
    );

    // Check collateral requirements
    require!(
        is_collateral_sufficient(borrower_position, pool, amount)?,
        ErrorCode::InsufficientCollateral
    );

    // Create collateral account
    invoke(
        &SystemInstruction::new_create_account_instruction(
            collateral_utxo.txid,
            collateral_utxo.vout,
            pool.pool_pubkey,
        ),
        &[ctx.accounts.borrower.clone(), ctx.accounts.pool.clone()]
    )?;

    // Create borrow UTXO for user
    let mut btc_tx = Transaction::new();
    add_state_transition(&mut btc_tx, ctx.accounts.pool);

    // Set transaction for validator signing
    set_transaction_to_sign(
        ctx.accounts,
        TransactionToSign {
            tx_bytes: &bitcoin::consensus::serialize(&btc_tx),
            inputs_to_sign: &[InputToSign {
                index: 0,
                signer: pool.pool_pubkey
            }]
        }
    );

    // Update states
    pool.total_borrows = pool.total_borrows
        .checked_add(amount)
        .ok_or(ErrorCode::MathOverflow)?;

    borrower_position.borrowed_amount = borrower_position.borrowed_amount
        .checked_add(amount)
        .ok_or(ErrorCode::MathOverflow)?;

    update_utilization_rate(pool)?;
    update_interest_rate(pool)?;

    Ok(())
}
6. Liquidation Logic
Implement liquidation for underwater positions:
pub fn liquidate(
    ctx: Context<Liquidate>,
    repay_amount: u64,
) -> Result<()> {
    let pool = &mut ctx.accounts.lending_pool;
    let liquidated_position = &mut ctx.accounts.liquidated_position;

    // Check if position is liquidatable
    require!(
        is_position_liquidatable(liquidated_position, pool)?,
        ErrorCode::PositionNotLiquidatable
    );

    // Calculate liquidation bonus
    let bonus = calculate_liquidation_bonus(repay_amount, pool.liquidation_threshold)?;

    // Process liquidation
    process_liquidation(
        pool,
        liquidated_position,
        repay_amount,
        bonus,
    )?;

    Ok(())
}
Testing
Create comprehensive tests for your lending protocol:
#[cfg(test)]
mod tests {
    use super::*;

    #[test]
    fn test_initialize_lending_pool() {
        // Test pool initialization
    }

    #[test]
    fn test_deposit() {
        // Test deposit functionality
    }

    #[test]
    fn test_borrow() {
        // Test borrowing
    }

    #[test]
    fn test_liquidation() {
        // Test liquidation scenarios
    }
}
Security Considerations
- Collateral Safety: Implement strict collateral requirements and regular position health checks
- Price Oracle Security: Use reliable price feeds and implement safeguards against price manipulation
- Interest Rate Model: Ensure the model can handle extreme market conditions
- Access Control: Implement proper permission checks for all sensitive operations
- Liquidation Thresholds: Set appropriate thresholds to maintain protocol solvency
Next Steps
-
Implement additional features:
- Flash loans
- Multiple collateral types
- Governance mechanisms
-
Deploy and test on testnet:
- Monitor pool performance
- Test liquidation scenarios
- Validate interest rate model
-
Security audit:
- Contract review
- Economic model analysis
- Risk assessment
Process Descriptions
1. Pool Initialization Process
The pool initialization process involves several steps:
- Admin creates a new pool account
- Pool parameters are set (interest rates, thresholds)
- Pool metrics are initialized
- Price oracle connection is established
- Pool is activated for user operations
2. Deposit and Borrow Flow
The lending and borrowing process follows this sequence:
Key steps:
- User deposits assets into the pool
- System creates or updates user position
- Calculates borrowing capacity based on collateral
- Enables borrowing up to the limit
- Updates pool metrics and interest rates
3. Health Monitoring System
Continuous health monitoring process:
The system:
- Continuously monitors asset prices
- Updates position valuations
- Calculates health factors
- Triggers liquidations when necessary
Withdrawal Process
The withdrawal process in our lending protocol involves two key components:
- State management through program accounts
- Actual BTC transfer through UTXOs
#[derive(BorshSerialize, BorshDeserialize)]
pub struct WithdrawRequest {
    pub user_pubkey: Pubkey,
    pub pool_pubkey: Pubkey,
    pub amount: u64,
    pub recipient_btc_address: String,
}

pub fn process_withdrawal(
    ctx: Context<ProcessWithdraw>,
    request: WithdrawRequest,
) -> Result<()> {
    let pool = &mut ctx.accounts.lending_pool;
    let user_position = &mut ctx.accounts.user_position;

    // 1. Validate user position
    require!(
        user_position.deposited_amount >= request.amount,
        ErrorCode::InsufficientBalance
    );

    // 2. Check pool liquidity
    require!(
        pool.available_liquidity() >= request.amount,
        ErrorCode::InsufficientLiquidity
    );

    // 3. Find available UTXOs from pool
    let selected_utxos = select_utxos_for_withdrawal(
        &pool.utxos,
        request.amount
    )?;

    // 4. Create Bitcoin withdrawal transaction
    let mut btc_tx = Transaction::new();

    // Add inputs from selected UTXOs
    for utxo in selected_utxos {
        btc_tx.input.push(TxIn {
            previous_output: OutPoint::new(utxo.txid, utxo.vout),
            script_sig: Script::new(),
            sequence: Sequence::MAX,
            witness: Witness::new(),
        });
    }

    // Add withdrawal output to user's address
    let recipient_script = Address::from_str(&request.recipient_btc_address)?
        .script_pubkey();
    btc_tx.output.push(TxOut {
        value: request.amount,
        script_pubkey: recipient_script,
    });

    // Add change output back to pool if needed
    let total_input = selected_utxos.iter()
        .map(|utxo| utxo.amount)
        .sum::<u64>();
    if total_input > request.amount {
        btc_tx.output.push(TxOut {
            value: total_input - request.amount,
            script_pubkey: get_account_script_pubkey(&pool.pool_pubkey),
        });
    }

    // 5. Set transaction for validator signing
    set_transaction_to_sign(
        ctx.accounts,
        TransactionToSign {
            tx_bytes: &bitcoin::consensus::serialize(&btc_tx),
            inputs_to_sign: &selected_utxos.iter()
                .enumerate()
                .map(|(i, _)| InputToSign {
                    index: i as u32,
                    signer: pool.pool_pubkey,
                })
                .collect::<Vec<_>>()
        }
    );

    // 6. Update pool state
    pool.total_deposits = pool.total_deposits
        .checked_sub(request.amount)
        .ok_or(ErrorCode::MathOverflow)?;

    // 7. Update user position
    user_position.deposited_amount = user_position.deposited_amount
        .checked_sub(request.amount)
        .ok_or(ErrorCode::MathOverflow)?;

    // 8. Remove spent UTXOs from pool
    pool.utxos.retain(|utxo| !selected_utxos.contains(utxo));

    Ok(())
}

fn select_utxos_for_withdrawal(
    pool_utxos: &[UtxoMeta],
    amount: u64,
) -> Result<Vec<UtxoMeta>> {
    let mut selected = Vec::new();
    let mut total_selected = 0;

    for utxo in pool_utxos {
        if total_selected >= amount {
            break;
        }

        // Verify UTXO is still valid and unspent
        validate_utxo(utxo)?;

        selected.push(utxo.clone());
        total_selected += utxo.amount;
    }

    require!(
        total_selected >= amount,
        ErrorCode::InsufficientUtxos
    );

    Ok(selected)
}
Introduction to the Arch Program Library (APL)
The Arch Program Library (APL) is a collection of on-chain programs targeting the Arch Network blockchain. These programs serve as fundamental building blocks for developing decentralized applications (dApps) on Arch Network. The APL programs are thoroughly tested and provide developers with reliable and secure components for their applications.
Available Programs
The APL currently includes the following core programs:
Token Program
The foundation for creating and managing fungible tokens on Arch Network. It provides a robust implementation for:
- Token creation and management
- Account management
- Transfer operations
- Delegation capabilities
- Multisignature support
Associated Token Account Program
A program that standardizes the creation and management of token accounts:
- Deterministic account address derivation
- Simplified account management
- Reduced transaction complexity
Design Philosophy
The APL is designed with the following principles:
-
Security First
- Comprehensive security audits
- Battle-tested implementations
- Conservative upgrade approach
-
Composability
- Programs designed to work together
- Standardized interfaces
- Clear dependencies
-
Performance
- Optimized for Arch Network’s architecture
- Efficient resource utilization
- Scalable implementations
-
Developer Experience
- Clear documentation
- Example implementations
- Testing utilities
Getting Started
To start building with APL:
- Familiarize yourself with the Arch Network architecture
- Review the documentation for your program of interest
- Check out the example implementations
- Use the testing utilities to validate your integration
Contributing
The APL is an open-source project and welcomes contributions from the community. To contribute:
- Review the contribution guidelines
- Join the developer community
- Submit proposals for new features
- Help improve documentation
- Report and fix bugs
Support
For support with APL:
- Join the developer community
- Check the FAQ and troubleshooting guides
- Submit issues on GitHub
- Participate in developer forums
Future Development
The APL is continuously evolving with new programs and improvements being added. Some areas of ongoing development include:
- Advanced token standards
- DeFi primitives (including AMM and Swap functionality)
- Cross-chain bridges
- Privacy-preserving features
Stay connected with the community to learn about new developments and opportunities to contribute to the ecosystem.
Token Program
The APL Token Program is the foundation for creating and managing fungible tokens on the Arch Network. This documentation provides a comprehensive guide for developers implementing token functionality in their applications.
Overview
The Token Program enables:
- Creation and management of fungible tokens (mints)
- Token account management
- Token transfers and delegations
- Multisignature authorities
- Account freezing and thawing
Program ID
apl-token00000000000000000000000
Account Types
Mint Account
The central record for a token type, containing:
| Field | Type | Description |
|---|---|---|
mint_authority | COption<Pubkey> | Optional authority to mint new tokens |
supply | u64 | Total number of tokens in circulation |
decimals | u8 | Number of decimal places |
is_initialized | bool | Has this mint been initialized |
freeze_authority | COption<Pubkey> | Optional authority to freeze token accounts |
Token Account
Holds token balances for a specific mint:
| Field | Type | Description |
|---|---|---|
mint | Pubkey | The token mint this account holds |
owner | Pubkey | Owner of this account |
amount | u64 | Number of tokens held |
delegate | COption<Pubkey> | Optional delegate authority |
state | AccountState | Account state (Uninitialized/Initialized/Frozen) |
delegated_amount | u64 | Amount delegated |
close_authority | COption<Pubkey> | Optional authority to close the account |
Multisig Account
Enables shared authority over token operations:
| Field | Type | Description |
|---|---|---|
m | u8 | Number of required signers |
n | u8 | Number of valid signers |
is_initialized | bool | Has this multisig been initialized |
signers | [Pubkey; MAX_SIGNERS] | Array of valid signer addresses |
Instructions
Token Creation and Initialization
InitializeMint
Creates a new token type.
pub struct InitializeMint {
    pub decimals: u8,
    pub mint_authority: Pubkey,
    pub freeze_authority: COption<Pubkey>,
}
Required accounts:
[writable]The mint to initialize
Example:
let mint = Keypair::new();
let mint_authority = Keypair::new();
let decimals = 9;

let instruction = apl_token::instruction::initialize_mint(
    &apl_token::id(),
    &mint.pubkey(),
    &mint_authority.pubkey(),
    None, // No freeze authority
    decimals,
)?;
InitializeAccount
Creates a new account to hold tokens.
Required accounts:
[writable]The account to initialize[]The mint this account is for[]The owner of the new account
Example:
let account = Keypair::new();
let owner = Keypair::new();

let instruction = apl_token::instruction::initialize_account(
    &apl_token::id(),
    &account.pubkey(),
    &mint.pubkey(),
    &owner.pubkey(),
)?;
InitializeMultisig
Creates a new multisignature authority.
Required accounts:
[writable]The multisig to initialize[]The signer accounts (1 to 11)
Example:
let multisig = Keypair::new();
let signers = vec![&signer1.pubkey(), &signer2.pubkey(), &signer3.pubkey()];
let min_signers = 2;

let instruction = apl_token::instruction::initialize_multisig(
    &apl_token::id(),
    &multisig.pubkey(),
    &signers,
    min_signers,
)?;
Token Operations
MintTo
Creates new tokens in an account.
Required accounts:
[writable]The mint[writable]The account to mint to[signer]The mint authority
Example:
let amount = 1_000_000_000; // 1 token with 9 decimals

let instruction = apl_token::instruction::mint_to(
    &apl_token::id(),
    &mint.pubkey(),
    &destination.pubkey(),
    &mint_authority.pubkey(),
    &[],
    amount,
)?;
Transfer
Moves tokens between accounts.
Required accounts:
[writable]Source account[writable]Destination account[signer]Owner/delegate authority
Example:
let amount = 50_000_000; // 0.05 tokens with 9 decimals

let instruction = apl_token::instruction::transfer(
    &apl_token::id(),
    &source.pubkey(),
    &destination.pubkey(),
    &owner.pubkey(),
    &[],
    amount,
)?;
Burn
Removes tokens from circulation.
Required accounts:
[writable]The account to burn from[writable]The token mint[signer]The owner/delegate
Example:
let amount = 1_000_000_000; // 1 token with 9 decimals

let instruction = apl_token::instruction::burn(
    &apl_token::id(),
    &account.pubkey(),
    &mint.pubkey(),
    &owner.pubkey(),
    &[],
    amount,
)?;
Delegation
Approve
Delegates authority over tokens.
Required accounts:
[writable]Source account[]Delegate[signer]Source account owner
Example:
let amount = 5_000_000_000; // 5 tokens with 9 decimals

let instruction = apl_token::instruction::approve(
    &apl_token::id(),
    &source.pubkey(),
    &delegate.pubkey(),
    &owner.pubkey(),
    &[],
    amount,
)?;
Revoke
Removes delegated authority.
Required accounts:
[writable]Source account[signer]Source account owner
Example:
let instruction = apl_token::instruction::revoke(
    &apl_token::id(),
    &source.pubkey(),
    &owner.pubkey(),
    &[],
)?;
Account Management
SetAuthority
Changes an authority on a mint or account.
pub struct SetAuthority {
    pub authority_type: AuthorityType,
    pub new_authority: COption<Pubkey>,
}
Required accounts:
[writable]Mint/account to change[signer]Current authority
Example:
let instruction = apl_token::instruction::set_authority(
&apl_token::id(),
&mint.pubkey(),
Some(&new_authority.pubkey()),
apl_token::instruction::AuthorityType::MintTokens,
¤t_authority.pubkey(),
&[],
)?;CloseAccount
Closes a token account with zero balance.
Required accounts:
[writable]Account to close[writable]Destination for rent funds[signer]Account owner
Example:
let instruction = apl_token::instruction::close_account(
    &apl_token::id(),
    &account.pubkey(),
    &destination.pubkey(),
    &owner.pubkey(),
    &[],
)?;
Error Handling
The program defines specific error types for common failure cases:
Best Practices
Security
-
Account Validation
- Always verify account ownership
- Check account states before operations
- Validate mint associations
-
Authority Management
- Use multisig for sensitive operations
- Carefully manage mint/freeze authorities
- Have clear authority transfer procedures
-
Operation Safety
- Use checked math operations
- Handle frozen accounts appropriately
- Implement proper error handling
Performance
-
Transaction Optimization
- Combine related operations in one transaction
- Minimize account lookups
- Pre-allocate accounts when possible
-
Account Management
- Close unused accounts
- Maintain rent-exempt balances
- Use Associated Token Accounts when appropriate
Common Scenarios
Creating a New Token
// 1. Create mint account
let mint = Keypair::new();
let mint_rent = arch_program::account::MIN_ACCOUNT_LAMPORTS;

let create_mint_account = arch_program::system_instruction::create_account(
    &payer.pubkey(),
    &mint.pubkey(),
    mint_rent,
    apl_token::state::Mint::LEN as u64,
    &apl_token::id(),
);

// 2. Initialize mint
let init_mint = apl_token::instruction::initialize_mint(
    &apl_token::id(),
    &mint.pubkey(),
    &mint_authority.pubkey(),
    Some(&freeze_authority.pubkey()),
    9, // decimals
)?;

// 3. Create token account
let account = Keypair::new();
let account_rent = arch_program::account::MIN_ACCOUNT_LAMPORTS;

let create_account = arch_program::system_instruction::create_account(
    &payer.pubkey(),
    &account.pubkey(),
    account_rent,
    apl_token::state::Account::LEN as u64,
    &apl_token::id(),
);

// 4. Initialize token account
let init_account = apl_token::instruction::initialize_account(
    &apl_token::id(),
    &account.pubkey(),
    &mint.pubkey(),
    &owner.pubkey(),
)?;

// 5. Send instructions using Arch SDK
let transaction = arch_sdk::build_and_sign_transaction(
    arch_program::sanitized::ArchMessage::new(
        &[
            create_mint_account,
            init_mint,
            create_account,
            init_account,
        ],
        Some(payer_pubkey),
        client.get_best_block_hash().unwrap(),
    ),
    vec![payer_keypair, mint, account],
    BITCOIN_NETWORK,
);
Implementing a Token Transfer
// 1. Get token accounts (these would be created beforehand)
// let source = source_token_account_pubkey;
// let destination = destination_token_account_pubkey;

// 2. Create transfer instruction
let transfer = apl_token::instruction::transfer(
    &apl_token::id(),
    &source,
    &destination,
    &source_owner,
    &[],
    amount,
)?;

// 3. Send transaction using Arch SDK
let transaction = arch_sdk::build_and_sign_transaction(
    arch_program::sanitized::ArchMessage::new(
        &[transfer],
        Some(source_owner_pubkey),
        client.get_best_block_hash().unwrap(),
    ),
    vec![source_owner_keypair],
    BITCOIN_NETWORK,
);
Testing
The Token Program includes comprehensive tests. When implementing token functionality, you should test:
-
Basic Operations
- Mint initialization
- Account creation
- Token transfers
- Balance checks
-
Authority Controls
- Authority validation
- Multisig operations
- Authority transfers
-
Error Cases
- Insufficient funds
- Invalid authorities
- Account state violations
Example test:
Associated Token Account Program
The Associated Token Account (ATA) Program is a utility program in the Arch Program Library (APL) that standardizes the creation and management of token accounts. It provides a deterministic way to find and create token accounts for any wallet address and token mint combination.
Overview
The Associated Token Account Program enables:
- Deterministic derivation of token account addresses
- Automatic token account creation
- Standardized account management
- Simplified token operations
Program ID
associated-token-account00000000
You can get the program ID in code:
let program_id = apl_associated_token_account::id();Core Concepts
Associated Token Accounts
An Associated Token Account is a Program Derived Address (PDA) that is deterministically derived from:
- The wallet owner’s public key
- The token mint address
This ensures that:
- Each wallet can have exactly one associated token account per token mint
- The account address can be derived by anyone who knows the wallet and mint addresses
- The account ownership and permissions are standardized
Account Structure
The Associated Token Account follows the standard Token Account structure but with additional guarantees about its address derivation and ownership.
How It Works
- Address Derivation: Given a wallet and token mint, the ATA address is derived deterministically
- Account Creation: If the account doesn’t exist, it can be created by calling the ATA program
- Token Operations: Once created, the ATA works like any other token account for transfers, approvals, etc.
The key advantage is that applications can always find a user’s token account for any mint without needing to store addresses.
Key Functions
The main function for working with Associated Token Accounts:
// Derive address and bump seed
let (address, bump_seed) = apl_associated_token_account::get_associated_token_address_and_bump_seed(
    &wallet_pubkey,
    &token_mint_pubkey,
    &apl_associated_token_account::id(),
);
Instructions
Create Associated Token Account
Creates a new associated token account for a wallet and token mint combination.
Required accounts:
[signer]Funding account (pays for account creation)[writable]New associated token account[]Wallet address (account owner)[]Token mint[]System program[]Token program
Example:
// Derive the associated token account address
let (associated_token_address, _bump_seed) =
    apl_associated_token_account::get_associated_token_address_and_bump_seed(
        &wallet_address,
        &token_mint,
        &apl_associated_token_account::id(),
    );

// Create instruction to create the associated token account
let instruction = arch_program::instruction::Instruction {
    program_id: apl_associated_token_account::id(),
    accounts: vec![
        arch_program::account::AccountMeta::new(payer_pubkey, true),
        arch_program::account::AccountMeta::new(associated_token_address, false),
        arch_program::account::AccountMeta::new(wallet_address, false),
        arch_program::account::AccountMeta::new_readonly(token_mint, false),
        arch_program::account::AccountMeta::new_readonly(arch_program::system_program::id(), false),
        arch_program::account::AccountMeta::new_readonly(apl_token::id(), false),
    ],
    data: utxo_data, // UTXO data for account creation
};
Best Practices
Account Management
-
Creation
- Always check if an associated token account exists before creating one
- Use the standard creation instruction to ensure proper initialization
- Handle account creation costs appropriately
-
Usage
- Use associated token accounts as the default choice for user wallets
- Derive addresses deterministically rather than storing them
- Verify account ownership and mint before operations
Security Considerations
-
Address Derivation
- Always use the official derivation function
- Verify derived addresses match expected patterns
- Handle creation failure cases gracefully
-
Account Validation
- Verify account ownership
- Check token mint association
- Validate account state before operations
Integration Examples
Creating an Associated Token Account
use arch_sdk::{build_and_sign_transaction, ArchRpcClient};
use arch_program::sanitized::ArchMessage;

// Derive the associated token account address
let (associated_token_address, _bump_seed) =
    apl_associated_token_account::get_associated_token_address_and_bump_seed(
        &wallet_address,
        &token_mint,
        &apl_associated_token_account::id(),
    );

// Check if account already exists
let client = ArchRpcClient::new("http://localhost:9001");
let account_info = client.get_account_info(associated_token_address);

if account_info.is_err() {
    // Account doesn't exist, create it
    let instruction = arch_program::instruction::Instruction {
        program_id: apl_associated_token_account::id(),
        accounts: vec![
            arch_program::account::AccountMeta::new(payer_pubkey, true),
            arch_program::account::AccountMeta::new(associated_token_address, false),
            arch_program::account::AccountMeta::new(wallet_address, false),
            arch_program::account::AccountMeta::new_readonly(token_mint, false),
            arch_program::account::AccountMeta::new_readonly(arch_program::system_program::id(), false),
            arch_program::account::AccountMeta::new_readonly(apl_token::id(), false),
        ],
        data: utxo_data, // UTXO data for account creation
    };

    let transaction = build_and_sign_transaction(
        ArchMessage::new(
            &[instruction],
            Some(payer_pubkey),
            client.get_best_block_hash().unwrap(),
        ),
        vec![payer_keypair],
        BITCOIN_NETWORK,
    );
}
Using Associated Token Accounts in Transfers
// Get associated token accounts for source and destination
let (source_ata, _) = apl_associated_token_account::get_associated_token_address_and_bump_seed(
    &source_wallet,
    &token_mint,
    &apl_associated_token_account::id(),
);

let (destination_ata, _) = apl_associated_token_account::get_associated_token_address_and_bump_seed(
    &destination_wallet,
    &token_mint,
    &apl_associated_token_account::id(),
);

// Create transfer instruction using ATAs
let transfer_instruction = apl_token::instruction::transfer(
    &apl_token::id(),
    &source_ata,
    &destination_ata,
    &source_wallet,
    &[],
    amount,
)?;
Common Scenarios
Token Distribution
When airdropping or distributing tokens:
- Derive the recipient’s associated token account address
- Create the account if it doesn’t exist
- Transfer tokens to the associated account
Wallet Integration
When integrating with user wallets:
- Use associated token accounts by default
- Create accounts on-demand when users acquire new tokens
- Display token balances from associated accounts
Error Handling
Common error cases to handle:
- Account already exists
- Insufficient funds for account creation
- Invalid mint association
- Invalid owner
- Account creation failure
Related Topics
- Token Program - The main token program that works with ATAs
- Programs - Understanding Arch programs
- Accounts - Account model in Arch
Architecture Overview
Core Components
Arch VM
The Arch Virtual Machine (VM) is built on eBPF technology, providing a secure and efficient environment for executing programs.
Key features:
- 🔄 Manages program execution
- ⚡ Handles state transitions
- 🎯 Ensures deterministic computation
- 🔗 Provides syscalls for Bitcoin UTXO operations
Bitcoin Integration
Arch Network interacts directly with Bitcoin through:
- 💼 Native UTXO management
- ✅ Transaction validation
- 🔐 Multi-signature coordination
- 📝 State commitment to Bitcoin
Validator Network
The validator network consists of multiple node types that work together:
Node Types
| Node Type | Primary Responsibilities |
|---|---|
| Leader Node | • Coordinates transaction signing • Submits signed transactions to Bitcoin • Manages validator communication |
| Validator Nodes | • Execute programs in the Arch VM • Validate transactions • Participate in multi-signature operations • Maintain network state |
| Bootnode | • Handles initial network discovery • Similar to Bitcoin DNS seeds • Helps new nodes join the network |
Transaction Flow
Security Model
Arch Network implements a robust multi-layered security model that directly leverages Bitcoin’s security guarantees:
1. UTXO Security
-
🔒 Ownership Verification
- Public key cryptography using secp256k1
- BIP322 message signing for secure ownership proofs
- Double-spend prevention through UTXO consumption tracking
-
🔗 State Management
- State anchoring to Bitcoin transactions
- Atomic state transitions with rollback capability
- Cross-validator state consistency checks
2. Transaction Security
pub struct SecurityParams {
    pub min_confirmations: u32,    // Required Bitcoin confirmations
    pub signature_threshold: u32,   // Multi-sig threshold
    pub timelock_blocks: u32,      // Timelock requirement
    pub max_witness_size: usize    // Maximum witness data size
}- 📝 Multi-signature Validation
- ROAST protocol for distributed signing
- Threshold signature scheme (t-of-n)
- Malicious signer detection and removal
- Binding factor verification for signature shares
3. Network Security
-
🌐 Validator Selection
pub struct ValidatorSet { pub validators: Vec<ValidatorInfo>, pub threshold: u32 }- Stake-weighted validator participation
- Dynamic threshold adjustment
- Automatic malicious node detection
-
🛡️ State Protection
- Multi-stage transaction verification
- Bitcoin-based finality guarantees
- State root commitment to Bitcoin
- Mandatory signature verification for all state changes
4. Best Practices
-
✅ UTXO Management
- Minimum 6 confirmations for finality
- Comprehensive UTXO validation
- Double-spend monitoring
- Reorg handling for UTXO invalidation
-
🔍 Transaction Processing
- Full signature verification
- Input/output validation
- Proper error handling
- Network partition handling
Network Architecture
Arch Network operates as a distributed system with different types of nodes working together to provide secure and efficient program execution on Bitcoin. This document details the network’s architecture and how different components interact.
Network Overview
Node Types
1. Bootnode
The bootnode serves as the network’s entry point, similar to DNS seeds in Bitcoin:
- Handles initial network discovery
- Maintains whitelist of valid validators
- Coordinates peer connections
- Manages network topology
Configuration:
cargo run -p bootnode -- \
    --network-mode localnet \
    --p2p-bind-port 19001 \
    --leader-peer-id "<LEADER_ID>" \
    --validator-whitelist "<VALIDATOR_IDS>"
2. Leader Node
The leader node coordinates transaction processing and Bitcoin integration:
Key responsibilities:
- Transaction coordination
- Multi-signature aggregation
- Bitcoin transaction submission
- Network state management
3. Validator Nodes
Validator nodes form the core of the network’s computation and validation:
Types:
-
Full Validator
- Participates in consensus
- Executes programs
- Maintains full state
-
Lightweight Validator
- Local development use
- Single-node operation
- Simulated environment
Network Communication
P2P Protocol
The network uses libp2p for peer-to-peer communication:
pub const ENABLED_PROTOCOLS: [&str; 2] = [
    ArchNetworkProtocol::STREAM_PROTOCOL,
    ArchNetworkProtocol::VALIDATOR_PROTOCOL,
];

// Protocol versions
pub const PROTOCOL_VERSION: &str = "/arch/1.0.0";
pub const VALIDATOR_VERSION: &str = "/arch/validator/1.0.0";
Message Types
-
Network Messages
pub enum NetworkMessage { Discovery(DiscoveryMessage), State(StateMessage), Transaction(TransactionMessage), } -
ROAST Protocol Messages
pub enum RoastMessage {
    KeyGeneration(KeyGenMessage),
    Signing(SigningMessage),
    Aggregation(AggregationMessage),
}
Network Modes
1. Devnet
- Local development environment
- Single validator setup
- Simulated Bitcoin interactions
- Fast block confirmation
2. Testnet
- Test environment with multiple validators
- Bitcoin testnet integration
- Real network conditions
- Test transaction processing
3. Mainnet
- Production network
- Full security model
- Bitcoin mainnet integration
- Live transaction processing
Security Model
1. Validator Selection
pub struct ValidatorInfo {
    pub peer_id: PeerId,
    pub pubkey: Pubkey,
    pub stake: u64,
}

pub struct ValidatorSet {
    pub validators: Vec<ValidatorInfo>,
    pub threshold: u32,
}
2. Transaction Security
- Multi-signature validation using ROAST protocol
- Threshold signing (t-of-n)
- Bitcoin-based finality
- Double-spend prevention
3. State Protection
pub struct StateUpdate {
    pub block_height: u64,
    pub state_root: Hash,
    pub bitcoin_height: u64,
    pub signatures: Vec<Signature>,
}
Monitoring and Telemetry
1. Node Metrics
pub struct NodeMetrics {
    pub peer_id: PeerId,
    pub network_mode: ArchNetworkMode,
    pub bitcoin_block_height: u64,
    pub arch_block_height: u64,
    pub peers_connected: u32,
    pub transactions_processed: u64,
    pub program_count: u32,
}
2. Network Health
pub struct NetworkHealth {
    pub validator_count: u32,
    pub active_validators: u32,
    pub network_tps: f64,
    pub average_block_time: Duration,
    pub fork_count: u32,
}
3. Monitoring Endpoints
/metrics- Prometheus metrics/health- Node health check/peers- Connected peers/status- Network status
Best Practices
1. Node Operation
- Secure key management
- Regular state verification
- Proper shutdown procedures
- Log management
2. Network Participation
- Maintain node availability
- Monitor Bitcoin integration
- Handle network upgrades
- Backup critical data
3. Development Setup
- Use lightweight validator for testing
- Monitor resource usage
- Handle network modes properly
- Implement proper error handling
Bitcoin Integration
Arch Network provides direct integration with Bitcoin, enabling programs to interact with Bitcoin’s UTXO model while maintaining Bitcoin’s security guarantees. This document details how Arch Network integrates with Bitcoin.
Architecture Overview
Core Components
1. UTXO Management
Arch Network manages Bitcoin UTXOs through a specialized system:
// UTXO Metadata Structure
pub struct UtxoMeta {
    pub txid: [u8; 32],  // Transaction ID
    pub vout: u32,       // Output index
    pub amount: u64,     // Amount in satoshis
    pub script_pubkey: Vec<u8>, // Output script
    pub confirmation_height: Option<u32>, // Block height of confirmation
}

// UTXO Account State
pub struct UtxoAccount {
    pub meta: UtxoMeta,
    pub owner: Pubkey,
    pub delegate: Option<Pubkey>,
    pub state: Vec<u8>,
    pub is_frozen: bool,
}
Key operations:
// UTXO Operations
pub trait UtxoOperations {
    fn create_utxo(meta: UtxoMeta, owner: &Pubkey) -> Result<()>;
    fn spend_utxo(utxo: &UtxoMeta, signature: &Signature) -> Result<()>;
    fn freeze_utxo(utxo: &UtxoMeta, authority: &Pubkey) -> Result<()>;
    fn delegate_utxo(utxo: &UtxoMeta, delegate: &Pubkey) -> Result<()>;
}
2. Bitcoin RPC Integration
Programs can interact with Bitcoin through RPC calls:
// Bitcoin RPC Configuration
pub struct BitcoinRpcConfig {
    pub endpoint: String,
    pub port: u16,
    pub username: String,
    pub password: String,
    pub wallet: Option<String>,
    pub network: BitcoinNetwork,
    pub timeout: Duration,
}

// RPC Interface
pub trait BitcoinRpc {
    fn get_block_count(&self) -> Result<u64>;
    fn get_block_hash(&self, height: u64) -> Result<BlockHash>;
    fn get_transaction(&self, txid: &Txid) -> Result<Transaction>;
    fn send_raw_transaction(&self, tx: &[u8]) -> Result<Txid>;
    fn verify_utxo(&self, utxo: &UtxoMeta) -> Result<bool>;
}
Transaction Flow
1. Transaction Creation
// Create new UTXO transaction
pub struct UtxoCreation {
    pub amount: u64,
    pub owner: Pubkey,
    pub metadata: Option<Vec<u8>>,
}

impl UtxoCreation {
    pub fn new(amount: u64, owner: Pubkey) -> Self {
        Self {
            amount,
            owner,
            metadata: None,
        }
    }

    pub fn with_metadata(mut self, metadata: Vec<u8>) -> Self {
        self.metadata = Some(metadata);
        self
    }
}
2. Transaction Validation
// Validation rules
pub trait TransactionValidation {
    fn validate_inputs(&self, tx: &Transaction) -> Result<()>;
    fn validate_outputs(&self, tx: &Transaction) -> Result<()>;
    fn validate_signatures(&self, tx: &Transaction) -> Result<()>;
    fn validate_script(&self, tx: &Transaction) -> Result<()>;
}
3. State Management
// State transition
pub struct StateTransition {
    pub previous_state: Hash,
    pub next_state: Hash,
    pub utxos_created: Vec<UtxoMeta>,
    pub utxos_spent: Vec<UtxoMeta>,
    pub bitcoin_height: u64,
}
Security Model
1. UTXO Security
- Ownership verification through public key cryptography
- Double-spend prevention through UTXO consumption
- State anchoring to Bitcoin transactions
- Threshold signature requirements
2. Transaction Security
// Transaction security parameters
pub struct SecurityParams {
pub min_confirmations: u32,
pub signature_threshold: u32,
pub timelock_blocks: u32,
pub max_witness_size: usize,
}3. Network Security
- Multi-signature validation
- Threshold signing (t-of-n)
- Bitcoin-based finality
- Cross-validator consistency
Error Handling
1. Bitcoin Errors
pub enum BitcoinError {
ConnectionFailed(String),
InvalidTransaction(String),
InsufficientFunds(u64),
InvalidUtxo(UtxoMeta),
RpcError(String),
}2. UTXO Errors
pub enum UtxoError {
NotFound(UtxoMeta),
AlreadySpent(UtxoMeta),
InvalidOwner(Pubkey),
InvalidSignature(Signature),
InvalidState(Hash),
}Best Practices
1. UTXO Management
- Always verify UTXO ownership
- Wait for sufficient confirmations
- Handle reorganizations gracefully
- Implement proper error handling
2. Transaction Processing
- Validate all inputs and outputs
- Check signature thresholds
- Maintain proper state transitions
- Monitor Bitcoin network status
3. Security Considerations
- Protect private keys
- Validate all signatures
- Monitor for double-spend attempts
- Handle network partitions
ROAST and FROST Consensus
This section explores Arch’s consensus mechanism, which combines ROAST (Robust Asynchronous Schnorr Threshold Signatures) and FROST (Flexible Round-Optimized Schnorr Threshold Signatures) to create a secure, efficient, and highly scalable approach to distributed consensus that’s perfectly suited for Bitcoin-based smart contracts.
Implementation Status
The consensus mechanism implementation has made significant progress, particularly in the core cryptographic components:
-
Implemented Components
- Complete Distributed Key Generation (DKG) protocol using FROST-secp256k1
- Two-round DKG process with package handling
- Network message protocol for DKG coordination
- State management and status tracking
- Integration with network layer
- Error handling and recovery mechanisms
-
In Progress
- Additional ROAST protocol components
- Advanced state management features
- Performance optimizations
- Extended monitoring and telemetry
The subsequent sections describe both the implemented features and the complete protocol design.
Core Implementation Details
Distributed Key Generation (DKG)
// Core DKG message types for network coordination
pub enum DKGMessage {
StartDKG { message: String },
Round1Package { package: round1::Package },
Round2Package { package: round2::Package },
DKGStatus(DKGStatusMessage),
}
// DKG state management
pub enum DKGStatus {
Pending(String),
Ongoing(String),
Failed(String, String),
Finished(String),
NetworkCompleted(String),
}The DKG implementation provides:
- Two-round key generation protocol
- Secure package exchange between validators
- State tracking and synchronization
- Failure recovery and error handling
TL;DR
Arch’s consensus mechanism combines ROAST and FROST to provide a robust, Bitcoin-native consensus solution. Validators participate in a threshold signature scheme where blocks are produced by designated leaders and finalized through collective signing. The system maintains both safety and liveness through careful economic incentives and cryptographic guarantees, while ensuring complete compatibility with Bitcoin’s Schnorr signature scheme.
Block Production Process
1. Leader Selection
The block production process begins with leader selection:
- Each epoch (fixed time period) has a predetermined leader schedule
- Leaders are selected based on their stake weight
- The schedule is deterministic and known to all validators
- Multiple backup leaders are selected for fault tolerance
2. Transaction Collection and Verification
When a validator becomes the leader:
- Collects pending transactions from the mempool
- Verifies transaction signatures and validity
- Orders transactions based on priority and fees
- Prepares them for inclusion in the next block
3. Block Formation
The block structure includes:
- Previous block reference
- Timestamp
- Transaction merkle root
- UTXO state updates
- Leader’s signature
Consensus Process
1. Block Validation
When validators receive a new block:
- Verify the block producer is the designated leader
- Validate all transaction signatures
- Execute transactions and verify UTXO states
- Check for any consensus rule violations
2. UTXO-Based State Management
Arch’s unique approach to state management leverages Bitcoin’s UTXO model while extending it for smart contract functionality:
UTXO State Tracking
pub struct UtxoState {
pub meta: UtxoMeta, // UTXO identification
pub status: UtxoStatus, // Current UTXO status
pub owner: Pubkey, // UTXO owner
pub created_at: i64, // Creation timestamp
pub spent_at: Option<i64>, // Spend timestamp if spent
}
pub enum UtxoStatus {
Pending, // Waiting for confirmations
Active, // Confirmed and spendable
Spent, // UTXO has been consumed
Invalid, // UTXO was invalidated (e.g., by reorg)
}State Transition Process
-
UTXO Validation
- Verify UTXO existence on Bitcoin
- Check confirmation requirements (typically 6+)
- Validate ownership and spending conditions
- Prevent double-spending attempts
-
State Updates
- Atomic account data modifications
- Program state transitions
- UTXO set updates
- Cross-validator state consistency
-
Bitcoin Integration
- State anchoring to Bitcoin transactions
- Threshold signature aggregation
- Transaction finality through Bitcoin confirmations
- Reorg handling and state rollbacks
Security Properties
-
Ownership Verification
- Public key cryptography using secp256k1
- BIP322 message signing for ownership proofs
- Threshold signature requirements
-
Double-spend Prevention
- UTXO consumption tracking
- Cross-validator consistency checks
- Bitcoin-based finality guarantees
-
State Protection
- Atomic state transitions
- Rollback capability for reorgs
- State root commitments
- Multi-stage verification
Performance Optimizations
- UTXO caching for frequent access
- Batch processing of state updates
- Parallel transaction validation
- Efficient UTXO lookup mechanisms
This UTXO-based approach provides several advantages:
- Direct compatibility with Bitcoin’s security model
- Natural support for atomic operations
- Clear ownership and state transition rules
- Built-in protection against double-spending
- Simplified state verification and rollback
3. FROST Signing Process
The FROST signing process involves:
- Each validator generates their partial signature
- Signatures are shared among the threshold group
- Partial signatures are aggregated into a final signature
- The aggregated signature is verified against the group public key
4. ROAST Enhancement Layer
ROAST transforms FROST into a production-ready consensus mechanism by adding several crucial enhancements:
Asynchronous Operation Guarantees
Unlike traditional consensus mechanisms that require strict synchronization:
- Validators can participate in signing rounds without tight timing constraints
- The protocol progresses even when some validators are temporarily delayed
- Network partitions and varying message delivery times are handled gracefully
- No assumptions about network synchrony are required for safety
Byzantine Fault Tolerance
ROAST maintains safety and liveness even in the presence of malicious actors:
- Tolerates up to f Byzantine validators where f < n/3
- Malicious behavior is detected and isolated
- Signature shares from Byzantine validators can be identified and excluded
- The protocol remains secure even if Byzantine validators:
- Submit invalid signature shares
- Attempt to sign conflicting blocks
- Try to delay or prevent consensus
- Collude with other malicious validators
Leader Rotation Mechanism
ROAST implements a robust leader rotation system that:
- Deterministically selects leaders based on stake weight and randomness
- Automatically rotates leaders to prevent centralization
- Provides backup leaders in case of primary leader failure
- Ensures fair distribution of block production opportunities
- Maintains progress even when leaders fail or misbehave
Liveness Guarantees
ROAST ensures the network continues to make progress through several mechanisms:
-
View Synchronization
- Validators maintain a consistent view of network state
- Recovery procedures for missed blocks or state updates
- Automatic resynchronization after network partitions
-
Failure Recovery
- Automatic detection of failed validators
- Seamless transition to backup leaders
- Recovery from temporary network failures
- Rejoining procedures for validators that fall behind
-
Progress Conditions
- Guaranteed block finalization when sufficient honest validators participate
- No single validator can prevent progress
- Continued operation during validator churn
- Resilient to temporary network issues
-
Deadlock Prevention
- No waiting for specific validators
- Timeout mechanisms for unresponsive participants
- Alternative paths for consensus when optimal path fails
- Dynamic adjustment of protocol parameters
These enhancements make ROAST particularly well-suited for production environments where:
- Network conditions are unpredictable
- Validators may join or leave the network
- Malicious actors may attempt to disrupt consensus
- High availability and reliability are required
Fork Resolution
When forks occur:
- Validators identify competing chains
- Calculate the weight of each fork based on stake
- Apply the heaviest-chain rule
- Coordinate chain reorganization if needed
Understanding FROST
FROST is a threshold signature scheme that enables a group of participants to collectively generate Schnorr signatures. This foundational protocol is crucial for Arch’s consensus mechanism because it provides a way to achieve distributed agreement while maintaining compatibility with Bitcoin’s native signature scheme.
Key Components
- Distributed Key Generation: Validators collectively participate in a process that generates a shared public key while keeping individual private key shares separate and secure.
- Threshold Signatures: The system requires a specific number of validators (t-of-n) to cooperate in order to produce valid signatures, balancing security with fault tolerance.
- Share Management: Each validator maintains their own private key share, contributing to the system’s security through distribution of trust.
- Signature Aggregation: Multiple partial signatures are combined into a single Schnorr signature that’s indistinguishable from a standard single-signer signature.
Benefits of FROST
-
Enhanced Security
- No single validator can compromise the system
- Distributed trust model eliminates single points of failure
- Cryptographic guarantees of signature validity
-
Bitcoin Compatibility
- Native integration with Bitcoin’s Schnorr signature scheme
- No additional on-chain overhead
- Seamless interaction with Bitcoin’s transaction validation
-
Efficiency
- Constant-size signatures regardless of validator count
- Optimized communication patterns
- Reduced blockchain space usage
ROAST: Enhancing FROST for Production
While FROST provides the cryptographic foundation, ROAST adds crucial properties needed for real-world deployment in adversarial environments. ROAST transforms FROST from a theoretical protocol into a production-ready consensus mechanism.
Key Enhancements
-
Asynchronous Operation
- Validators can participate without strict timing requirements
- Resilient to network delays and partitions
- Maintains liveness in real-world conditions
-
Robustness Against Attacks
- Continues operating even with malicious participants
- Detects and handles various forms of validator misbehavior
- Provides provable security guarantees
-
Leader Selection
- Efficient and fair leader rotation mechanism
- Prevents centralization of power
- Maintains system progress even if leaders fail
-
Liveness Guarantees
- Ensures forward progress under adverse conditions
- Handles validator churn gracefully
- Recovers automatically from temporary failures
Arch’s Novel Implementation
Arch’s implementation of ROAST/FROST represents a significant innovation in the blockchain space, particularly for Bitcoin-based smart contract platforms.
Unique Features
-
Bitcoin-Native Design
- Optimized for Bitcoin’s specific constraints and capabilities
- Leverages Bitcoin’s security model
- Minimizes on-chain footprint
-
Smart Contract Integration
- Seamless combination with programmable logic
- Maintains Bitcoin’s security guarantees
- Enables complex decentralized applications
-
Scalable State Management
- Efficient handling of state transitions
- Parallel transaction processing where possible
- Optimized validator resource usage
-
Economic Security
- Carefully designed incentive structure
- Slashing conditions for misbehavior
- Aligned validator and network interests
Performance Characteristics
- Throughput: High transaction processing capacity without sacrificing decentralization
- Latency: Optimized confirmation times while maintaining security
- Resource Usage: Efficient use of network and computational resources
- Scalability: Linear scaling with validator count for most operations
Security Considerations
Threat Model
- Byzantine Validators: System remains secure with up to f Byzantine validators (where f < n/3)
- Network Adversaries: Resilient against various network-level attacks
- Cryptographic Security: Based on well-studied cryptographic assumptions
Security Properties
-
Safety
- No conflicting transactions can be confirmed
- Cryptographic guarantees of transaction finality
- Protection against double-spending
-
Liveness
- System continues to make progress
- Recovers from temporary failures
- Handles validator set changes
-
Fault Tolerance
- Continues operating with partial validator failures
- Graceful degradation under attack
- Automatic recovery mechanisms
Future Directions
The ROAST/FROST consensus mechanism in Arch provides a solid foundation for future enhancements:
-
Scalability Improvements
- Research into further optimization of signature aggregation
- Investigation of layer-2 scaling solutions
- Exploration of parallel processing techniques
-
Security Enhancements
- Ongoing cryptographic research
- Additional protection against emerging threats
- Enhanced monitoring and detection systems
-
Feature Extensions
- Support for more complex smart contract patterns
- Enhanced cross-chain interoperability
- Advanced state management techniques
Further Reading
Academic Papers and Research
FROST (Flexible Round-Optimized Schnorr Threshold Signatures)
- FROST: Flexible Round-Optimized Schnorr Threshold Signatures - The original FROST paper by Chelsea Komlo and Ian Goldberg
- Two-Round Threshold Schnorr Signatures with FROST - An optimized two-round variant of FROST
- Implementing FROST - Reference implementation by the Zcash Foundation
ROAST (Robust Asynchronous Schnorr Threshold Signatures)
- ROAST: Robust Asynchronous Schnorr Threshold Signatures - The foundational ROAST paper
- Practical Threshold Signatures for Bitcoin - Implementation insights for Bitcoin-based threshold signatures
Threshold Cryptography and Consensus
- A Survey of Distributed Consensus Protocols for Blockchain Networks - Comprehensive overview of consensus mechanisms
- Threshold Signatures: The Future of Consensus? - Analysis of threshold signatures in consensus protocols
- Schnorr Multi-Signatures and Applications - Foundational work on Schnorr multi-signatures
Technical Resources
Implementation Guides
- BIP 340: Schnorr Signatures for secp256k1 - Bitcoin Improvement Proposal for Schnorr signatures
- Implementing Threshold Signatures - Technical guide on threshold signature implementation
- Multi-Party Computation for Distributed Key Generation - Reference implementation of distributed key generation
Security Analysis
- Security Analysis of Threshold Signature Schemes - Comprehensive security analysis
- Formal Verification of FROST - Formal security proofs for FROST
- Byzantine Fault Tolerance in Distributed Systems - Analysis of BFT in consensus protocols
Community Resources
- FROST Working Group - Community working group on FROST implementation
- Bitcoin Dev Mailing List - Discussions on threshold signatures in Bitcoin
Conclusion
The combination of ROAST and FROST in Arch represents a significant advancement in Bitcoin-based smart contract platforms. This consensus mechanism enables sophisticated applications while maintaining the security and decentralization principles that make Bitcoin valuable. Through careful design and implementation, Arch has created a system that is not just theoretically sound but practically deployable and scalable for real-world applications.
Program
A program is a special kind of account that contains executable eBPF bytecode, denoted by the Account.is_executable: true field. This allows an account to receive arbitrary instruction data via a transaction to be processed by the runtime.
Every program is stateless, meaning that it can only read/write data to other accounts and that it cannot write to its own account; this, in-part, is how parallelized execution is made possible (see State for more info).
💡 Additionally, programs can send instructions to other programs which, in turn, receive instructions and thus extend program composability further. This is known as cross-program invocation (CPI) and will be detailed in future sections.
Components:
1. Entrypoint
Every Arch program includes a single entrypoint used to invoke the program. A handler function, often named process_instruction, is then used to handle the data passed into the entrypoint.
These parameters are required for every instruction to be processed._
use arch_program::entrypoint;
entrypoint!(process_instruction);
pub fn process_instruction(
program_id: &Pubkey,
accounts: &[AccountInfo],
instruction_data: &[u8],
) -> Result<(), ProgramError> {
// Program logic here
}2. Instruction
The instruction_data is deserialized after being passed into the entrypoint. From there, if there are multiple instructions, a match statement can be utilized to point the logic flow to the appropriate handler function previously defined within the program which can continue processing the instruction.
3. Process Instruction
If a program has multiple instructions, a corresponding handler function should be defined to include the specific logic unique to the instruction.
4. State
Since programs are stateless, a “data” account is needed to hold state for a user. This is a non-executable account that holds program data.
If a program receives instruction that results in a user’s state being altered, the program would manage this user’s state via a mapping within the program’s logic. This mapping would link the user’s pubkey with a data account where the state would live for that specific program.
The program will likely include a struct to define the structure of its state and make it easier to work with. The deserialization of account data occurs during program invocation. After an update is made, state data gets re-serialized into a byte array and stored within the data field of the account.
UTXO (Unspent Transaction Output)
UTXOs (Unspent Transaction Outputs) are fundamental to Bitcoin’s transaction model and serve as the foundation for state management in Arch Network. Unlike account-based systems that track balances, UTXOs represent discrete “coins” that must be consumed entirely in transactions.
Core Concepts
What is a UTXO?
- A UTXO represents an unspent output from a previous transaction
- Each UTXO is uniquely identified by a transaction ID (txid) and output index (vout)
- UTXOs are immutable - they can only be created or spent, never modified
- Once spent, a UTXO cannot be reused (prevents double-spending)
Role in Arch Network
- UTXOs anchor program state to Bitcoin’s security model
- They provide deterministic state transitions
- Enable atomic operations across the network
- Allow for provable ownership and state validation
UTXO Structure
The UtxoMeta struct encapsulates the core UTXO identification data:
use arch_program::utxo::UtxoMeta;
use bitcoin::Txid;
#[derive(Debug, Clone, PartialEq)]
pub struct UtxoMeta {
pub txid: [u8; 32], // Bitcoin transaction ID (32 bytes)
pub vout: u32, // Output index in the transaction
}
impl UtxoMeta {
/// Creates a new UTXO metadata instance
pub fn new(txid: [u8; 32], vout: u32) -> Self {
Self { txid, vout }
}
/// Deserializes UTXO metadata from a byte slice
/// Format: [txid(32 bytes)][vout(4 bytes)]
pub fn from_slice(data: &[u8]) -> Self {
let mut txid = [0u8; 32];
txid.copy_from_slice(&data[0..32]);
let vout = u32::from_le_bytes([
data[32], data[33], data[34], data[35]
]);
Self { txid, vout }
}
}UTXO Lifecycle
1. Creation Process
Creating a UTXO with Bitcoin RPC
use bitcoincore_rpc::{Auth, Client as RpcClient, RpcApi};
use bitcoin::{Amount, Address};
use arch_program::pubkey::Pubkey;
// Initialize Bitcoin RPC client
let rpc = RpcClient::new(
"http://localhost:18443", // Bitcoin node RPC endpoint
Auth::UserPass(
"user".to_string(),
"pass".to_string()
)
).expect("Failed to create RPC client");
// Generate a new account address
let account_address = Pubkey::new_unique();
let btc_address = Address::from_pubkey(&account_address);
// Create UTXO by sending Bitcoin
// Parameters explained:
// - address: Destination Bitcoin address
// - amount: Amount in satoshis (3000 sats = 0.00003 BTC)
// - comment: Optional transaction comment
// - replaceable: Whether the tx can be replaced (RBF)
let txid = rpc.send_to_address(
&btc_address,
Amount::from_sat(3000),
Some("Create Arch UTXO"), // Comment
None, // Comment_to
Some(true), // Replaceable
None, // Fee rate
None, // Fee estimate mode
None // Avoid reuse
)?;
// Wait for confirmation (recommended)
rpc.wait_for_confirmation(&txid, 1)?;Creating an Arch Account with UTXO
use arch_program::{
system_instruction::SystemInstruction,
pubkey::Pubkey,
transaction::Transaction,
};
// Create new program account backed by UTXO
let account_pubkey = Pubkey::new_unique();
let instruction = SystemInstruction::new_create_account_instruction(
txid.try_into().unwrap(),
0, // vout index
account_pubkey,
// Additional parameters like:
// - space: Amount of space to allocate
// - owner: Program that owns the account
);
// Build and sign transaction
let transaction = Transaction::new_signed_with_payer(
&[instruction],
Some(&payer.pubkey()),
&[&payer],
recent_blockhash
);2. State Management
// Example UTXO state tracking
#[derive(Debug)]
pub struct UtxoState {
pub meta: UtxoMeta,
pub status: UtxoStatus,
pub owner: Pubkey,
pub created_at: i64,
pub spent_at: Option<i64>,
}
#[derive(Debug)]
pub enum UtxoStatus {
Pending, // Waiting for confirmations
Active, // Confirmed and spendable
Spent, // UTXO has been consumed
Invalid, // UTXO was invalidated (e.g., by reorg)
}Error Handling
Common UTXO-related errors to handle:
pub enum UtxoError {
NotFound, // UTXO doesn't exist
AlreadySpent, // UTXO was already consumed
InsufficientConfirmations, // Not enough confirmations
InvalidOwner, // Unauthorized attempt to spend
Reorged, // UTXO invalidated by reorg
InvalidVout, // Output index doesn't exist
SerializationError, // Data serialization failed
}Related Topics
- Account Model - How UTXOs relate to Arch accounts
- Program State - Using UTXOs for program state
- System Program - Core UTXO operations
Account Guide
Navigation: Reference → Program → Account Guide
For the core account structure and data types, see Account Structure.
Accounts are the fundamental building blocks for state management and program interaction in Arch Network. They serve as containers for both program code and state data, bridging the gap between Bitcoin’s UTXO model and modern programmable state machines.
Note: For detailed documentation on core system functions used to interact with accounts (like
invoke,new_create_account_instruction,add_state_transition, andset_transaction_to_sign), see System Functions.
Core Concepts
Account Fundamentals
Every account in Arch Network is uniquely identified by a public key (pubkey) and contains four essential components:
pub struct Account {
/// The program that owns this account
pub owner: Pubkey,
/// Number of lamports assigned to this account
pub lamports: u64,
/// Data held in this account
pub data: Vec<u8>,
/// Whether this account can process instructions
pub executable: bool,
}Component Details:
-
Owner (Pubkey)
- Controls account modifications
- Determines which program can modify data
- Can be transferred to new programs
- Required for all accounts
-
Lamports (u64)
- Native token balance
- Used for:
- Transaction fees
- Rent payments
- State storage costs
- Program execution fees
-
Data (Vec
) - Flexible byte array for state storage
- Common uses:
- Program code (if executable)
- Program state
- UTXO metadata
- Configuration data
- Size determined at creation
-
Executable Flag (bool)
- Determines if account contains program code
- Immutable after deployment
- Controls instruction processing capability
Account Types & Use Cases
1. Program Accounts
Program accounts contain executable code and form the backbone of Arch Network’s programmable functionality.
// Example program account creation
let program_account = SystemInstruction::CreateAccount {
lamports: rent.minimum_balance(program_data.len()),
space: program_data.len() as u64,
owner: bpf_loader::id(), // BPF Loader owns program accounts
executable: true,
data: program_data,
};Key characteristics:
- Immutable after deployment
- Owned by BPF loader
- Contains verified program code
- Processes instructions
2. Data Accounts
Data accounts store program state and user data. They’re highly flexible and can be structured to meet various needs.
// Example data structure for a game account
#[derive(BorshSerialize, BorshDeserialize)]
pub struct GameAccount {
pub player: Pubkey,
pub score: u64,
pub level: u8,
pub achievements: Vec<Achievement>,
pub last_played: i64,
}
// Creating a data account
let game_account = SystemInstruction::CreateAccount {
lamports: rent.minimum_balance(size_of::<GameAccount>()),
space: size_of::<GameAccount>() as u64,
owner: game_program::id(),
executable: false,
data: Vec::new(), // Will be initialized by program
};Common use cases:
- Player profiles
- Game state
- DeFi positions
- NFT metadata
- Configuration settings
3. UTXO Accounts
Special data accounts that bridge Bitcoin UTXOs with Arch Network state.
#[derive(BorshSerialize, BorshDeserialize)]
pub struct UtxoAccount {
pub meta: UtxoMeta,
pub owner: Pubkey,
pub delegate: Option<Pubkey>,
pub state: UtxoState,
pub created_at: i64,
pub last_updated: i64,
pub constraints: Vec<UtxoConstraint>,
}
// Example UTXO account creation
let utxo_account = SystemInstruction::CreateAccount {
lamports: rent.minimum_balance(size_of::<UtxoAccount>()),
space: size_of::<UtxoAccount>() as u64,
owner: utxo_program::id(),
executable: false,
data: Vec::new(),
};Account Interactions
Account interactions in Arch Network are facilitated through a set of core system functions. These functions handle everything from account creation to state transitions and are documented in detail in System Functions. Below are common patterns for account interactions:
1. Creation Patterns
// 1. Basic account creation
pub fn create_basic_account(
payer: &Keypair,
space: u64,
owner: &Pubkey,
) -> Result<Keypair, Error> {
let account = Keypair::new();
let rent = banks_client.get_rent().await?;
let lamports = rent.minimum_balance(space as usize);
let ix = system_instruction::create_account(
&payer.pubkey(),
&account.pubkey(),
lamports,
space,
owner,
);
let tx = Transaction::new_signed_with_payer(
&[ix],
Some(&payer.pubkey()),
&[payer, &account],
recent_blockhash,
);
banks_client.process_transaction(tx).await?;
Ok(account)
}
// 2. PDA (Program Derived Address) creation
pub fn create_pda_account(
program_id: &Pubkey,
seeds: &[&[u8]],
space: u64,
) -> Result<Pubkey, Error> {
let (pda, bump) = Pubkey::find_program_address(seeds, program_id);
let ix = system_instruction::create_account(
&payer.pubkey(),
&pda,
lamports,
space,
program_id,
);
// Include the bump seed for deterministic address
let seeds_with_bump = &[&seeds[..], &[&[bump]]].concat();
let signer_seeds = &[&seeds_with_bump[..]];
invoke_signed(&ix, &[payer, pda], signer_seeds)?;
Ok(pda)
}2. State Management
// Example of managing account state
pub trait AccountState: Sized {
fn try_from_slice(data: &[u8]) -> Result<Self, Error>;
fn try_serialize(&self) -> Result<Vec<u8>, Error>;
fn load(account: &AccountInfo) -> Result<Self, Error> {
Self::try_from_slice(&account.data.borrow())
}
fn save(&self, account: &AccountInfo) -> Result<(), Error> {
let data = self.try_serialize()?;
let mut account_data = account.data.borrow_mut();
account_data[..data.len()].copy_from_slice(&data);
Ok(())
}
}
// Implementation example
impl AccountState for GameAccount {
fn update_score(&mut self, new_score: u64) -> Result<(), Error> {
self.score = new_score;
self.last_played = Clock::get()?.unix_timestamp;
Ok(())
}
}3. Cross-Program Invocation (CPI)
// Example of one program calling another
pub fn process_instruction(
program_id: &Pubkey,
accounts: &[AccountInfo],
instruction_data: &[u8],
) -> ProgramResult {
// Deserialize accounts
let account_info_iter = &mut accounts.iter();
let source_info = next_account_info(account_info_iter)?;
let dest_info = next_account_info(account_info_iter)?;
let system_program = next_account_info(account_info_iter)?;
// Create CPI context
let cpi_accounts = Transfer {
from: source_info.clone(),
to: dest_info.clone(),
};
let cpi_program = system_program.clone();
let cpi_ctx = CpiContext::new(cpi_program, cpi_accounts);
// Perform cross-program invocation
transfer(cpi_ctx, amount)?;
Ok(())
}Security Considerations
1. Access Control
fn verify_account_access(
account: &AccountInfo,
expected_owner: &Pubkey,
writable: bool,
) -> ProgramResult {
// Check account ownership
if account.owner != expected_owner {
return Err(ProgramError::IncorrectProgramId);
}
// Verify write permission if needed
if writable && !account.is_writable {
return Err(ProgramError::InvalidAccountData);
}
// Additional checks...
Ok(())
}2. Data Validation
fn validate_account_data<T: AccountState>(
account: &AccountInfo,
validate_fn: impl Fn(&T) -> bool,
) -> ProgramResult {
// Load and validate account data
let data = T::load(account)?;
if !validate_fn(&data) {
return Err(ProgramError::InvalidAccountData);
}
Ok(())
}Best Practices
1. Account Management
- Always validate account ownership before modifications
- Use PDAs for deterministic addresses
- Implement proper error handling
- Close unused accounts to reclaim rent
2. Data Safety
- Validate all input data
- Use proper serialization
- Handle account size limits
- Implement atomic operations
3. Performance
- Minimize account creations
- Batch operations when possible
- Use appropriate data structures
- Cache frequently accessed data
4. Upgrades
- Plan for version management
- Implement migration strategies
- Use flexible data structures
- Document state changes
Common Patterns
1. Account Initialization
pub fn initialize_account<T: AccountState>(
program_id: &Pubkey,
account: &AccountInfo,
initial_state: T,
) -> ProgramResult {
// Verify account is uninitialized
if !account.data_is_empty() {
return Err(ProgramError::AccountAlreadyInitialized);
}
// Set account owner
account.set_owner(program_id)?;
// Initialize state
initial_state.save(account)?;
Ok(())
}2. Account Updates
pub fn update_account<T: AccountState>(
account: &AccountInfo,
update_fn: impl FnOnce(&mut T) -> ProgramResult,
) -> ProgramResult {
// Load current state
let mut state = T::load(account)?;
// Apply update
update_fn(&mut state)?;
// Save updated state
state.save(account)?;
Ok(())
}3. Account Closure
pub fn close_account(
account: &AccountInfo,
destination: &AccountInfo,
) -> ProgramResult {
// Transfer lamports
let dest_starting_lamports = destination.lamports();
**destination.lamports.borrow_mut() = dest_starting_lamports
.checked_add(account.lamports())
.ok_or(ProgramError::Overflow)?;
**account.lamports.borrow_mut() = 0;
// Clear data
account.data.borrow_mut().fill(0);
Ok(())
}Related Topics
- UTXOs - How UTXOs integrate with accounts
- Programs - Programs that own and modify accounts
- Instructions - How to interact with accounts
Instructions and Messages
Instructions and messages are fundamental components of Arch’s transaction processing system that enable communication between clients and programs. They form the basis for all state changes and interactions within the Arch network.
Instructions
An instruction is the basic unit of program execution in Arch. It contains all the information needed for a program to execute a specific operation. Instructions are processed atomically, meaning they either complete entirely or have no effect.
Structure
pub struct Instruction {
/// Program ID that executes this instruction
pub program_id: Pubkey,
/// Accounts required for this instruction
pub accounts: Vec<AccountMeta>,
/// Instruction data
pub data: Vec<u8>,
}Components:
- Program ID: The pubkey of the program that will process the instruction
- Accounts: List of accounts required for the instruction, with their metadata
- Instruction Data: Custom data specific to the instruction, typically serialized using Borsh or another format
Account Metadata
pub struct AccountMeta {
pub pubkey: Pubkey,
pub is_signer: bool,
pub is_writable: bool,
}pubkey: The account’s public keyis_signer: Whether the account must sign the transactionis_writable: Whether the account’s data can be modified
Messages
A message is a collection of instructions that form a transaction. Messages ensure atomic execution of multiple instructions, meaning either all instructions succeed or none take effect.
Structure
pub struct Message {
/// List of account keys referenced by the instructions
pub account_keys: Vec<Pubkey>,
/// Recent blockhash
pub recent_blockhash: Hash,
/// List of instructions to execute
pub instructions: Vec<CompiledInstruction>,
}Components:
- Account Keys: All unique accounts referenced across instructions
- Recent Blockhash: Used for transaction uniqueness and timeout
- Instructions: List of instructions to execute in sequence
Instruction Processing Flow:
-
Client creates an instruction with:
- Program ID to execute the instruction
- Required accounts with appropriate permissions
- Instruction-specific data (serialized parameters)
-
Instruction(s) are bundled into a message:
- Multiple instructions can be atomic
- Account permissions are consolidated
- Blockhash is included for uniqueness
-
Message is signed to create a transaction:
- All required signers must sign
- Transaction size limits apply
- Fees are calculated
-
Transaction is sent to the network:
- Validated by validators
- Processed in parallel when possible
- Results are confirmed
-
Program processes the instruction:
- Deserializes instruction data
- Validates accounts and permissions
- Executes operation
- Updates account state
Best Practices:
-
Account Validation
- Always verify account ownership
- Check account permissions
- Validate account relationships
-
Data Serialization
- Use consistent serialization format (preferably Borsh)
- Include version information
- Handle errors gracefully
- Validate data lengths
-
Error Handling
- Return specific error types
- Provide clear error messages
- Handle all edge cases
- Implement proper cleanup
Cross-Program Invocation (CPI)
Instructions can invoke other programs through CPI, enabling composability:
-
Create new instruction for target program:
- Specify program ID
- Include required accounts
- Prepare instruction data
-
Pass required accounts:
- Include all necessary accounts
- Set proper permissions
- Handle PDA derivation
-
Invoke using
invokeorinvoke_signed:- For regular accounts:
invoke - For PDAs:
invoke_signed - Handle return values
- For regular accounts:
-
Handle results:
- Check return status
- Process any returned data
- Handle errors appropriately
Security Considerations:
-
Account Verification
- Verify all account permissions
- Check ownership and signatures
- Validate account relationships
- Prevent privilege escalation
-
Data Validation
- Sanitize all input data
- Check buffer lengths
- Validate numerical ranges
- Prevent integer overflow
-
State Management
- Maintain atomic operations
- Handle partial failures
- Prevent race conditions
- Ensure consistent state
Common Patterns:
-
Initialization
- Create necessary accounts
- Set initial state
- Assign proper ownership
-
State Updates
- Validate permissions
- Update account data
- Maintain invariants
-
Account Management
- Close accounts when done
- Manage PDAs properly
Syscalls
A syscall is a function that can be used to obtain information from the underlying virtual machine.
// Used for cross-program invocation (CPI)
// Invokes a cross-program call
define_syscall!(fn sol_invoke_signed_rust(instruction_addr: *const u8, account_infos_addr: *const u8, account_infos_len: u64) -> u64);
// Sets the data to be returned for the cross-program invocation
define_syscall!(fn sol_set_return_data(data: *const u8, length: u64));
// Returns the cross-program invocation data
define_syscall!(fn sol_get_return_data(data: *mut u8, length: u64, program_id: *mut Pubkey) -> u64);
// Arch
// Validates and sets up transaction for being signed
define_syscall!(fn arch_set_transaction_to_sign(transaction_to_sign: *const TransactionToSign));
// Retrieves raw Bitcoin transaction from RPC and copies into memory buffer
define_syscall!(fn arch_get_bitcoin_tx(data: *mut u8, length: u64, txid: &[u8; 32]) -> u64);
// Retrieves the multi-sig public key and copies into memory buffer
define_syscall!(fn arch_get_network_xonly_pubkey(data: *mut u8) -> u64);
// Validates ownership of a Bitcoin UTXO against a public key
define_syscall!(fn arch_validate_utxo_ownership(utxo: *const UtxoMeta, owner: *const Pubkey) -> u64);
// Generates a Bitcoin script public key and copies into memory buffer
define_syscall!(fn arch_get_account_script_pubkey(script: *mut u8, pubkey: *const Pubkey) -> u64);
// Retrieves the latest Bitcoin block height
define_syscall!(fn arch_get_bitcoin_block_height() -> u64);
// logs
// Prints the hexidecimal representation of a string slice to stdout
define_syscall!(fn sol_log_(message: *const u8, len: u64));
// Prints 64-bit values represented as hexadecimal to stdout
define_syscall!(fn sol_log_64_(arg1: u64, arg2: u64, arg3: u64, arg4: u64, arg5: u64));
// Prints the hexidecimal representation of a public key to stdout
define_syscall!(fn sol_log_pubkey(pubkey_addr: *const u8));
// Prints the base64 representation of a data array to stdout
define_syscall!(fn sol_log_data(data: *const u8, data_len: u64));Nodes
Let’s introduce the nodes that comprise the Arch Network stack in greater detail.
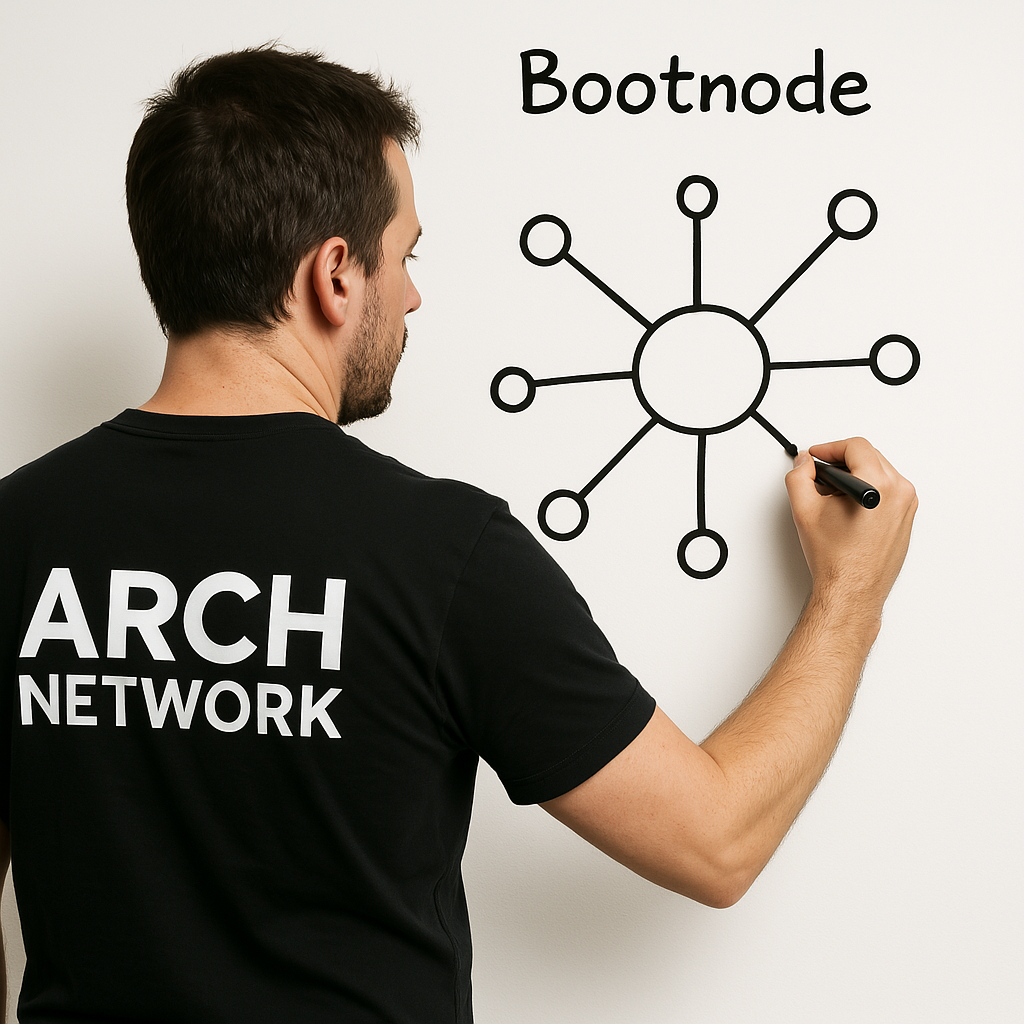
All signing is coordinated by the leader. Ultimately, the leader submits signed Bitcoin transactions to the Bitcoin network following program execution.
This node represents a generic node operated by another party. It performs the validator role and has a share in the network’s distributed signing key. The leader node passes transactions to validator nodes to validate and sign. After enough signatures have been collected (a threshold has been met), the leader can then submit a fully signed Bitcoin transaction to the Bitcoin network.
The validator node also runs the eBPF virtual machine and executes the transactions asynchronously alongside the other validator nodes in the network.
This validator is a lightweight server that only serves as an RPC for developers to get up and running quickly with the least amount of overhead. It simulates a single-node blockchain environment that is meant for efficient, rapid development.
Note: the Lightweight Validator node uses the same image as the Validator node though operates singularly for maximum efficiency. You can start a lightweight validator using the
arch-cli validator startcommand.
More can be read about the Arch Network architecture in our docs.
SDK Reference
The Arch Network ecosystem provides two distinct SDKs for building applications. Each SDK serves different use cases and development environments. This page will help you choose the right SDK for your project.
Available SDKs
1. TypeScript SDK (by Saturn)
The TypeScript SDK is developed and maintained by Saturn (@saturnbtc) and provides a comprehensive JavaScript/TypeScript interface for interacting with the Arch Network.
Package: @saturnbtcio/arch-sdk
Repository: arch-typescript-sdk
Language: TypeScript/JavaScript
Best for:
- Frontend applications (React, Vue, Angular)
- Node.js backend services
- Web3 applications
- Rapid prototyping
- JavaScript/TypeScript developers
2. Rust SDK
The Rust SDK is the native SDK included in the main Arch Network repository. It provides low-level access to all network features and is used for building high-performance applications and programs.
Package: arch_sdk
Repository: Part of arch-network
Language: Rust
Best for:
- On-chain programs (smart contracts)
- High-performance applications
- System-level integrations
- Validator/node development
- Rust developers
Choosing the Right SDK
Use the TypeScript SDK when:
- Building web applications or dApps
- Working with Node.js backends
- Integrating Arch Network into existing JavaScript projects
- You need quick development cycles
- Your team is more familiar with JavaScript/TypeScript
Use the Rust SDK when:
- Writing on-chain programs for Arch Network
- Building high-performance applications
- Developing system-level tools or validators
- You need maximum control and efficiency
- Your team is comfortable with Rust
Quick Start Comparison
TypeScript SDK Installation
npm install @saturnbtcio/arch-sdk
# or
yarn add @saturnbtcio/arch-sdk
Rust SDK Installation
# In your Cargo.toml
[dependencies]
arch_sdk = "0.5.4"
Basic Connection Example
TypeScript SDK:
import { Connection, Keypair } from '@saturnbtcio/arch-sdk';
const connection = new Connection('http://localhost:9002');
const keypair = Keypair.generate();
const isReady = await connection.isNodeReady();
console.log('Node ready:', isReady);
Rust SDK:
use arch_sdk::{Connection, Keypair};
#[tokio::main]
async fn main() -> Result<(), Box<dyn std::error::Error>> {
let connection = Connection::new("http://localhost:9002");
let keypair = Keypair::new();
let is_ready = connection.is_node_ready().await?;
println!("Node ready: {}", is_ready);
Ok(())
}
Documentation Structure
TypeScript SDK Documentation
- Getting Started with TypeScript SDK
- TypeScript API Reference
- TypeScript Examples
- Web3 Integration Guide
Rust SDK Documentation
Shared Concepts
These concepts apply to both SDKs:
- Pubkey - Public key type for identifying accounts
- Account - Account structure and management
- Instructions and Messages - Transaction building
- Runtime Transaction - Transaction format
- Processed Transaction - Transaction results
- Signature - Digital signatures
Feature Comparison
| Feature | TypeScript SDK | Rust SDK |
|---|---|---|
| Language | TypeScript/JavaScript | Rust |
| Installation | npm/yarn | Cargo |
| Async Support | Promises/async-await | Tokio async |
| Program Development | Client-side only | Full support |
| Browser Support | ✅ Full | ❌ No |
| Node.js Support | ✅ Full | ✅ Full |
| Performance | Good | Excellent |
| Type Safety | TypeScript types | Rust type system |
| Bundle Size | ~200KB | N/A |
| Learning Curve | Moderate | Steep |
Migration Between SDKs
While both SDKs interact with the same Arch Network, they have different APIs and patterns. Here are key differences to consider:
Connection Management
- TypeScript: Uses promise-based async patterns
- Rust: Uses Tokio-based async runtime
Error Handling
- TypeScript: Try-catch with custom error types
- Rust: Result<T, E> pattern with detailed error types
Data Serialization
- TypeScript: JSON and Buffer-based serialization
- Rust: Borsh and custom serialization
Getting Help
TypeScript SDK Support
- Issues: Saturn SDK GitHub Issues
- Documentation: TypeScript SDK Docs
- Examples: TypeScript Examples
Rust SDK Support
- Issues: Arch Network GitHub Issues
- Documentation: Rust SDK Docs
- Examples: Rust Examples
General Support
- Discord: Arch Network Discord
- Forum: Arch Network Forum
- Stack Overflow: Tag with
arch-network
Next Steps
Choose your SDK and get started:
For a general introduction to Arch Network concepts, visit our Getting Started Guide.
Getting Started with the TypeScript SDK
This guide will walk you through setting up and using the Arch Network TypeScript SDK (developed by Saturn) to build your first application.
Note: The Arch TypeScript SDK is a low-level SDK that provides direct RPC access to Arch nodes. It does not include high-level abstractions like transaction builders or wallet management.
Prerequisites
- Node.js 16+ and npm or yarn
- Basic understanding of blockchain concepts and JavaScript/TypeScript
- Arch Network node running locally or access to a remote node
Installation
Create a New Project
# Create a new project
mkdir my-arch-app
cd my-arch-app
npm init -y
# Install the Saturn TypeScript SDK
npm install @saturnbtcio/arch-sdk
# Install TypeScript (optional but recommended)
npm install -D typescript @types/node
npx tsc --init
For Existing Projects
# Using npm
npm install @saturnbtcio/arch-sdk
# Using yarn
yarn add @saturnbtcio/arch-sdk
# Using pnpm
pnpm add @saturnbtcio/arch-sdk
Your First Connection
Create a file named connect.ts (or connect.js for JavaScript):
import { RpcConnection } from '@saturnbtcio/arch-sdk';
async function main() {
// Connect to local validator
const connection = new RpcConnection('http://localhost:9002');
try {
console.log('🔌 Connecting to Arch node at http://localhost:9002...\n');
// Get current block count
const blockCount = await connection.getBlockCount();
console.log('✓ Current block count:', blockCount);
// Get best block hash
const bestBlockHash = await connection.getBestBlockHash();
console.log('✓ Best block hash:', bestBlockHash);
// Get block hash for a specific height
if (blockCount > 0) {
const blockHeight = blockCount - 1;
const blockHash = await connection.getBlockHash(blockHeight);
console.log(`✓ Block hash at height ${blockHeight}:`, blockHash);
}
console.log('\n✅ Successfully connected to Arch node!');
console.log('📊 Network is active with', blockCount, 'blocks');
} catch (error) {
console.error('❌ Error connecting to Arch node:', error);
console.log('\n💡 Make sure your Arch node is running at http://localhost:9002');
console.log(' You can start it with: arch-node --network=testnet');
}
}
// Run the main function
main().catch(console.error);
Run the script:
# TypeScript
npx ts-node connect.ts
# JavaScript
node connect.js
Example output:
🔌 Connecting to Arch node at http://localhost:9002...
✓ Current block count: 57230
✓ Best block hash: 349e8a42cdc98d05d427ba8fe8efcfd13e875591f1f1f111960a991f3add8105
✓ Block hash at height 57229: 349e8a42cdc98d05d427ba8fe8efcfd13e875591f1f1f111960a991f3add8105
✅ Successfully connected to Arch node!
📊 Network is active with 57230 blocks
Creating Accounts
The SDK provides utilities for creating accounts using secp256k1 cryptography:
import { RpcConnection, ArchConnection } from '@saturnbtcio/arch-sdk';
async function createAccount() {
const connection = new RpcConnection('http://localhost:9002');
const arch = ArchConnection(connection);
// Create a new account
const account = await arch.createNewAccount();
console.log('🔑 New Account Created:');
console.log('Private Key:', account.privkey);
console.log('Public Key:', account.pubkey);
console.log('Address:', account.address);
return account;
}
createAccount().catch(console.error);
Create Account with Faucet Funding
import { RpcConnection } from '@saturnbtcio/arch-sdk';
import { randomBytes } from 'node:crypto';
// Helper function to wait for a specified time
const wait = (ms: number) => new Promise(resolve => setTimeout(resolve, ms));
async function createAndFundAccount() {
const connection = new RpcConnection('http://localhost:9002');
try {
console.log('🔌 Connecting to Arch node...\n');
// Check the current block height
const initialBlockCount = await connection.getBlockCount();
console.log('📊 Current block height:', initialBlockCount);
// Generate a random 32-byte public key
const pubkey = randomBytes(32);
console.log('🔑 Generated public key:', pubkey.toString('hex'));
// Create account with faucet
console.log('\n💰 Step 1: Creating account with faucet...');
await connection.createAccountWithFaucet(pubkey);
console.log('✅ Faucet account creation initiated');
// Get the Arch address
const archAddress = await connection.getAccountAddress(pubkey);
console.log('📍 Arch address:', archAddress);
// Request airdrop to fund the account
console.log('\n💰 Step 2: Requesting airdrop...');
await connection.requestAirdrop(pubkey);
console.log('✅ Airdrop requested');
// Wait for account to be created and funded
console.log('\n⏳ Waiting for account to be confirmed on chain...');
console.log(' (This may take 5-10 seconds)');
let accountFound = false;
const maxAttempts = 6;
for (let attempt = 1; attempt <= maxAttempts; attempt++) {
const waitTime = attempt * 2000; // Increase wait time each attempt
console.log(`\n🔄 Attempt ${attempt}/${maxAttempts}: Waiting ${waitTime / 1000} seconds...`);
await wait(waitTime);
// Check block progress
const currentBlockCount = await connection.getBlockCount();
console.log(`📈 Blocks produced: ${currentBlockCount - initialBlockCount}`);
try {
const accountInfo = await connection.readAccountInfo(pubkey);
console.log('\n✅ Account successfully created and funded!');
console.log('\n📊 Account Details:');
console.log(' Address:', archAddress);
console.log(' Full info:', JSON.stringify(accountInfo, null, 2));
// Access properties safely
const info = accountInfo as any;
if (info.lamports !== undefined) {
console.log(' Balance:', info.lamports, 'lamports');
}
if (info.owner) {
console.log(' Owner:', Buffer.from(Object.values(info.owner)).toString('hex'));
}
if (info.utxo) {
console.log(' UTXO:', info.utxo);
}
if (info.is_executable !== undefined) {
console.log(' Executable:', info.is_executable);
}
accountFound = true;
break;
} catch (error) {
if (attempt === maxAttempts) {
console.log('❌ Account not found after maximum attempts');
} else {
console.log('⏳ Account not ready yet, continuing to wait...');
}
}
}
if (accountFound) {
console.log('\n🎉 Success! Your Arch account is ready to use.');
console.log('💡 You can now:');
console.log(' - Send transactions from this account');
console.log(' - Interact with Arch programs');
console.log(' - Deploy smart contracts');
console.log('\n📝 Save these for future reference:');
console.log(' Pubkey:', pubkey.toString('hex'));
console.log(' Address:', archAddress);
}
} catch (error) {
console.error('❌ Error:', error);
console.log('\n💡 Troubleshooting:');
console.log(' - Make sure your Arch node is running at http://localhost:9002');
console.log(' - Ensure the node has faucet functionality enabled');
console.log(' - Check that the node is syncing and producing blocks');
}
}
createAndFundAccount();
Reading Account Information
import { RpcConnection } from '@saturnbtcio/arch-sdk';
async function readAccount() {
const connection = new RpcConnection('http://localhost:9002');
// Example: System program pubkey (32 zero bytes with last byte as 1)
const systemProgramPubkey = new Uint8Array(32);
systemProgramPubkey[31] = 1;
try {
const accountInfo = await connection.readAccountInfo(systemProgramPubkey);
console.log('Account Info:', accountInfo);
// Get account address
const address = await connection.getAccountAddress(systemProgramPubkey);
console.log('Account Address:', address);
} catch (error) {
console.error('Error reading account:', error);
}
}
Working with Messages and Instructions
The SDK uses a low-level message format for transactions:
import { RpcConnection, InstructionUtil, MessageUtil, PubkeyUtil } from '@saturnbtcio/arch-sdk';
import type { Message, Instruction } from '@saturnbtcio/arch-sdk';
// Create a simple instruction
const instruction: Instruction = {
program_id: PubkeyUtil.systemProgram(), // Returns system program pubkey
accounts: [
{
pubkey: new Uint8Array(32), // Your account pubkey
is_signer: true,
is_writable: true,
},
],
data: new Uint8Array([1, 2, 3, 4]), // Instruction data
};
// Create a message
const message: Message = {
signers: [new Uint8Array(32)], // Array of signer pubkeys
instructions: [instruction],
};
// Serialize the message for sending
const serializedMessage = MessageUtil.serialize(message);
console.log('Serialized message:', serializedMessage);
Sending Transactions
To send transactions, you need to create a RuntimeTransaction:
import { RpcConnection } from '@saturnbtcio/arch-sdk';
import type { RuntimeTransaction, SanitizedMessage } from '@saturnbtcio/arch-sdk';
async function sendTransaction() {
const connection = new RpcConnection('http://localhost:9002');
// Note: Creating valid transactions requires proper message construction
// and cryptographic signatures. This is a simplified example.
const sanitizedMessage: SanitizedMessage = {
header: {
num_required_signatures: 1,
num_readonly_signed_accounts: 0,
num_readonly_unsigned_accounts: 0,
},
account_keys: [
new Uint8Array(32), // Signer pubkey
PubkeyUtil.systemProgram(), // System program
],
recent_blockhash: new Uint8Array(32), // Recent blockhash
instructions: [
{
program_id_index: 1, // Index into account_keys
accounts: [0], // Indexes into account_keys
data: new Uint8Array([1, 2, 3, 4]),
},
],
};
const transaction: RuntimeTransaction = {
version: 0,
signatures: [new Uint8Array(64)], // 64-byte signatures
message: sanitizedMessage,
};
try {
const txId = await connection.sendTransaction(transaction);
console.log('Transaction sent:', txId);
} catch (error) {
console.error('Error sending transaction:', error);
}
}
Querying Blocks
import { RpcConnection } from '@saturnbtcio/arch-sdk';
async function queryBlocks() {
const connection = new RpcConnection('http://localhost:9002');
try {
// Get the latest block
const bestBlockHash = await connection.getBestBlockHash();
const block = await connection.getBlock(bestBlockHash);
if (block) {
console.log('Block:', block);
console.log('Number of transactions:', block.transactions?.length || 0);
}
} catch (error) {
console.error('Error querying blocks:', error);
}
}
Get Processed Transaction
import { RpcConnection } from '@saturnbtcio/arch-sdk';
async function getTransaction(txId: string) {
const connection = new RpcConnection('http://localhost:9002');
try {
const processedTx = await connection.getProcessedTransaction(txId);
if (processedTx) {
console.log('Transaction found:', processedTx);
console.log('Status:', processedTx.status);
} else {
console.log('Transaction not found');
}
} catch (error) {
console.error('Error getting transaction:', error);
}
}
Get Program Accounts
import { RpcConnection } from '@saturnbtcio/arch-sdk';
async function getProgramAccounts() {
const connection = new RpcConnection('http://localhost:9002');
// Example: Get all accounts owned by a program
const programId = new Uint8Array(32); // Your program ID
try {
const accounts = await connection.getProgramAccounts(programId);
console.log(`Found ${accounts.length} accounts for program`);
accounts.forEach((account, index) => {
console.log(`Account ${index}:`, account);
});
} catch (error) {
console.error('Error getting program accounts:', error);
}
}
Utility Functions
The SDK provides several utility modules for working with Arch data structures:
import {
PubkeyUtil,
MessageUtil,
InstructionUtil,
AccountUtil,
SignatureUtil
} from '@saturnbtcio/arch-sdk';
// Get system program pubkey
const systemProgram = PubkeyUtil.systemProgram();
// Work with public keys
const pubkeyBytes = new Uint8Array(32);
const pubkeyHex = PubkeyUtil.toHex(pubkeyBytes);
const pubkeyFromHex = PubkeyUtil.fromHex(pubkeyHex);
// Serialize/deserialize messages
const serializedMsg = MessageUtil.serialize(message);
const deserializedMsg = MessageUtil.deserialize(serializedMsg);
Error Handling
The SDK provides custom error types:
import { RpcConnection, ArchRpcError } from '@saturnbtcio/arch-sdk';
async function handleErrors() {
const connection = new RpcConnection('http://localhost:9002');
try {
await connection.getBlock('invalid-hash');
} catch (error) {
if (error instanceof ArchRpcError) {
console.error('RPC Error:', error.error);
console.error('Error code:', error.error.code);
console.error('Error message:', error.error.message);
} else {
console.error('Unexpected error:', error);
}
}
}
Complete Example
Here’s a complete example showing how to connect and query the network:
import { RpcConnection, ArchConnection } from '@saturnbtcio/arch-sdk';
async function completeExample() {
// 1. Setup connection
const connection = new RpcConnection('http://localhost:9002');
const arch = ArchConnection(connection);
try {
// 2. Get network info
console.log('📊 Network Information:');
const blockCount = await connection.getBlockCount();
console.log('Block count:', blockCount);
const bestBlockHash = await connection.getBestBlockHash();
console.log('Best block hash:', bestBlockHash);
// 3. Create a new account
console.log('\n🔑 Creating new account...');
const account = await arch.createNewAccount();
console.log('Address:', account.address);
// 4. Get block information
if (blockCount > 0) {
const blockHash = await connection.getBlockHash(blockCount - 1);
const block = await connection.getBlock(blockHash);
if (block) {
console.log('\n📦 Latest block:');
console.log('Hash:', blockHash);
console.log('Transactions:', block.transactions?.length || 0);
}
}
console.log('\n✅ Example completed successfully!');
} catch (error) {
console.error('❌ Error:', error);
}
}
completeExample().catch(console.error);
Important Notes
-
Low-Level SDK: This SDK provides low-level RPC access. High-level features like transaction building, wallet management, and program deployment helpers are not included.
-
Message Construction: Creating valid transactions requires proper understanding of Arch’s message format and cryptographic signatures.
-
Type Safety: The SDK is written in TypeScript and provides type definitions for all data structures.
-
Error Handling: Always wrap RPC calls in try-catch blocks as network operations can fail.
Next Steps
- Learn about Arch’s account model
- Understand message and instruction formats
- Explore the RPC API for all available methods
- Check the TypeScript SDK source for implementation details
Resources
- NPM Package: @saturnbtcio/arch-sdk
- GitHub Repository: saturnbtc/arch-typescript-sdk
- Discord: Arch Network Discord
TypeScript SDK API Reference
This page provides a comprehensive API reference for the Arch Network TypeScript SDK developed by Saturn.
Note: The Arch TypeScript SDK is a low-level SDK that provides direct RPC access to Arch nodes. It does not include high-level abstractions like transaction builders or wallet management.
Core Classes
RpcConnection
The main class for interacting with an Arch Network node via RPC.
import { RpcConnection } from '@saturnbtcio/arch-sdk';
const connection = new RpcConnection('http://localhost:9002');
Methods
sendTransaction(params: RuntimeTransaction): Promise<string>- Send a transactionsendTransactions(params: RuntimeTransaction[]): Promise<string[]>- Send multiple transactionsreadAccountInfo(pubkey: Pubkey): Promise<AccountInfoResult>- Read account informationgetAccountAddress(pubkey: Pubkey): Promise<string>- Get account address from pubkeygetBestBlockHash(): Promise<string>- Get the best block hashgetBlock(blockHash: string): Promise<Block | undefined>- Get block by hashgetBlockCount(): Promise<number>- Get current block countgetBlockHash(blockHeight: number): Promise<string>- Get block hash by heightgetProcessedTransaction(txid: string): Promise<ProcessedTransaction | undefined>- Get transaction infogetProgramAccounts(programId: Pubkey, filters?: AccountFilter[]): Promise<ProgramAccount[]>- Get program accountsrequestAirdrop(pubkey: Pubkey): Promise<void>- Request airdrop (testnet only)createAccountWithFaucet(pubkey: Pubkey): Promise<void>- Create and fund account (testnet only)
ArchConnection
A wrapper that adds additional functionality to any Provider implementation.
import { RpcConnection, ArchConnection } from '@saturnbtcio/arch-sdk';
const connection = new RpcConnection('http://localhost:9002');
const arch = ArchConnection(connection);
Methods
createNewAccount(): Promise<CreatedAccount>- Create a new account with secp256k1 keypair
Core Types
Pubkey
type Pubkey = Uint8Array; // 32 bytes
Message
interface Message {
signers: Pubkey[];
instructions: Instruction[];
}
Instruction
interface Instruction {
program_id: Pubkey;
accounts: AccountMeta[];
data: Uint8Array;
}
AccountMeta
interface AccountMeta {
pubkey: Pubkey;
is_signer: boolean;
is_writable: boolean;
}
RuntimeTransaction
interface RuntimeTransaction {
version: number;
signatures: Signature[]; // Array of 64-byte signatures
message: SanitizedMessage;
}
SanitizedMessage
interface SanitizedMessage {
header: MessageHeader;
account_keys: Pubkey[];
recent_blockhash: Uint8Array;
instructions: SanitizedInstruction[];
}
MessageHeader
interface MessageHeader {
num_required_signatures: number;
num_readonly_signed_accounts: number;
num_readonly_unsigned_accounts: number;
}
SanitizedInstruction
interface SanitizedInstruction {
program_id_index: number;
accounts: number[];
data: Uint8Array;
}
AccountInfoResult
interface AccountInfoResult {
lamports: number;
data: Uint8Array;
owner: Pubkey;
executable: boolean;
rent_epoch: number;
}
CreatedAccount
interface CreatedAccount {
privkey: string; // Hex-encoded private key
pubkey: string; // Hex-encoded public key
address: string; // Bitcoin-style address
}
Block
interface Block {
hash: string;
previous_blockhash: string;
parent_slot: number;
transactions?: ProcessedTransaction[];
block_time?: number;
block_height?: number;
}
ProcessedTransaction
interface ProcessedTransaction {
txid: string;
status: ProcessedTransactionStatus;
bitcoin_txids: string[];
}
interface ProcessedTransactionStatus {
Processed?: {
runtime_transaction: RuntimeTransaction;
execution_result: any;
bitcoin_txids: string[];
};
}
Utility Modules
PubkeyUtil
import { PubkeyUtil } from '@saturnbtcio/arch-sdk';
// Get system program pubkey
const systemProgram = PubkeyUtil.systemProgram();
// Convert to/from hex
const hex = PubkeyUtil.toHex(pubkey);
const pubkey = PubkeyUtil.fromHex(hex);
MessageUtil
import { MessageUtil } from '@saturnbtcio/arch-sdk';
// Serialize/deserialize messages
const serialized = MessageUtil.serialize(message);
const message = MessageUtil.deserialize(serialized);
SanitizedMessageUtil
import { SanitizedMessageUtil } from '@saturnbtcio/arch-sdk';
// Work with sanitized messages
const serialized = SanitizedMessageUtil.serialize(sanitizedMessage);
const sanitizedMessage = SanitizedMessageUtil.deserialize(serialized);
InstructionUtil
import { InstructionUtil } from '@saturnbtcio/arch-sdk';
// Serialize/deserialize instructions
const serialized = InstructionUtil.serialize(instruction);
const instruction = InstructionUtil.deserialize(serialized);
AccountUtil
import { AccountUtil } from '@saturnbtcio/arch-sdk';
// Work with account data
const serialized = AccountUtil.serialize(accountInfo);
const accountInfo = AccountUtil.deserialize(serialized);
SignatureUtil
import { SignatureUtil } from '@saturnbtcio/arch-sdk';
// Signature utilities (implementation details vary)
Error Handling
ArchRpcError
import { ArchRpcError } from '@saturnbtcio/arch-sdk';
try {
await connection.getBlock('invalid-hash');
} catch (error) {
if (error instanceof ArchRpcError) {
console.error('RPC Error:', error.error);
// error.error.code - Error code
// error.error.message - Error message
}
}
Schema Exports
The SDK exports Borsh schemas for serialization:
PubkeySchemaMessageSchemaSanitizedMessageSchemaInstructionSchemaSanitizedInstructionSchemaMessageHeaderSchemaUtxoMetaSchema
Constants
Action
import { Action } from '@saturnbtcio/arch-sdk';
// RPC action constants used internally
Complete API Documentation
For the most up-to-date API reference and implementation details:
TypeScript SDK Examples
This page provides practical examples of using the Arch Network TypeScript SDK (by Saturn) for common tasks.
Note: These examples demonstrate the low-level RPC API. The SDK does not include high-level abstractions like transaction builders or wallet management.
Basic Examples
Connecting and Querying Network
import { RpcConnection } from '@saturnbtcio/arch-sdk';
async function networkExample() {
const connection = new RpcConnection('http://localhost:9002');
try {
// Get network status
const blockCount = await connection.getBlockCount();
console.log('Current block count:', blockCount);
// Get latest block
const bestBlockHash = await connection.getBestBlockHash();
const block = await connection.getBlock(bestBlockHash);
if (block) {
console.log('Latest block:', {
hash: block.hash,
height: block.block_height,
transactions: block.transactions?.length || 0
});
}
} catch (error) {
console.error('Network error:', error);
}
}
Account Management
import { RpcConnection, ArchConnection } from '@saturnbtcio/arch-sdk';
async function accountExample() {
const connection = new RpcConnection('http://localhost:9002');
const arch = ArchConnection(connection);
// Create a new account with private key
const newAccount = await arch.createNewAccount();
console.log('New account created:');
console.log(' Private key:', newAccount.privkey);
console.log(' Public key:', newAccount.pubkey);
console.log(' Address:', newAccount.address);
// Convert hex pubkey to Uint8Array for RPC calls
const pubkeyBytes = new Uint8Array(
newAccount.pubkey.match(/.{1,2}/g)!.map(byte => parseInt(byte, 16))
);
// Read account info
try {
const accountInfo = await connection.readAccountInfo(pubkeyBytes);
console.log('Account info:', accountInfo);
} catch (error) {
console.log('Account not found (expected for new account)');
}
}
Creating and Funding Accounts
import { RpcConnection } from '@saturnbtcio/arch-sdk';
async function fundAccountExample() {
const connection = new RpcConnection('http://localhost:9002');
// Generate a random pubkey (in practice, derive from private key)
const pubkey = new Uint8Array(32);
crypto.getRandomValues(pubkey);
try {
// Create and fund account (testnet only)
await connection.createAccountWithFaucet(pubkey);
console.log('Account created and funded');
// Read the funded account
const accountInfo = await connection.readAccountInfo(pubkey);
console.log('Account balance:', accountInfo.lamports);
} catch (error) {
console.error('Failed to create account:', error);
}
}
Working with Messages and Instructions
Creating a Simple Message
import { MessageUtil, PubkeyUtil } from '@saturnbtcio/arch-sdk';
import type { Message, Instruction } from '@saturnbtcio/arch-sdk';
function createSimpleMessage() {
// Create account pubkeys
const signer = new Uint8Array(32);
crypto.getRandomValues(signer);
// Create an instruction
const instruction: Instruction = {
program_id: PubkeyUtil.systemProgram(),
accounts: [
{
pubkey: signer,
is_signer: true,
is_writable: true,
},
],
data: new Uint8Array([1, 2, 3, 4]), // Instruction data
};
// Create a message
const message: Message = {
signers: [signer],
instructions: [instruction],
};
// Serialize for sending
const serialized = MessageUtil.serialize(message);
console.log('Serialized message:', serialized);
// Deserialize back
const deserialized = MessageUtil.deserialize(serialized);
console.log('Deserialized:', deserialized);
}
Creating a Runtime Transaction
import { RpcConnection, SanitizedMessageUtil } from '@saturnbtcio/arch-sdk';
import type { RuntimeTransaction, SanitizedMessage } from '@saturnbtcio/arch-sdk';
async function createTransaction() {
const connection = new RpcConnection('http://localhost:9002');
// Create account keys
const signer = new Uint8Array(32);
crypto.getRandomValues(signer);
// Create a sanitized message
const sanitizedMessage: SanitizedMessage = {
header: {
num_required_signatures: 1,
num_readonly_signed_accounts: 0,
num_readonly_unsigned_accounts: 1,
},
account_keys: [
signer, // Index 0: Signer
PubkeyUtil.systemProgram(), // Index 1: System program
],
recent_blockhash: new Uint8Array(32), // You need a real blockhash
instructions: [
{
program_id_index: 1, // System program
accounts: [0], // Signer account
data: new Uint8Array([0, 0, 0, 0]), // Transfer instruction
},
],
};
// Create the runtime transaction
const transaction: RuntimeTransaction = {
version: 0,
signatures: [new Uint8Array(64)], // Need real signature
message: sanitizedMessage,
};
// Note: This example doesn't include proper signing
// In practice, you need to sign the message with the private key
console.log('Transaction created (unsigned)');
}
Advanced Examples
Querying Blocks and Transactions
import { RpcConnection } from '@saturnbtcio/arch-sdk';
async function blockExplorer() {
const connection = new RpcConnection('http://localhost:9002');
try {
// Get recent blocks
const blockCount = await connection.getBlockCount();
console.log(`\nExploring last 5 blocks (current height: ${blockCount})`);
for (let i = 0; i < 5 && blockCount - i > 0; i++) {
const height = blockCount - i - 1;
const hash = await connection.getBlockHash(height);
const block = await connection.getBlock(hash);
if (block) {
console.log(`\nBlock ${height}:`);
console.log(` Hash: ${hash}`);
console.log(` Transactions: ${block.transactions?.length || 0}`);
// Check transactions in the block
if (block.transactions && block.transactions.length > 0) {
for (const tx of block.transactions) {
console.log(` TX: ${tx.txid}`);
}
}
}
}
} catch (error) {
console.error('Error exploring blocks:', error);
}
}
Getting Program Accounts
import { RpcConnection } from '@saturnbtcio/arch-sdk';
async function getProgramAccountsExample() {
const connection = new RpcConnection('http://localhost:9002');
// Example program ID (replace with actual program)
const programId = new Uint8Array(32);
programId[31] = 2; // Example program ID
try {
// Get all accounts owned by the program
const accounts = await connection.getProgramAccounts(programId);
console.log(`Found ${accounts.length} accounts for program`);
accounts.forEach((account, index) => {
console.log(`\nAccount ${index}:`);
console.log(' Pubkey:', account.pubkey);
console.log(' Account:', account.account);
});
// With filters (if supported)
const filteredAccounts = await connection.getProgramAccounts(
programId,
[
// Filter examples would go here
// The actual filter format depends on implementation
]
);
} catch (error) {
console.error('Error getting program accounts:', error);
}
}
Error Handling with Retry
import { RpcConnection, ArchRpcError } from '@saturnbtcio/arch-sdk';
async function robustRpcCall<T>(
fn: () => Promise<T>,
maxRetries: number = 3
): Promise<T> {
let lastError: Error | undefined;
for (let i = 0; i < maxRetries; i++) {
try {
return await fn();
} catch (error) {
lastError = error as Error;
if (error instanceof ArchRpcError) {
console.error(`RPC Error (attempt ${i + 1}):`, error.error);
// Don't retry on certain errors
if (error.error.code === 404) {
throw error; // Not found - don't retry
}
}
// Wait before retry (exponential backoff)
if (i < maxRetries - 1) {
await new Promise(resolve =>
setTimeout(resolve, 1000 * Math.pow(2, i))
);
}
}
}
throw lastError;
}
// Usage example
async function example() {
const connection = new RpcConnection('http://localhost:9002');
const blockCount = await robustRpcCall(
() => connection.getBlockCount()
);
console.log('Block count:', blockCount);
}
Integration Examples
Node.js Service Example
import express from 'express';
import { RpcConnection, ArchConnection } from '@saturnbtcio/arch-sdk';
const app = express();
app.use(express.json());
const connection = new RpcConnection(process.env.ARCH_RPC_URL || 'http://localhost:9002');
const arch = ArchConnection(connection);
// Get network status endpoint
app.get('/api/status', async (req, res) => {
try {
const blockCount = await connection.getBlockCount();
const bestBlockHash = await connection.getBestBlockHash();
res.json({
success: true,
data: {
blockCount,
bestBlockHash,
}
});
} catch (error) {
res.status(500).json({
success: false,
error: error.message
});
}
});
// Create new account endpoint
app.post('/api/account/new', async (req, res) => {
try {
const account = await arch.createNewAccount();
// In production, you'd want to securely store the private key
res.json({
success: true,
data: {
address: account.address,
pubkey: account.pubkey,
// Don't return private key in production!
}
});
} catch (error) {
res.status(500).json({
success: false,
error: error.message
});
}
});
app.listen(3000, () => {
console.log('Server running on port 3000');
});
React Hook Example
import { useState, useEffect } from 'react';
import { RpcConnection } from '@saturnbtcio/arch-sdk';
function useArchBlockCount() {
const [blockCount, setBlockCount] = useState<number | null>(null);
const [loading, setLoading] = useState(true);
const [error, setError] = useState<string | null>(null);
useEffect(() => {
const connection = new RpcConnection('https://api.arch.network');
let mounted = true;
async function fetchBlockCount() {
try {
const count = await connection.getBlockCount();
if (mounted) {
setBlockCount(count);
setError(null);
}
} catch (err) {
if (mounted) {
setError(err.message);
setBlockCount(null);
}
} finally {
if (mounted) {
setLoading(false);
}
}
}
fetchBlockCount();
// Set up polling
const interval = setInterval(fetchBlockCount, 10000);
return () => {
mounted = false;
clearInterval(interval);
};
}, []);
return { blockCount, loading, error };
}
// Usage in component
function BlockCounter() {
const { blockCount, loading, error } = useArchBlockCount();
if (loading) return <div>Loading...</div>;
if (error) return <div>Error: {error}</div>;
return <div>Current block: {blockCount}</div>;
}
Utility Functions
Working with Public Keys
import { PubkeyUtil } from '@saturnbtcio/arch-sdk';
// Convert between formats
function pubkeyExamples() {
// Create a pubkey from hex string
const hexPubkey = '0102030405060708090a0b0c0d0e0f101112131415161718191a1b1c1d1e1f20';
const pubkeyBytes = PubkeyUtil.fromHex(hexPubkey);
// Convert back to hex
const hexAgain = PubkeyUtil.toHex(pubkeyBytes);
console.log('Hex match:', hexPubkey === hexAgain);
// Get system program pubkey
const systemProgram = PubkeyUtil.systemProgram();
console.log('System program:', PubkeyUtil.toHex(systemProgram));
}
More Examples
For more examples and implementation details:
Next Steps
Web3 Integration Guide
This guide covers how to integrate the Arch Network TypeScript SDK (by Saturn) with Web3 applications, wallets, and dApps.
Important: The Arch TypeScript SDK is a low-level RPC client. It does not include wallet adapters, transaction builders, or other high-level abstractions. This guide shows how you could build these features on top of the SDK.
Understanding the Limitations
The current TypeScript SDK provides:
- Low-level RPC connection (
RpcConnection) - Basic account creation with secp256k1 (
ArchConnection) - Message/transaction serialization utilities
- Type definitions for Arch data structures
It does NOT provide:
- Wallet adapters or browser wallet integration
- High-level transaction builders
- React/Vue components or hooks
- State management solutions
Building Wallet Integration
Since the SDK doesn’t include wallet adapters, you’ll need to build your own. Here’s a conceptual approach:
Defining a Wallet Interface
import { RpcConnection } from '@saturnbtcio/arch-sdk';
import type { RuntimeTransaction, SanitizedMessage } from '@saturnbtcio/arch-sdk';
// Define what a wallet adapter might look like
interface ArchWallet {
publicKey: Uint8Array | null;
connected: boolean;
connect(): Promise<{ publicKey: string }>;
disconnect(): Promise<void>;
signMessage(message: Uint8Array): Promise<Uint8Array>;
signTransaction(tx: SanitizedMessage): Promise<Uint8Array>;
}
// Example implementation skeleton
class BrowserWalletAdapter implements ArchWallet {
publicKey: Uint8Array | null = null;
connected: boolean = false;
async connect(): Promise<{ publicKey: string }> {
// This would interface with actual browser wallet
// For now, this is just a placeholder
throw new Error('Wallet integration not implemented');
}
async disconnect(): Promise<void> {
this.publicKey = null;
this.connected = false;
}
async signMessage(message: Uint8Array): Promise<Uint8Array> {
// Would call wallet's signing method
throw new Error('Message signing not implemented');
}
async signTransaction(tx: SanitizedMessage): Promise<Uint8Array> {
// Would call wallet's transaction signing
throw new Error('Transaction signing not implemented');
}
}
Creating Transactions with External Signing
import { RpcConnection, SanitizedMessageUtil, PubkeyUtil } from '@saturnbtcio/arch-sdk';
import type { RuntimeTransaction, SanitizedMessage, SanitizedInstruction } from '@saturnbtcio/arch-sdk';
async function createAndSignTransaction(
connection: RpcConnection,
signer: Uint8Array,
signFunction: (message: Uint8Array) => Promise<Uint8Array>
) {
// Build a sanitized message
const message: SanitizedMessage = {
header: {
num_required_signatures: 1,
num_readonly_signed_accounts: 0,
num_readonly_unsigned_accounts: 1,
},
account_keys: [
signer, // Signer pubkey
PubkeyUtil.systemProgram(), // System program
],
recent_blockhash: new Uint8Array(32), // Need actual blockhash
instructions: [
{
program_id_index: 1,
accounts: [0],
data: new Uint8Array([0, 0, 0, 0]),
},
],
};
// Serialize message for signing
const serializedMessage = SanitizedMessageUtil.serialize(message);
// Sign with external wallet
const signature = await signFunction(serializedMessage);
// Create runtime transaction
const transaction: RuntimeTransaction = {
version: 0,
signatures: [signature],
message: message,
};
// Send transaction
const txId = await connection.sendTransaction(transaction);
return txId;
}
React Integration Pattern
Here’s how you might structure a React integration:
Basic Context Provider
import React, { createContext, useContext, useState } from 'react';
import { RpcConnection, ArchConnection } from '@saturnbtcio/arch-sdk';
interface ArchContextState {
connection: RpcConnection;
arch: ReturnType<typeof ArchConnection>;
// Add your wallet adapter here when implemented
}
const ArchContext = createContext<ArchContextState | null>(null);
export function ArchProvider({ children, endpoint }: { children: React.ReactNode, endpoint: string }) {
const connection = new RpcConnection(endpoint);
const arch = ArchConnection(connection);
const value = {
connection,
arch,
};
return (
<ArchContext.Provider value={value}>
{children}
</ArchContext.Provider>
);
}
export function useArch() {
const context = useContext(ArchContext);
if (!context) {
throw new Error('useArch must be used within ArchProvider');
}
return context;
}
Custom Hooks
import { useState, useEffect } from 'react';
import { RpcConnection } from '@saturnbtcio/arch-sdk';
// Hook for monitoring block count
export function useBlockCount(endpoint: string) {
const [blockCount, setBlockCount] = useState<number | null>(null);
const [loading, setLoading] = useState(true);
const [error, setError] = useState<Error | null>(null);
useEffect(() => {
const connection = new RpcConnection(endpoint);
let mounted = true;
const fetchBlockCount = async () => {
try {
const count = await connection.getBlockCount();
if (mounted) {
setBlockCount(count);
setError(null);
}
} catch (err) {
if (mounted) {
setError(err as Error);
}
} finally {
if (mounted) {
setLoading(false);
}
}
};
fetchBlockCount();
const interval = setInterval(fetchBlockCount, 10000);
return () => {
mounted = false;
clearInterval(interval);
};
}, [endpoint]);
return { blockCount, loading, error };
}
// Hook for account information
export function useAccountInfo(pubkey: Uint8Array | null) {
const { connection } = useArch();
const [accountInfo, setAccountInfo] = useState<any>(null);
const [loading, setLoading] = useState(false);
useEffect(() => {
if (!pubkey) return;
let cancelled = false;
const fetchAccount = async () => {
setLoading(true);
try {
const info = await connection.readAccountInfo(pubkey);
if (!cancelled) {
setAccountInfo(info);
}
} catch (error) {
console.error('Failed to fetch account:', error);
if (!cancelled) {
setAccountInfo(null);
}
} finally {
if (!cancelled) {
setLoading(false);
}
}
};
fetchAccount();
return () => {
cancelled = true;
};
}, [pubkey, connection]);
return { accountInfo, loading };
}
Building Transaction Helpers
Since the SDK doesn’t include transaction builders, here’s how you might create your own:
import { PubkeyUtil } from '@saturnbtcio/arch-sdk';
import type { SanitizedMessage, SanitizedInstruction } from '@saturnbtcio/arch-sdk';
class TransactionBuilder {
private accountKeys: Uint8Array[] = [];
private instructions: SanitizedInstruction[] = [];
private signerCount = 0;
addSigner(pubkey: Uint8Array): number {
const index = this.accountKeys.length;
this.accountKeys.push(pubkey);
this.signerCount++;
return index;
}
addAccount(pubkey: Uint8Array): number {
const index = this.accountKeys.length;
this.accountKeys.push(pubkey);
return index;
}
addInstruction(
programId: Uint8Array,
accounts: number[],
data: Uint8Array
): void {
// Ensure program ID is in account keys
let programIdIndex = this.accountKeys.findIndex(
key => this.arraysEqual(key, programId)
);
if (programIdIndex === -1) {
programIdIndex = this.addAccount(programId);
}
this.instructions.push({
program_id_index: programIdIndex,
accounts,
data,
});
}
build(recentBlockhash: Uint8Array): SanitizedMessage {
return {
header: {
num_required_signatures: this.signerCount,
num_readonly_signed_accounts: 0,
num_readonly_unsigned_accounts: this.accountKeys.length - this.signerCount,
},
account_keys: this.accountKeys,
recent_blockhash: recentBlockhash,
instructions: this.instructions,
};
}
private arraysEqual(a: Uint8Array, b: Uint8Array): boolean {
if (a.length !== b.length) return false;
for (let i = 0; i < a.length; i++) {
if (a[i] !== b[i]) return false;
}
return true;
}
}
// Usage example
function createTransferMessage(from: Uint8Array, to: Uint8Array, amount: bigint): SanitizedMessage {
const builder = new TransactionBuilder();
// Add accounts
const fromIndex = builder.addSigner(from);
const toIndex = builder.addAccount(to);
// Create transfer instruction data
// Note: This is a simplified example - actual encoding depends on the program
const data = new Uint8Array(8);
new DataView(data.buffer).setBigUint64(0, amount, true);
// Add instruction
builder.addInstruction(
PubkeyUtil.systemProgram(),
[fromIndex, toIndex],
data
);
// Build with a recent blockhash (you need to fetch this)
const recentBlockhash = new Uint8Array(32); // Placeholder
return builder.build(recentBlockhash);
}
Security Considerations
When building Web3 integrations with the low-level SDK:
- Key Management: Never handle private keys directly in browser code
- Message Validation: Always validate message contents before signing
- Error Handling: Implement robust error handling for RPC calls
- Type Safety: Use TypeScript strictly to catch errors at compile time
- Input Validation: Validate all user inputs, especially addresses and amounts
Example: Simple dApp Structure
// services/arch.ts
import { RpcConnection, ArchConnection } from '@saturnbtcio/arch-sdk';
export class ArchService {
private connection: RpcConnection;
private arch: ReturnType<typeof ArchConnection>;
constructor(endpoint: string) {
this.connection = new RpcConnection(endpoint);
this.arch = ArchConnection(this.connection);
}
async getNetworkStatus() {
const blockCount = await this.connection.getBlockCount();
const bestBlockHash = await this.connection.getBestBlockHash();
return { blockCount, bestBlockHash };
}
async createAccount() {
return await this.arch.createNewAccount();
}
async getAccountInfo(pubkey: Uint8Array) {
return await this.connection.readAccountInfo(pubkey);
}
}
// components/NetworkStatus.tsx
import React from 'react';
import { useBlockCount } from '../hooks/useBlockCount';
export function NetworkStatus() {
const { blockCount, loading, error } = useBlockCount('http://localhost:9002');
if (loading) return <div>Loading network status...</div>;
if (error) return <div>Error: {error.message}</div>;
return (
<div>
<h3>Network Status</h3>
<p>Current block: {blockCount}</p>
</div>
);
}
Next Steps
Since the TypeScript SDK is low-level, you’ll need to:
- Implement your own wallet integration layer
- Build transaction construction utilities
- Create state management solutions
- Develop UI components for common operations
For more information:
Getting Started with the Rust SDK
This guide will walk you through setting up and using the native Arch Network Rust SDK to build high-performance applications and on-chain programs.
Prerequisites
- Rust 1.70+ with Cargo
- Basic understanding of Rust and blockchain concepts
- Arch Network node running locally or access to a remote node
- Rust development environment set up
Installation
Create a New Rust Project
# Create a new binary project
cargo new my-arch-app --bin
cd my-arch-app
# Or create a library for on-chain programs
cargo new my-arch-program --lib
cd my-arch-program
Add the SDK Dependency
Edit your Cargo.toml:
[dependencies]
arch_sdk = "0.5.4"
arch_program = "0.5.4" # For on-chain program development
# Required for async operations
tokio = { version = "1.38", features = ["full"] }
# Optional dependencies commonly used
anyhow = "1.0"
serde = { version = "1.0", features = ["derive"] }
serde_json = "1.0"
Your First Connection
Create src/main.rs:
use arch_sdk::Connection;
use anyhow::Result;
#[tokio::main]
async fn main() -> Result<()> {
// Connect to local validator
let connection = Connection::new("http://localhost:9002");
// Check if node is ready
let is_ready = connection.is_node_ready().await?;
println!("Node ready: {}", is_ready);
// Get current block count
let block_count = connection.get_block_count().await?;
println!("Current block count: {}", block_count);
Ok(())
}
Run the program:
cargo run
Working with Keypairs
Generate a New Keypair
Create Keypair from Seed
Reading Account Information
Get Account Info
Get Multiple Accounts
Building and Sending Transactions
Simple Transfer
Create Account
Developing On-Chain Programs
Basic Program Structure
Create src/lib.rs for your on-chain program:
Building Programs
Add to Cargo.toml:
[lib]
crate-type = ["cdylib", "lib"]
[features]
no-entrypoint = []
[dependencies]
arch_program = "0.5.4"
Build the program:
cargo build-bpf
Error Handling
Using Result Types
Custom Error Types
Advanced Features
Parallel Account Processing
Custom Serialization
Testing
Unit Tests
Integration Tests
Create tests/integration_test.rs:
Best Practices
Performance Optimization
Security Considerations
Complete Example
Here’s a complete example combining multiple concepts:
use arch_sdk::{Connection, Keypair, Transaction};
use arch_program::{
instruction::Instruction,
pubkey::Pubkey,
system_instruction,
};
use anyhow::Result;
use std::str::FromStr;
const LAMPORTS_PER_SOL: u64 = 1_000_000_000;
#[tokio::main]
async fn main() -> Result<()> {
// 1. Setup connection
let connection = Connection::new("http://localhost:9002");
println!("Connecting to Arch Network...");
// 2. Create or load keypairs
let payer = Keypair::new();
let recipient = Keypair::new();
println!("Payer: {}", payer.pubkey());
println!("Recipient: {}", recipient.pubkey());
// 3. Check initial balances
let payer_balance = connection.get_balance(&payer.pubkey()).await?;
println!("Payer balance: {} SOL", payer_balance as f64 / LAMPORTS_PER_SOL as f64);
// 4. Create transfer instruction
let transfer_amount = LAMPORTS_PER_SOL / 10; // 0.1 SOL
let transfer_ix = system_instruction::transfer(
&payer.pubkey(),
&recipient.pubkey(),
transfer_amount,
);
// 5. Build transaction
let mut transaction = Transaction::new_with_payer(
&[transfer_ix],
Some(&payer.pubkey()),
);
// 6. Get recent blockhash and sign
let recent_blockhash = connection.get_latest_blockhash().await?;
transaction.sign(&[&payer], recent_blockhash);
// 7. Send transaction
println!("Sending transaction...");
match connection.send_and_confirm_transaction(&transaction).await {
Ok(signature) => {
println!("Transaction successful!");
println!("Signature: {}", signature);
// 8. Verify the transfer
let recipient_balance = connection.get_balance(&recipient.pubkey()).await?;
println!("Recipient balance: {} SOL",
recipient_balance as f64 / LAMPORTS_PER_SOL as f64);
}
Err(e) => {
eprintln!("Transaction failed: {}", e);
}
}
Ok(())
}
Next Steps
Now that you understand the basics of the Rust SDK:
- Program Development Guide - Build on-chain programs
- Rust API Reference - Complete API documentation
- Advanced Examples - Complex use cases
- Program Development - General program concepts
- System Calls - System-level operations
Resources
- Crate: arch_sdk on crates.io
- Documentation: docs.rs/arch_sdk
- GitHub: arch-network/arch-network
- Examples: Arch Network Examples
- Discord: Arch Network Discord
Rust SDK API Reference
This page provides a comprehensive API reference for the native Arch Network Rust SDK.
Note: For the most complete and up-to-date API documentation, please visit docs.rs/arch_sdk.
Core Modules
Connection
The main struct for interacting with an Arch Network node.
Keypair
Manages Ed25519 keypairs for transaction signing.
Transaction
Builds and signs transactions for the network.
Account
Represents account data on the network.
Instruction
Defines instructions for programs.
Key Traits
Signer
Trait for types that can sign transactions.
Serialize/Deserialize
Borsh serialization support for on-chain data.
Error Types
ArchError
Main error type for SDK operations.
ProgramError
Errors returned by on-chain programs.
Complete API Documentation
For complete API documentation, please refer to:
Rust SDK Examples
This page provides practical examples of using the native Arch Network Rust SDK for building high-performance applications and on-chain programs.
Basic Examples
Account Management
use arch_sdk::{Connection, Keypair, Account};
use arch_program::pubkey::Pubkey;
use anyhow::Result;
#[tokio::main]
async fn main() -> Result<()> {
let connection = Connection::new("http://localhost:9002");
// Create new account
let new_account = Keypair::new();
println!("New account: {}", new_account.pubkey());
// Check if account exists
match connection.get_account(&new_account.pubkey()).await? {
Some(account) => {
println!("Account exists with {} lamports", account.lamports);
}
None => {
println!("Account does not exist yet");
}
}
// Get multiple accounts efficiently
let pubkeys = vec![
Pubkey::new_unique(),
Pubkey::new_unique(),
new_account.pubkey(),
];
let accounts = connection.get_multiple_accounts(&pubkeys).await?;
for (i, account) in accounts.iter().enumerate() {
match account {
Some(acc) => println!("Account {}: {} lamports", i, acc.lamports),
None => println!("Account {}: Not found", i),
}
}
Ok(())
}
UTXO Operations
Transaction Building
On-Chain Program Examples
State Management Program
Cross-Program Invocation (CPI)
Advanced Patterns
Concurrent Operations
Custom Error Handling
Testing Patterns
Integration Tests
Performance Optimization
Connection Pooling
Resources
For more examples and patterns:
Program Development Guide
This guide covers developing on-chain programs (smart contracts) for the Arch Network using the Rust SDK.
Overview
Arch Network programs are compiled Rust code that runs on the network’s runtime. Programs can:
- Manage account state
- Process transactions
- Interact with other programs
- Interface with Bitcoin UTXOs
Setting Up Your Development Environment
Prerequisites
# Install Rust
curl --proto '=https' --tlsv1.2 -sSf https://sh.rustup.rs | sh
# Install Arch CLI tools
cargo install arch-cli
# Install BPF tools
arch install
Project Structure
my-program/
├── Cargo.toml
├── src/
│ ├── lib.rs # Program entrypoint
│ ├── instruction.rs # Instruction definitions
│ ├── processor.rs # Processing logic
│ ├── state.rs # State structures
│ └── error.rs # Custom errors
├── tests/
│ └── integration.rs # Integration tests
└── deploy/
└── deploy.ts # Deployment scripts
Your First Program
Basic Program Structure
Cargo.toml Configuration
[package]
name = "my_program"
version = "0.1.0"
edition = "2021"
[lib]
crate-type = ["cdylib", "lib"]
[features]
no-entrypoint = []
test-bpf = []
[dependencies]
arch_program = "0.5.4"
borsh = "1.5.1"
thiserror = "1.0"
[dev-dependencies]
arch_sdk = "0.5.4"
tokio = { version = "1", features = ["full"] }
Instruction Processing
Define Instructions
Process Instructions
State Management
Define State Structures
Program-Derived Addresses (PDAs)
Cross-Program Invocation (CPI)
Making CPI Calls
Error Handling
Custom Errors
Security Best Practices
Account Validation
Arithmetic Safety
Testing Your Program
Unit Tests
Integration Tests
Building and Deploying
Build Your Program
# Build for BPF target
cargo build-bpf
# Output will be in target/deploy/my_program.so
Deploy to Network
# Deploy using Arch CLI
arch program deploy target/deploy/my_program.so
# Or using custom deployment script
arch program deploy \
--program target/deploy/my_program.so \
--keypair ~/.config/arch/id.json \
--url http://localhost:9002
Advanced Topics
Upgradeable Programs
Programs can be made upgradeable by using a proxy pattern:
Resources
Core Types
Pubkey (Public Key)
A Pubkey represents a public key in the Arch Network, serving as a unique identifier for accounts, programs, and other entities. It’s a fundamental type you’ll use throughout your development with the Arch SDK.
Overview
A Pubkey is a 32-byte (256-bit) value derived from a private key using elliptic curve cryptography. Every account, program, and other entity on the Arch Network has a unique Pubkey that serves as its address.
Creating Public Keys
From a Private Key
import { Keypair } from '@saturnbtcio/arch-sdk';
// Generate a new keypair
const keypair = Keypair.generate();
const publicKey = keypair.publicKey;
// From existing private key
const keypair2 = Keypair.fromSecretKey(secretKeyBytes);
const publicKey2 = keypair2.publicKey;
From a String
import { Pubkey } from '@saturnbtcio/arch-sdk';
// From base58 string
const publicKey = new Pubkey('11111111111111111111111111111112');
// From hex string
const publicKey2 = new Pubkey('0x1234567890abcdef...');
From Bytes
import { Pubkey } from '@saturnbtcio/arch-sdk';
// From 32-byte array
const bytes = new Uint8Array(32);
// ... fill with your bytes
const publicKey = new Pubkey(bytes);
Common Operations
Converting to Different Formats
// Convert to base58 string
const base58String = publicKey.toBase58();
// Convert to hex string
const hexString = publicKey.toHex();
// Convert to bytes
const bytes = publicKey.toBytes();
// Convert to JSON
const json = publicKey.toJSON();
Comparison
// Check equality
const isEqual = publicKey1.equals(publicKey2);
// Compare public keys
const comparison = publicKey1.compare(publicKey2);
// Check if valid
const isValid = Pubkey.isValid(publicKeyString);
Special Public Keys
System Program
import { Pubkey } from '@saturnbtcio/arch-sdk';
// System program public key
const systemProgram = Pubkey.systemProgram();
Token Program
// Token program public key
const tokenProgram = Pubkey.tokenProgram();
Associated Token Account Program
// Associated token account program public key
const ataProgram = Pubkey.associatedTokenAccountProgram();
Program Derived Addresses (PDAs)
Program Derived Addresses are special public keys that are derived deterministically from a program ID and seeds, but have no corresponding private key.
import { Pubkey } from '@saturnbtcio/arch-sdk';
// Create a PDA
const [pda, bump] = Pubkey.findProgramAddressSync(
[
Buffer.from('my-seed'),
userPublicKey.toBuffer(),
Buffer.from('additional-seed')
],
programId
);
console.log('PDA:', pda.toBase58());
console.log('Bump:', bump);
Using PDAs in Programs
Validation
Input Validation
// Validate public key format
function validatePublicKey(input: string): boolean {
try {
const pubkey = new Pubkey(input);
return true;
} catch (error) {
return false;
}
}
// Check if string is valid public key
const isValidKey = Pubkey.isValid(userInput);
Security Considerations
// Always validate public keys from user input
function processUserAccount(accountString: string) {
if (!Pubkey.isValid(accountString)) {
throw new Error('Invalid public key format');
}
const publicKey = new Pubkey(accountString);
// ... process the account
}
Common Patterns
Account Management
// Store public keys in your application
interface UserAccount {
publicKey: Pubkey;
balance: number;
isProgram: boolean;
}
// Create account references
const accounts: UserAccount[] = [
{
publicKey: new Pubkey('11111111111111111111111111111112'),
balance: 1000,
isProgram: false
}
];
Transaction Building
// Use public keys in transactions
const instruction = new Instruction({
programId: myProgramId,
accounts: [
{ pubkey: userPublicKey, isSigner: true, isWritable: true },
{ pubkey: recipientPublicKey, isSigner: false, isWritable: true }
],
data: instructionData
});
Error Handling
try {
const publicKey = new Pubkey(userInput);
} catch (error) {
if (error instanceof PublicKeyError) {
console.error('Invalid public key:', error.message);
} else {
console.error('Unexpected error:', error);
}
}
Best Practices
Security
- Always validate input: Never trust user-provided public key strings
- Use type safety: Take advantage of TypeScript/Rust type systems
- Verify ownership: Check that accounts are owned by expected programs
Performance
- Cache public keys: Avoid recreating the same public key objects
- Use constants: Define well-known public keys as constants
- Batch operations: Process multiple public keys together when possible
Development
- Use meaningful names: Give public key variables descriptive names
- Document usage: Explain what each public key represents
- Test edge cases: Test with invalid and edge-case public keys
Examples
For complete examples using public keys, see:
- Hello World - Basic public key usage
- Account Management - Working with accounts
- PDA Examples - Program derived addresses
Source Code
The Pubkey implementation is available in the Arch Examples Repository.
Account
Accounts are the fundamental data storage unit in the Arch Network. They hold state, store data, and define ownership relationships. Understanding accounts is crucial for building applications on Arch.
Overview
Every piece of data on the Arch Network is stored in an account. Accounts can hold:
- Program code (executable accounts)
- Application data (data accounts)
- User balances (token accounts)
- Configuration settings (configuration accounts)
Account Structure
AccountInfo
The AccountInfo struct provides a view into an account during program execution:
AccountMeta
The AccountMeta struct describes how an account is used in a transaction:
Creating Accounts
Using the SDK
import { Connection, Keypair, SystemProgram } from '@saturnbtcio/arch-sdk';
// Generate a new account keypair
const newAccount = Keypair.generate();
// Create account instruction
const createAccountInstruction = SystemProgram.createAccount({
fromPubkey: payer.publicKey,
newAccountPubkey: newAccount.publicKey,
lamports: 1000000, // Rent-exempt balance
space: 256, // Account data size
programId: myProgramId
});
// Send transaction
const transaction = new Transaction()
.add(createAccountInstruction);
const signature = await connection.sendAndConfirmTransaction(
transaction,
[payer, newAccount]
);
Using the Faucet (Development)
// Create and fund account with faucet (testnet/devnet only)
const newAccount = Keypair.generate();
const transaction = await connection.createAccountWithFaucet(
newAccount.publicKey
);
console.log('Account created and funded:', newAccount.publicKey.toBase58());
Reading Account Data
Get Account Information
// Get basic account info
const accountInfo = await connection.getAccountInfo(publicKey);
if (accountInfo) {
console.log('Owner:', accountInfo.owner.toBase58());
console.log('Balance:', accountInfo.lamports);
console.log('Data length:', accountInfo.data.length);
console.log('Is executable:', accountInfo.executable);
}
Get Multiple Accounts
// Get multiple accounts at once
const accounts = await connection.getMultipleAccountsInfo([
publicKey1,
publicKey2,
publicKey3
]);
accounts.forEach((account, index) => {
if (account) {
console.log(`Account ${index}:`, account.owner.toBase58());
} else {
console.log(`Account ${index}: Not found`);
}
});
Query Program Accounts
// Get all accounts owned by a program
const programAccounts = await connection.getProgramAccounts(programId);
// With filters
const filteredAccounts = await connection.getProgramAccounts(programId, {
filters: [
{
dataSize: 165 // Only accounts with exactly 165 bytes
},
{
memcmp: {
offset: 0,
bytes: '3Mc6vR' // Base58 encoded bytes to match at offset 0
}
}
]
});
Account Ownership
System Program Accounts
By default, all accounts are owned by the System Program:
import { SystemProgram } from '@saturnbtcio/arch-sdk';
// Check if account is owned by system program
const isSystemAccount = accountInfo.owner.equals(SystemProgram.programId);
Program-Owned Accounts
Programs can own accounts to store their data:
// Check if account is owned by your program
const isOwnedByMyProgram = accountInfo.owner.equals(myProgramId);
// Transfer ownership (only the current owner can do this)
const transferInstruction = SystemProgram.assign({
accountPubkey: accountPublicKey,
programId: newOwnerProgramId
});
Working with Account Data
Serialization
// Serialize data to store in account
import { serialize, deserialize } from 'borsh';
// Define your data structure
class MyAccountData {
constructor(public value: number, public name: string) {}
static schema = new Map([
[MyAccountData, {
kind: 'struct',
fields: [
['value', 'u64'],
['name', 'string']
]
}]
]);
}
// Serialize for storage
const data = new MyAccountData(42, 'Hello');
const serialized = serialize(MyAccountData.schema, data);
// Deserialize from account
const deserialized = deserialize(MyAccountData.schema, accountData);
Updating Account Data
Account Security
Validation
// Always validate account ownership
function validateAccountOwnership(
account: AccountInfo,
expectedOwner: Pubkey
): boolean {
return account.owner.equals(expectedOwner);
}
// Check account signatures
function validateAccountSignature(
account: AccountInfo,
requiredSigner: Pubkey
): boolean {
return account.is_signer && account.key.equals(requiredSigner);
}
Access Control
Common Patterns
Account Initialization
// Initialize account with default data
const initializeInstruction = new Instruction({
programId: myProgramId,
accounts: [
{ pubkey: newAccount.publicKey, isSigner: true, isWritable: true },
{ pubkey: payer.publicKey, isSigner: true, isWritable: false }
],
data: Buffer.from([0]) // Initialize instruction
});
Account Closure
// Close account and reclaim rent
const closeInstruction = new Instruction({
programId: myProgramId,
accounts: [
{ pubkey: accountToClose.publicKey, isSigner: true, isWritable: true },
{ pubkey: destination.publicKey, isSigner: false, isWritable: true }
],
data: Buffer.from([255]) // Close instruction
});
Error Handling
try {
const accountInfo = await connection.getAccountInfo(publicKey);
if (!accountInfo) {
throw new Error('Account not found');
}
if (!accountInfo.executable) {
throw new Error('Account is not executable');
}
} catch (error) {
if (error instanceof AccountNotFoundError) {
console.error('Account does not exist');
} else {
console.error('Error fetching account:', error);
}
}
Best Practices
Security
- Always validate ownership: Check that accounts are owned by expected programs
- Verify signatures: Ensure required accounts have signed the transaction
- Check permissions: Verify accounts have appropriate read/write permissions
- Validate data: Always validate account data before processing
Performance
- Batch account queries: Use
getMultipleAccountsInfofor multiple accounts - Use filters: Apply filters when querying program accounts
- Cache account data: Cache frequently accessed account information
- Monitor account changes: Subscribe to account changes for real-time updates
Development
- Use TypeScript: Take advantage of type safety for account structures
- Document account layouts: Clearly document your account data structures
- Test edge cases: Test with empty accounts, invalid data, etc.
- Handle errors gracefully: Provide meaningful error messages
Examples
For complete examples working with accounts, see:
- Account Management - Creating and managing accounts
- Data Storage - Storing and retrieving data
- Token Accounts - Working with token accounts
Source Code
The account implementation is available in the Arch Examples Repository.
Instructions and Messages
Instructions and messages are the core building blocks for interacting with programs on the Arch Network. They define what operations to perform and how to execute them atomically.
Overview
- Instructions define individual operations to be performed by a program
- Messages group instructions together for atomic execution
- Transactions contain messages with signatures for network submission
Instructions
An instruction specifies a program to call, accounts to use, and data to pass.
Structure
Creating Instructions
import { Instruction, AccountMeta } from '@saturnbtcio/arch-sdk';
// Create a basic instruction
const instruction = new Instruction({
programId: myProgramId,
accounts: [
{
pubkey: userAccount,
isSigner: true,
isWritable: true
},
{
pubkey: dataAccount,
isSigner: false,
isWritable: true
}
],
data: Buffer.from([1, 2, 3, 4]) // Serialized instruction data
});
Account Metadata
Each instruction must specify how accounts will be used:
interface AccountMeta {
pubkey: Pubkey; // Account's public key
isSigner: boolean; // Must the account sign the transaction?
isWritable: boolean; // Can the account's data be modified?
}
Permission Examples
// Signer and writable (user's main account)
{
pubkey: userPublicKey,
isSigner: true,
isWritable: true
}
// Read-only reference (program or config account)
{
pubkey: configAccount,
isSigner: false,
isWritable: false
}
// Writable but not signer (data account owned by program)
{
pubkey: dataAccount,
isSigner: false,
isWritable: true
}
Instruction Data
Instruction data is typically serialized using Borsh or similar formats:
// Define instruction enum
enum MyProgramInstruction {
Initialize = 0,
UpdateValue = 1,
Close = 2
}
// Serialize instruction data
function createUpdateInstruction(newValue: number): Buffer {
const data = Buffer.alloc(9); // 1 byte for instruction + 8 bytes for u64
data.writeUInt8(MyProgramInstruction.UpdateValue, 0);
data.writeBigUInt64LE(BigInt(newValue), 1);
return data;
}
// Use in instruction
const instruction = new Instruction({
programId: myProgramId,
accounts: [/* ... */],
data: createUpdateInstruction(42)
});
Messages
Messages group instructions for atomic execution and include transaction metadata.
Structure
Creating Messages
import { Message, Transaction } from '@saturnbtcio/arch-sdk';
// Create transaction with multiple instructions
const transaction = new Transaction()
.add(instruction1)
.add(instruction2)
.add(instruction3);
// The transaction internally creates a message
const message = transaction.compileMessage();
Atomic Execution
All instructions in a message execute atomically - if any instruction fails, the entire transaction fails:
// These instructions will all succeed or all fail together
const transaction = new Transaction()
.add(transferInstruction) // Transfer tokens
.add(updateAccountInstruction) // Update account data
.add(logInstruction); // Log the operation
Building Transactions
Simple Transaction
// Single instruction transaction
const transaction = new Transaction()
.add(instruction);
// Sign and send
const signature = await connection.sendAndConfirmTransaction(
transaction,
[keypair]
);
Multi-Instruction Transaction
// Complex transaction with multiple operations
const transaction = new Transaction()
.add(createAccountInstruction)
.add(initializeAccountInstruction)
.add(transferInstruction);
// Sign with multiple keypairs if needed
const signature = await connection.sendAndConfirmTransaction(
transaction,
[payer, newAccount, authority]
);
Transaction Limits
// Check transaction size before sending
const messageSize = transaction.compileMessage().serialize().length;
const maxSize = 1232; // Current limit
if (messageSize > maxSize) {
throw new Error(`Transaction too large: ${messageSize} bytes`);
}
Common Patterns
System Program Operations
import { SystemProgram } from '@saturnbtcio/arch-sdk';
// Create account
const createInstruction = SystemProgram.createAccount({
fromPubkey: payer.publicKey,
newAccountPubkey: newAccount.publicKey,
lamports: 1000000,
space: 256,
programId: myProgramId
});
// Transfer lamports
const transferInstruction = SystemProgram.transfer({
fromPubkey: sender.publicKey,
toPubkey: recipient.publicKey,
lamports: 1000000
});
Program-Specific Instructions
// Create helper functions for your program
class MyProgram {
static initialize(
account: Pubkey,
authority: Pubkey,
initialValue: number
): Instruction {
return new Instruction({
programId: MY_PROGRAM_ID,
accounts: [
{ pubkey: account, isSigner: false, isWritable: true },
{ pubkey: authority, isSigner: true, isWritable: false }
],
data: Buffer.from([0, ...new BN(initialValue).toArray('le', 8)])
});
}
static updateValue(
account: Pubkey,
authority: Pubkey,
newValue: number
): Instruction {
return new Instruction({
programId: MY_PROGRAM_ID,
accounts: [
{ pubkey: account, isSigner: false, isWritable: true },
{ pubkey: authority, isSigner: true, isWritable: false }
],
data: Buffer.from([1, ...new BN(newValue).toArray('le', 8)])
});
}
}
// Use the helper functions
const initInstruction = MyProgram.initialize(
dataAccount.publicKey,
authority.publicKey,
100
);
Cross-Program Invocation (CPI)
Programs can call other programs using CPI:
Error Handling
Client-Side Validation
// Validate instruction before sending
function validateInstruction(instruction: Instruction): void {
if (!instruction.programId) {
throw new Error('Program ID is required');
}
if (instruction.accounts.length === 0) {
throw new Error('At least one account is required');
}
// Check for required signers
const hasRequiredSigner = instruction.accounts.some(
account => account.isSigner
);
if (!hasRequiredSigner) {
throw new Error('At least one signer is required');
}
}
Transaction Errors
try {
const signature = await connection.sendAndConfirmTransaction(
transaction,
[keypair]
);
} catch (error) {
if (error instanceof TransactionError) {
console.error('Transaction failed:', error.message);
console.error('Logs:', error.logs);
} else {
console.error('Unexpected error:', error);
}
}
Best Practices
Security
- Validate all accounts: Ensure accounts have correct permissions
- Check program ownership: Verify accounts are owned by expected programs
- Sanitize instruction data: Validate all input parameters
- Use type-safe serialization: Prefer Borsh or similar libraries
Performance
- Batch operations: Group related instructions in single transactions
- Minimize account usage: Only include necessary accounts
- Cache program IDs: Store frequently used program IDs as constants
- Optimize instruction data: Use efficient serialization formats
Development
- Create instruction builders: Build helper functions for common operations
- Document instruction formats: Clearly document expected data formats
- Test edge cases: Test with invalid accounts, insufficient funds, etc.
- Use TypeScript: Take advantage of type safety
Advanced Patterns
Conditional Instructions
// Build instructions based on conditions
const instructions: Instruction[] = [];
// Always initialize
instructions.push(initializeInstruction);
// Conditionally add operations
if (shouldTransfer) {
instructions.push(transferInstruction);
}
if (shouldClose) {
instructions.push(closeInstruction);
}
// Build transaction
const transaction = new Transaction();
instructions.forEach(ix => transaction.add(ix));
Instruction Factories
// Create reusable instruction factories
interface TokenTransferParams {
source: Pubkey;
destination: Pubkey;
authority: Pubkey;
amount: number;
}
function createTokenTransferInstruction(
params: TokenTransferParams
): Instruction {
return new Instruction({
programId: TOKEN_PROGRAM_ID,
accounts: [
{ pubkey: params.source, isSigner: false, isWritable: true },
{ pubkey: params.destination, isSigner: false, isWritable: true },
{ pubkey: params.authority, isSigner: true, isWritable: false }
],
data: encodeTokenTransferData(params.amount)
});
}
Examples
For complete examples using instructions and messages, see:
- Hello World - Basic instruction usage
- Counter - State management instructions
- Token Program - Complex instruction patterns
- Escrow - Multi-party transaction coordination
Source Code
The instruction and message implementations are available in the Arch Examples Repository.
Runtime Transaction
A runtime transaction includes a version number, a slice of signatures included on the transaction and a message field, which details a list of instructions to be processed atomically.
#[derive(Clone, Debug, Eq, PartialEq, Serialize, Deserialize, BorshDeserialize, BorshSerialize)]
pub struct RuntimeTransaction {
pub version: u32,
pub signatures: Vec<Signature>,
pub message: Message,
}Processed Transaction
A processed transaction is a custom data type that contains a runtime transaction, a status, denoting the result of executing this runtime transaction, as well as a collection of Bitcoin transaction IDs.
#[derive(Clone, Debug, Deserialize, Serialize, BorshDeserialize, BorshSerialize)]
pub enum Status {
Processing,
Processed,
}
#[derive(Clone, Debug, Serialize, Deserialize, BorshSerialize, BorshDeserialize)]
pub struct ProcessedTransaction {
pub runtime_transaction: RuntimeTransaction,
pub status: Status,
pub bitcoin_txids: Vec<String>,
}Signature
A signature is a custom data type that holds a slice of 64 bytes.
#[derive(Clone, Debug, Eq, PartialEq, Serialize, Deserialize, BorshSerialize, BorshDeserialize)]
pub struct Signature(pub Vec<u8>);RPC API Reference
The Arch Network provides a comprehensive JSON-RPC API for interacting with validator nodes. This API allows you to:
- Query account information and balances
- Submit transactions to the network
- Retrieve block and transaction data
- Monitor network state and readiness
- Manage validator operations
API Endpoints
Default Configuration
- Default Port:
9002for validator nodes,9001for local validators - Endpoint URL:
http://localhost:9002(or your node’s IP address) - Protocol: HTTP POST with JSON-RPC 2.0
Request Format
All RPC requests must be sent as HTTP POST requests with:
- Content-Type:
application/json - JSON-RPC Version:
"2.0"
{
"jsonrpc": "2.0",
"id": 1,
"method": "method_name",
"params": [/* parameters */]
}
Response Format
{
"jsonrpc": "2.0",
"id": 1,
"result": {/* response data */}
}
Available Methods
Account Operations
read_account_info- Get account informationget_account_address- Get Bitcoin address for accountget_program_accounts- Query accounts by program IDget_multiple_accounts- Get multiple accounts at oncerequest_airdrop- Request airdrop of lamports (dev networks only)create_account_with_faucet- Create and fund account with faucet (dev networks only)
Transaction Operations
send_transaction- Submit a single transactionsend_transactions- Submit multiple transactionsget_processed_transaction- Get transaction status and detailsrecent_transactions- Get recent transactions with filteringget_transactions_by_block- Get transactions from specific blockget_transactions_by_ids- Get multiple transactions by their IDs
Block Operations
get_block- Get block by hashget_block_by_height- Get block by heightget_block_count- Get current block countget_block_hash- Get block hash by heightget_best_block_hash- Get latest block hash
Network Operations
is_node_ready- Check node readinessget_peers- Get connected network peersget_current_state- Get current validator node statestart_dkg- Initiate Distributed Key Generation (leader only)reset_network- Reset network state (leader only)
Local Validator Specific Methods
get_arch_txid_from_btc_txid- Map Bitcoin txid to Arch txidget_transaction_report- Get detailed transaction processing reportget_latest_tx_using_account- Find most recent transaction for accountget_all_accounts- Get all account public keys
Account Operations
read_account_info
Retrieves information for a specified account.
Parameters:
pubkey- Account public key as a 32-byte array
Returns: Account information object with data, owner, utxo, is_executable, and tag fields.
Example:
curl -X POST -H 'Content-Type: application/json' -d '
{
"jsonrpc":"2.0",
"id":1,
"method":"read_account_info",
"params":[
[1,2,3,4,5,6,7,8,9,10,11,12,13,14,15,16,17,18,19,20,21,22,23,24,25,26,27,28,29,30,31,32]
]
}' http://localhost:9002/
get_account_address
Retrieves the Bitcoin address for a given account public key.
Parameters:
account_pubkey- Account public key as a 32-byte array
Returns: Bitcoin address string (format depends on network mode)
Example:
curl -X POST -H 'Content-Type: application/json' -d '
{
"jsonrpc":"2.0",
"id":1,
"method":"get_account_address",
"params":[
[1,2,3,4,5,6,7,8,9,10,11,12,13,14,15,16,17,18,19,20,21,22,23,24,25,26,27,28,29,30,31,32]
]
}' http://localhost:9002/
get_program_accounts
Fetches all accounts owned by a specified program ID.
Parameters:
program_id- Program public key as a 32-byte arrayfilters(optional) - Array of filter objects:{ "DataSize": <size> }- Filter by account data size{ "DataContent": { "offset": <offset>, "bytes": <byte_array> } }- Filter by data content
Returns: Array of account objects with pubkey and account information.
Example:
curl -X POST -H 'Content-Type: application/json' -d '
{
"jsonrpc":"2.0",
"id":1,
"method": "get_program_accounts",
"params": [
[80,82,242,228,43,246,248,133,88,238,139,124,88,96,107,32,71,40,52,251,90,42,66,176,66,32,147,203,137,211,253,40],
[
{
"DataSize": 165
},
{
"DataContent": {
"offset": 0,
"bytes": [1, 2, 3, 4]
}
}
]
]
}' http://localhost:9002/
get_multiple_accounts
Retrieves information for multiple accounts in a single request.
Parameters:
pubkeys- Array of account public keys (32-byte arrays)
Returns: Array of account information objects.
request_airdrop
Requests airdrop of lamports to a specified account.
Parameters:
pubkey- Account public key as a 32-byte array
Returns: Transaction ID string of the airdrop transaction
Note: Only available on non-mainnet networks (testnet, devnet, regtest).
Example:
curl -X POST -H 'Content-Type: application/json' -d '
{
"jsonrpc":"2.0",
"id":1,
"method":"request_airdrop",
"params":[
[1,2,3,4,5,6,7,8,9,10,11,12,13,14,15,16,17,18,19,20,21,22,23,24,25,26,27,28,29,30,31,32]
]
}' http://localhost:9002/
create_account_with_faucet
Creates a new account and funds it using the faucet.
Parameters:
pubkey- Account public key as a 32-byte array
Returns: RuntimeTransaction object for the account creation
Note: Only available on non-mainnet networks (testnet, devnet, regtest).
Example:
curl -X POST -H 'Content-Type: application/json' -d '
{
"jsonrpc":"2.0",
"id":1,
"method":"create_account_with_faucet",
"params":[
[1,2,3,4,5,6,7,8,9,10,11,12,13,14,15,16,17,18,19,20,21,22,23,24,25,26,27,28,29,30,31,32]
]
}' http://localhost:9002/
Transaction Operations
send_transaction
Submits a single transaction to the network.
Parameters:
transaction- RuntimeTransaction object containing:version- Transaction version (currently 0)signatures- Array of transaction signaturesmessage- Transaction message with signers and instructions
Returns: Transaction ID (txid) string
Example:
curl -X POST -H 'Content-Type: application/json' -d '
{
"jsonrpc":"2.0",
"id":1,
"method":"send_transaction",
"params":[{
"version": 0,
"signatures": [
{"0": [1,2,3,4,5,6,7,8,9,10,11,12,13,14,15,16,17,18,19,20,21,22,23,24,25,26,27,28,29,30,31,32,33,34,35,36,37,38,39,40,41,42,43,44,45,46,47,48,49,50,51,52,53,54,55,56,57,58,59,60,61,62,63,64]}
],
"message": {
"signers": [[1,2,3,4,5,6,7,8,9,10,11,12,13,14,15,16,17,18,19,20,21,22,23,24,25,26,27,28,29,30,31,32]],
"instructions": [
{
"program_id": [1,2,3,4,5,6,7,8,9,10,11,12,13,14,15,16,17,18,19,20,21,22,23,24,25,26,27,28,29,30,31,32],
"accounts": [
{
"pubkey": [1,2,3,4,5,6,7,8,9,10,11,12,13,14,15,16,17,18,19,20,21,22,23,24,25,26,27,28,29,30,31,32],
"is_signer": true,
"is_writable": true
}
],
"data": [1,2,3,4]
}
]
}
}]
}' http://localhost:9002/
send_transactions
Submits multiple transactions to the network.
Parameters:
transactions- Array of serialized transactions (byte arrays)
Returns: Array of transaction ID strings
Example:
curl -X POST -H 'Content-Type: application/json' -d '
{
"jsonrpc":"2.0",
"id":1,
"method":"send_transactions",
"params": [
[
[1,2,3,4,5,6,7,8,9,10],
[11,12,13,14,15,16,17,18,19,20]
]
]
}' http://localhost:9002/
get_processed_transaction
Retrieves a processed transaction and its status.
Parameters:
transaction_id- Transaction ID string
Returns: Object containing runtime_transaction, status, and bitcoin_txids
Example:
curl -X POST -H 'Content-Type: application/json' -d '
{
"jsonrpc":"2.0",
"id":1,
"method":"get_processed_transaction",
"params":[
"1234567890abcdef1234567890abcdef1234567890abcdef1234567890abcdef"
]
}' http://localhost:9002/
recent_transactions
Retrieves recent transactions with optional filtering.
Parameters:
params- Object with optional fields:limit(optional) - Maximum number of transactions to returnoffset(optional) - Number of transactions to skipaccount(optional) - Filter by account involvement (32-byte array)
Returns: Array of ProcessedTransaction objects
Example:
curl -X POST -H 'Content-Type: application/json' -d '
{
"jsonrpc":"2.0",
"id":1,
"method":"recent_transactions",
"params":[{
"limit": 10,
"offset": 0,
"account": [1,2,3,4,5,6,7,8,9,10,11,12,13,14,15,16,17,18,19,20,21,22,23,24,25,26,27,28,29,30,31,32]
}]
}' http://localhost:9002/
get_transactions_by_block
Retrieves transactions from a specific block.
Parameters:
params- Object with required and optional fields:block_hash- Block hash stringlimit(optional) - Maximum number of transactions to returnoffset(optional) - Number of transactions to skipaccount(optional) - Filter by account involvement (32-byte array)
Returns: Array of ProcessedTransaction objects
Example:
curl -X POST -H 'Content-Type: application/json' -d '
{
"jsonrpc":"2.0",
"id":1,
"method":"get_transactions_by_block",
"params":[{
"block_hash": "000000000019d6689c085ae165831e934ff763ae46a2a6c172b3f1b60a8ce26f",
"limit": 50,
"offset": 0
}]
}' http://localhost:9002/
get_transactions_by_ids
Retrieves multiple transactions by their IDs.
Parameters:
params- Object with required field:txids- Array of transaction ID strings
Returns: Array of ProcessedTransaction objects (null for missing transactions)
Example:
curl -X POST -H 'Content-Type: application/json' -d '
{
"jsonrpc":"2.0",
"id":1,
"method":"get_transactions_by_ids",
"params":[{
"txids": [
"1234567890abcdef1234567890abcdef1234567890abcdef1234567890abcdef",
"fedcba0987654321fedcba0987654321fedcba0987654321fedcba0987654321"
]
}]
}' http://localhost:9002/
Block Operations
get_block
Retrieves a block by its hash.
Parameters:
block_hash- Block hash stringfilter(optional) - Block transaction filter
Returns: Block object with transaction data
Example:
curl -X POST -H 'Content-Type: application/json' -d '
{
"jsonrpc":"2.0",
"id":1,
"method":"get_block",
"params":[
"000000000019d6689c085ae165831e934ff763ae46a2a6c172b3f1b60a8ce26f"
]
}' http://localhost:9002/
get_block_by_height
Retrieves a block by its height.
Parameters:
block_height- Block height numberfilter(optional) - Block transaction filter
Returns: Block object with transaction data
get_block_count
Retrieves the current block count.
Parameters: None
Returns: Current block count as a number
Example:
curl -X POST -H 'Content-Type: application/json' -d '
{
"jsonrpc":"2.0",
"id":1,
"method":"get_block_count",
"params":[]
}' http://localhost:9002/
get_block_hash
Retrieves the block hash for a given height.
Parameters:
block_height- Block height number
Returns: Block hash string
Example:
curl -X POST -H 'Content-Type: application/json' -d '
{
"jsonrpc":"2.0",
"id":1,
"method":"get_block_hash",
"params":[680000]
}' http://localhost:9002/
get_best_block_hash
Retrieves the hash of the latest block.
Parameters: None
Returns: Latest block hash string
Network Operations
is_node_ready
Checks if the node is ready to process requests.
Parameters: None
Returns: Boolean indicating readiness
Example:
curl -X POST -H 'Content-Type: application/json' -d '
{
"jsonrpc":"2.0",
"id":1,
"method":"is_node_ready",
"params":[]
}' http://localhost:9002/
get_peers
Retrieves information about connected network peers.
Parameters: None
Returns: Array of peer statistics objects
Example:
curl -X POST -H 'Content-Type: application/json' -d '
{
"jsonrpc":"2.0",
"id":1,
"method":"get_peers",
"params":[]
}' http://localhost:9002/
get_current_state
Retrieves the current state of the validator node.
Parameters: None
Returns: CurrentState object containing validator state information
Example:
curl -X POST -H 'Content-Type: application/json' -d '
{
"jsonrpc":"2.0",
"id":1,
"method":"get_current_state",
"params":[]
}' http://localhost:9002/
start_dkg
Initiates the Distributed Key Generation (DKG) process.
Parameters: None
Returns: Success message if the DKG process is initiated
Note: Not available for local validators.
Example:
curl -X POST -H 'Content-Type: application/json' -d '
{
"jsonrpc":"2.0",
"id":1,
"method":"start_dkg",
"params":[]
}' http://localhost:9002/
reset_network
Resets the network state.
Parameters: None
Returns: Success message if the network reset is successful
Note: Only callable by the Leader node. Not available for local validators.
Example:
curl -X POST -H 'Content-Type: application/json' -d '
{
"jsonrpc":"2.0",
"id":1,
"method":"reset_network",
"params":[]
}' http://localhost:9002/
Local Validator Specific Methods
The following methods are available only when using the local validator (for development):
get_arch_txid_from_btc_txid
Maps a Bitcoin transaction ID to its corresponding Arch transaction ID.
Parameters:
btc_txid- Bitcoin transaction ID string
Returns: Optional Arch transaction ID string (null if not found)
Example:
curl -X POST -H 'Content-Type: application/json' -d '
{
"jsonrpc":"2.0",
"id":1,
"method":"get_arch_txid_from_btc_txid",
"params":["1234567890abcdef1234567890abcdef1234567890abcdef1234567890abcdef"]
}' http://localhost:9002/
get_transaction_report
Retrieves detailed transaction processing report for debugging.
Parameters:
txid- Transaction ID string
Returns: Transaction report string with processing details
Example:
curl -X POST -H 'Content-Type: application/json' -d '
{
"jsonrpc":"2.0",
"id":1,
"method":"get_transaction_report",
"params":["1234567890abcdef1234567890abcdef1234567890abcdef1234567890abcdef"]
}' http://localhost:9002/
get_latest_tx_using_account
Finds the most recent transaction involving a specific account.
Parameters:
account_pubkey- Account public key as hex string
Returns: Optional transaction ID string (null if not found)
Example:
curl -X POST -H 'Content-Type: application/json' -d '
{
"jsonrpc":"2.0",
"id":1,
"method":"get_latest_tx_using_account",
"params":["0102030405060708090a0b0c0d0e0f101112131415161718191a1b1c1d1e1f20"]
}' http://localhost:9002/
get_all_accounts
Retrieves all account public keys in the database.
Parameters: None
Returns: Array of account public key hex strings
Example:
curl -X POST -H 'Content-Type: application/json' -d '
{
"jsonrpc":"2.0",
"id":1,
"method":"get_all_accounts",
"params":[]
}' http://localhost:9002/
SDK Integration
For easier integration, use the official SDK:
- TypeScript/JavaScript:
@saturnbtcio/arch-sdk - Rust:
arch_sdkcrate
CLI Alternative
Most RPC operations can also be performed using the Arch Network CLI:
# Deploy a program
arch-cli deploy <ELF_PATH>
# Check transaction status
arch-cli confirm <TX_ID>
# Get account information
arch-cli account <ACCOUNT_ADDRESS>
# Get block information
arch-cli get-block <BLOCK_HASH>
# Get current block height
arch-cli get-block-height
# Get program messages from transaction
arch-cli log-program-messages <TX_ID>
# Change account owner
arch-cli change-owner <ACCOUNT_ADDRESS> <NEW_OWNER>
Error Handling
All RPC methods return JSON-RPC 2.0 compliant error responses:
{
"jsonrpc": "2.0",
"id": 1,
"error": {
"code": -32600,
"message": "Invalid Request",
"data": "Additional error details"
}
}
Common error codes:
-32600: Invalid Request-32601: Method not found-32602: Invalid params-32603: Internal error
System Program
The Arch System Program is the core program that manages fundamental account operations on the Arch Network. This program provides essential functionality for account creation, ownership management, UTXO anchoring, and lamport transfers.
Overview
The System Program handles:
- Account Creation: Creating new accounts with specified ownership and data allocation
- UTXO Integration: Anchoring accounts to Bitcoin UTXOs for native Bitcoin integration
- Ownership Management: Transferring account ownership between programs
- Lamport Transfers: Moving lamports (the base unit of value) between accounts
- Space Allocation: Allocating data storage space for accounts
Available Instructions
CreateAccount
Creates a new account with the specified parameters.
Parameters:
lamports: u64- Number of lamports to transfer to the new accountspace: u64- Number of bytes of memory to allocateowner: Pubkey- Address of the program that will own the new account
Account References:
[WRITE, SIGNER]Funding account (payer)[WRITE, SIGNER]New account to create
Example:
CreateAccountWithAnchor
Creates a new account and anchors it to a specific Bitcoin UTXO.
Parameters:
lamports: u64- Number of lamports to transferspace: u64- Number of bytes to allocateowner: Pubkey- Program that will own the accounttxid: [u8; 32]- Bitcoin transaction IDvout: u32- Output index in the Bitcoin transaction
Account References:
[WRITE, SIGNER]Funding account[WRITE, SIGNER]New account to create
Example:
Assign
Changes the owner of an existing account.
Parameters:
owner: Pubkey- New owner program
Account References:
[WRITE, SIGNER]Account to reassign
Example:
Anchor
Anchors an existing account to a Bitcoin UTXO.
Parameters:
txid: [u8; 32]- Bitcoin transaction IDvout: u32- Output index
Account References:
[WRITE, SIGNER]Account to anchor
Transfer
Transfers lamports from one account to another.
Parameters:
lamports: u64- Amount to transfer
Account References:
[WRITE, SIGNER]Source account[WRITE]Destination account
Example:
Allocate
Allocates space in an account without funding it.
Parameters:
space: u64- Number of bytes to allocate
Account References:
[WRITE, SIGNER]Account to allocate space for
Example:
Error Handling
The System Program can return the following errors:
AccountAlreadyInUse- Account with the same address already existsResultWithNegativeLamports- Account doesn’t have enough lamports for operationInvalidProgramId- Cannot assign account to this program IDInvalidAccountDataLength- Cannot allocate account data of this lengthMaxSeedLengthExceeded- Requested seed length is too longAddressWithSeedMismatch- Address doesn’t match derived seed
Important Constants
Best Practices
Account Creation
- Always fund with sufficient lamports: Accounts need at least
MIN_ACCOUNT_LAMPORTSto be created - Use appropriate space allocation: Allocate only the space you need to minimize costs
- Set correct ownership: Ensure the owner program can properly manage the account
UTXO Integration
- Verify UTXO existence: Ensure the referenced Bitcoin UTXO exists and is confirmed
- Use proper confirmation counts: Wait for sufficient Bitcoin confirmations before using anchored accounts
- Handle reorgs gracefully: Account for potential Bitcoin reorganizations
Security Considerations
- Validate signers: Always verify that required accounts are properly signed
- Check ownership: Verify account ownership before operations
- Handle edge cases: Account for insufficient funds, invalid parameters, etc.
Integration with Bitcoin
The System Program’s UTXO anchoring functionality enables direct integration with Bitcoin:
- Account-UTXO Mapping: Accounts can be directly linked to Bitcoin UTXOs
- Ownership Verification: Bitcoin signatures can prove account ownership
- State Synchronization: Account states can be synchronized with Bitcoin state
This integration provides:
- Native Bitcoin security guarantees
- Direct UTXO management capabilities
- Seamless Bitcoin transaction integration
- Provable ownership and state anchoring
Related Documentation
- Account Model - Understanding Arch’s account structure
- Instructions and Messages - How instructions work
- Bitcoin Integration - Bitcoin-native features
- UTXO Management - Working with Bitcoin UTXOs
CreateAccount
Index: 0
Create a new account.
Below, within the Instruction data field, we find a local variable instruction_data that contains vec![0], the correct index for making a call to SystemProgram::CreateAccount.
let instruction_data = vec![0];
let instruction = Instruction {
program_id: Pubkey::system_program(),
accounts: vec![AccountMeta {
pubkey,
is_signer: true,
is_writable: true,
}],
data: instruction_data,
}MakeExecutable
Index: 2
Sets the account as executable, marking it as a program.
Below, within the Instruction data field, we find a local variable instruction_data that contains vec![2], the correct index for making a call to SystemProgram::MakeExecutable.
let instruction_data = vec![2];
let instruction = Instruction {
program_id: Pubkey::system_program(),
accounts: vec![AccountMeta {
pubkey,
is_signer: true,
is_writable: true,
}],
data: instruction_data,
}We can proceed to confirm that the program is executable with read_account_info which returns an AccountInfoResult that gets parsed to obtain the is_executable value.
assert!(
read_account_info("node_url", program_pubkey)
.unwrap()
.is_executable
);Troubleshooting
This guide helps you diagnose and resolve common issues you might encounter while developing on the Arch Network.
Common Issues
Build Errors
1. Cargo Build Failures
error: failed to run custom build command for `arch-sdk v0.1.0`
Solution:
- Ensure you have the latest Rust toolchain installed
- Check that you’re using a compatible version of the Arch SDK
- Try cleaning your build directory:
cargo clean cargo build
2. Program Compilation Errors
error: linking with `cc` failed: exit status: 1
Solution:
- Verify you have the required system dependencies
- Update your Arch SDK to the latest version
- Check your program’s target architecture:
rustup target add wasm32-unknown-unknown
Deployment Issues
1. Program Deployment Failures
Error: Program deployment failed: Transaction simulation failed
Solution:
- Check your account has sufficient balance
- Verify the program binary size is within limits
- Ensure you’re connected to the correct network:
arch-cli config get
2. Transaction Errors
Error: Transaction failed: Custom program error: 0x1
Solution:
- Check program logs for detailed error information
- Verify instruction data format
- Ensure all required accounts are provided
Runtime Issues
1. Account Creation Failures
Error: Failed to create account: insufficient funds
Solution:
- Verify account balance
- Check rent-exempt minimum:
arch-cli rent minimum-balance <size> - Ensure correct account size calculation
2. Instruction Processing Errors
Error: Program failed to complete: Program failed to process instruction
Solution:
- Enable program logging:
msg!("Debug output: {:?}", data); - Check account ownership
- Verify instruction data format
Network Issues
1. Connection Problems
Error: Unable to connect to RPC endpoint
Solution:
- Check network status
- Verify endpoint configuration:
arch-cli config get - Try alternate RPC endpoints
2. Validator Issues
Error: Validator node is not responding
Solution:
- Check validator logs
- Verify Bitcoin Core and Titan are running
- Ensure sufficient system resources
Development Environment
1. SDK Version Mismatch
error: package `arch-sdk v0.1.0` cannot be built
Solution:
- Update Arch SDK:
cargo update -p arch-sdk - Check compatibility matrix
- Clean and rebuild project
2. Tool Chain Issues
error: linker `cc` not found
Solution:
- Install required system dependencies
- Update Rust toolchain:
rustup update - Verify PATH configuration
Performance Issues
1. Slow Transaction Processing
Solution:
- Check compute budget usage
- Optimize account lookups
- Consider batching transactions
2. High Resource Usage
Solution:
- Monitor program size
- Optimize data structures
- Review account storage strategy
Debugging Tools
1. Program Logs
Enable detailed logging:
RUST_LOG=debug arch-cli program-logs <PROGRAM_ID>
2. Transaction Inspection
Analyze transaction details:
arch-cli transaction-info <TX_SIGNATURE>
3. Account Inspection
View account data:
arch-cli account <ACCOUNT_ADDRESS>
Best Practices
-
Development Workflow
- Use local validator for testing
- Maintain separate development/production configs
- Regular testing with minimal test accounts
-
Error Handling
- Implement comprehensive error types
- Add detailed error messages
- Log relevant debug information
-
Maintenance
- Regular dependency updates
- Security audits
- Performance monitoring
Getting Help
If you’re still experiencing issues:
- Check the GitHub Issues
- Join the Discord Community
- Review the API Documentation
Remember to provide relevant information when seeking help:
- Error messages
- Program logs
- Environment details
- Steps to reproduce
FAQ
Resources
Bitcoin mempool and blockchain explorer
- mempool.space - Arch Regtest
- Bitcoin mempool and block explorer. This mempool.space instance monitors the regtest Bitcoin blockchain being used to run and validate all examples in this repo.
- Solana CLI
- Solana Local Development Guide